12 Pixie Cuts for Thin Wavy Hair
Introduction
You love your natural waves, but when they fall flat they can leave thin hair looking limp and lifeless — longer lengths drag the wave pattern down, and heavy layers hide whatever movement you have. The good news is that a pixie cut works with your texture instead of against it: shorter lengths let waves spring up, creating lift, body, and a fuller silhouette almost by magic. Whether you want something soft and feminine or bold and edgy, there is a pixie shape that makes thin wavy hair look thicker and more vibrant. Below you will find 12 pixie cuts for thin wavy hair, each styled to flatter your face and wake up your wave pattern — and if you ever grow it out, you will love how these shorter cuts transition, much like the layered volume in these 12 Short Shag Haircuts for Fine Hair.
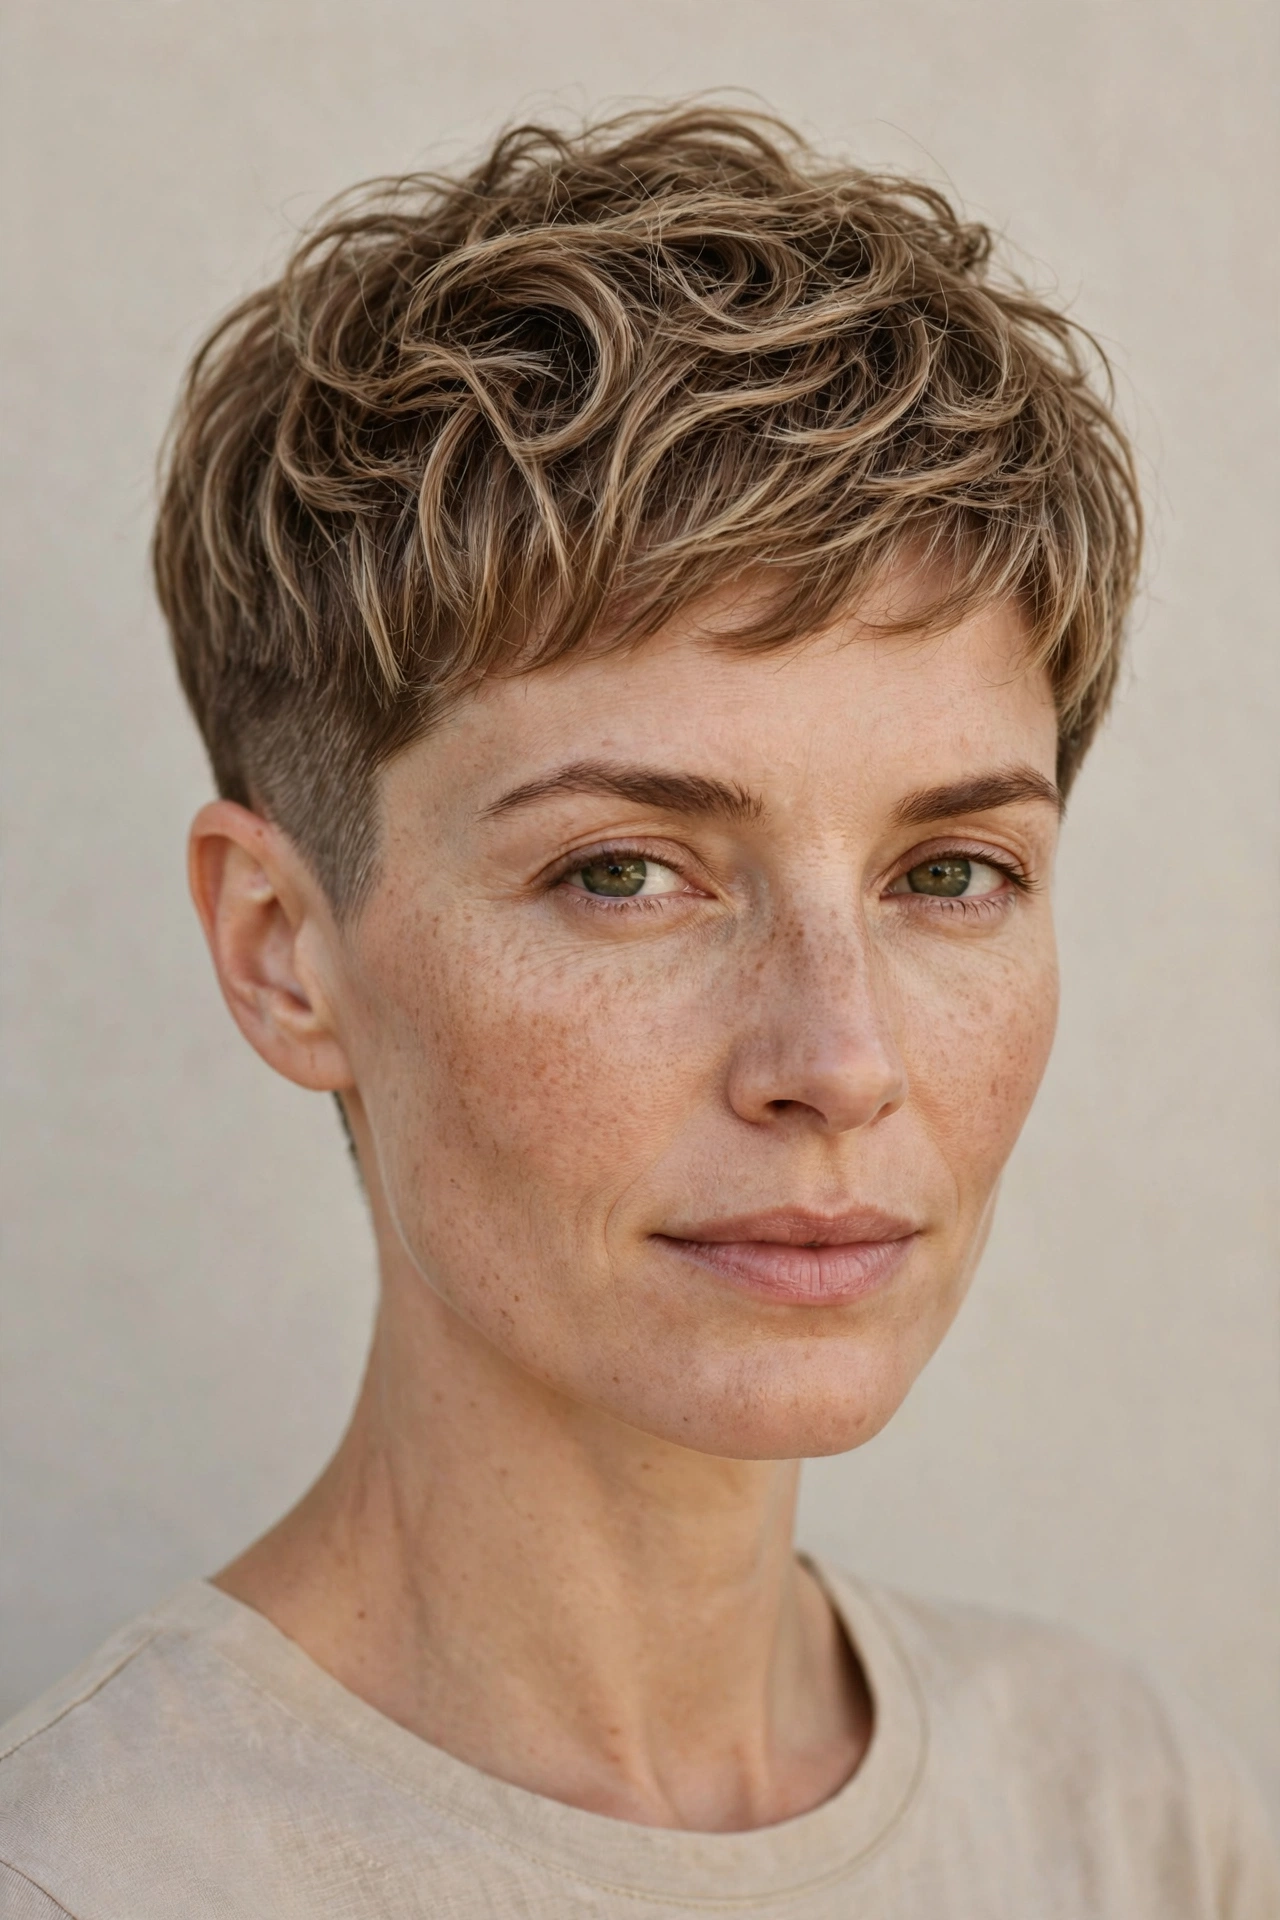
The Classic Tapered Pixie
The classic tapered pixie is the timeless short cut that never goes out of style, and it happens to be one of the kindest choices for thin wavy hair. The sides and back are neatly tapered close to the head while the crown keeps enough length for your waves to show off their natural bend, which instantly creates the illusion of density. This cut suits oval, heart, and square face shapes beautifully because the gentle tapering follows your bone structure instead of fighting it. Your waves add softness to the silhouette, so the result reads polished rather than severe, and the shorter length means your natural texture can finally lift at the root instead of being weighed down. It is a low-drama, high-payoff choice for anyone who wants wash-and-go ease with a put-together finish that looks intentional every single day.
- Apply a lightweight mousse to damp hair to define waves without stiffness.
- Blow-dry the crown upward with your fingers for instant root lift.
- Pinch small sections of wax between your fingertips to shape the tips.
- Tousle the top forward or to the side to switch up the look.
Ask your stylist for tapered sides with scissor work rather than a harsh buzzed fade, keeping one to two inches of length through the crown so your waves have room to move. At home, shampoo with a volumizing formula every other day and let the top air-dry when you have time — waves look softer that way. A pea-sized amount of texture paste adds separation, and a light sea-salt spray on second-day hair revives the wave. Book a trim every four to six weeks to keep the taper crisp; the shape grows out gracefully into a longer pixie, so you will never hit an awkward stage if you decide to stretch appointments.
The Textured Choppy Pixie
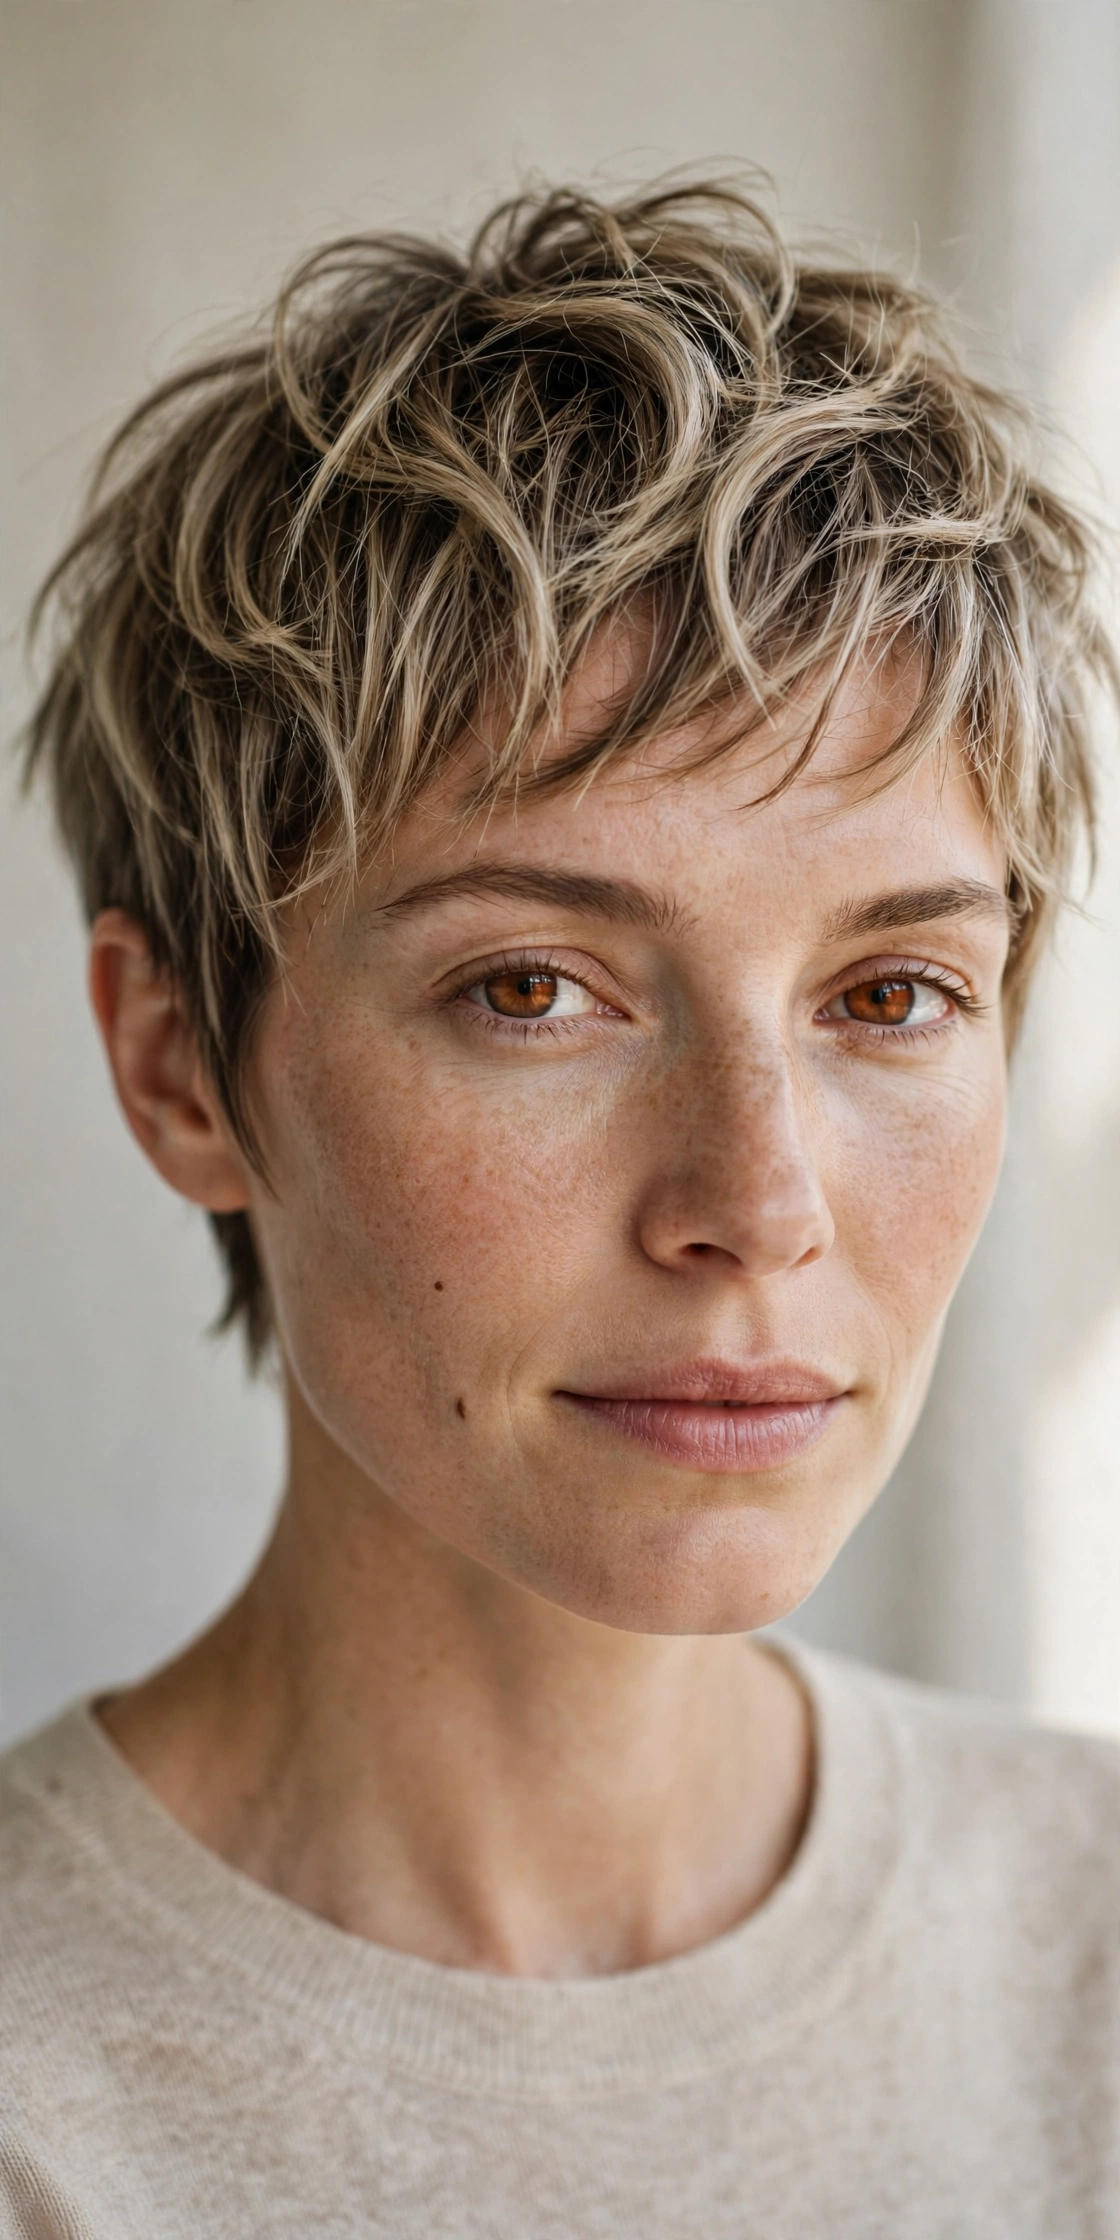
The textured choppy pixie is the ultimate volume illusion for thin wavy hair, built entirely on jagged, piecey layers that catch light and create the appearance of fullness. Instead of one smooth length, your stylist carves varied points and notches throughout the crown, and each snip gives your waves a separate ledge to curl around — suddenly thin hair looks multi-dimensional and thick. This cut flatters round and oval faces especially well, because the irregular edges break up width and add height on top. It is playful, modern, and forgiving: even on days you do nothing, the chop gives your hair built-in movement and an artful, undone finish that looks like you tried when you barely did.
- Scrunch a dime-sized amount of curl cream into damp waves to enhance separation.
- Diffuse the crown on low heat while scrunching upward for extra bounce.
- Pull individual pieces apart with matte clay for a lived-in edge.
- Ruffle the roots with dry shampoo on day two for refreshed volume.
Tell your stylist you want a choppy, razor-textured pixie with disconnected layers through the top, and bring a few reference photos so the degree of texture is clear. At home, keep heat minimal — diffusing beats flat ironing for this cut — and use sulfate-free shampoo to protect the ragged ends from dryness. A trim every five to seven weeks keeps the chop intentional rather than shaggy. If you grow it out, the choppy layers blend beautifully into a short shag, making this one of the easiest pixies to transition into longer styles.
The Long Pixie with Side-Swept Bangs
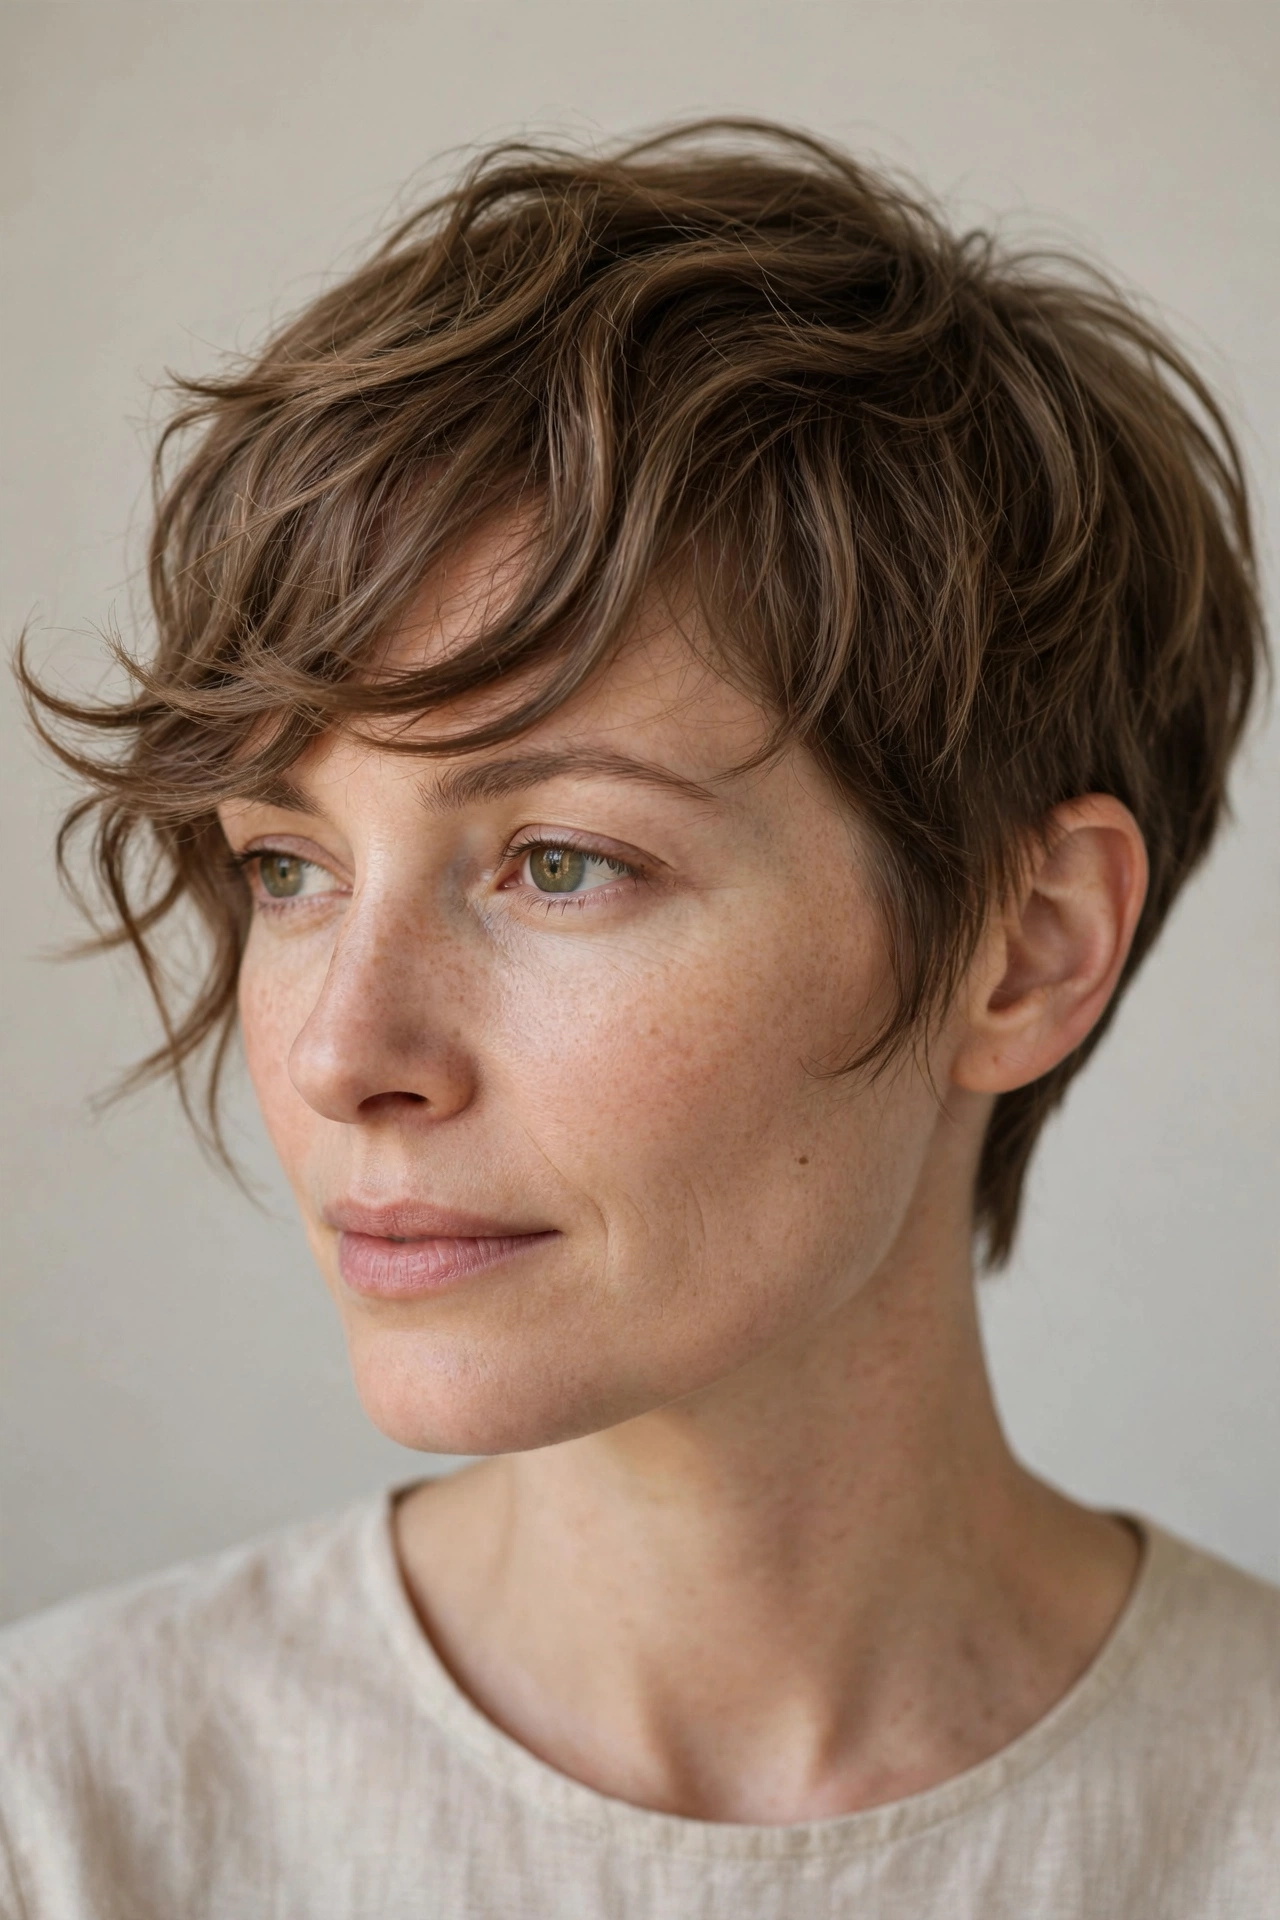
The long pixie with side-swept bangs is the perfect compromise if you want short hair that still feels soft and feminine. The overall length sits just above the ears with a longer fringe swept dramatically across the forehead, and on thin wavy hair that diagonal sweep is pure magic: it stacks waves over one side of the face, creating instant depth and the look of far more hair. This style is wonderfully kind to round, square, and heart-shaped faces because the sweeping line elongates the face and softens strong angles. Your natural wave keeps the fringe from looking flat or severe, giving the whole cut a romantic, effortless sway that longer bobs simply cannot match on thin hair.
- Smooth the fringe to the side with a flat brush and a warm blow-dryer.
- Apply smoothing cream to the bangs only to control frizz without flattening waves.
- Twist the ends of the fringe loosely for a piecey, casual finish.
- Set the sweep with a light-hold spray so it moves naturally all day.
Ask your stylist for a pixie that is longer on top and through the fringe — about three to four inches — with shorter tapered sides to keep the silhouette light. Style the bangs while damp for the best control, directing them across your forehead with the dryer nozzle pointed downward. A shine serum on the fringe keeps it sleek while the rest stays textured. Trim every four to six weeks, focusing on the fringe, and know that the grow-out phase is seamless: the length simply flows into a classic pixie bob.
The Curly-Top Pixie

The curly-top pixie celebrates your waves at their liveliest by keeping the crown and top long enough for real curl to form while the sides stay neat and short. On thin wavy hair, this contrast is a game changer — concentrating your length where the wave pattern is strongest makes the top look abundant, while the close sides eliminate the thin, stringy bits that often appear around the ears. It suits oval, diamond, and heart faces especially well, since the height on top balances a narrower jaw and adds flirty, feminine volume. If your waves lean toward curls, this cut lets them shine in their full glory with a modern, confident silhouette that feels anything but sparse.
- Apply curl-defining gel to soaking-wet hair and scrunch upward firmly.
- Diffuse on medium heat with your head flipped for maximum root volume.
- Refresh curls on day two by misting with water and re-scrunching.
- Pick the roots gently with your fingers for extra lift at the crown.
Ask your stylist to leave two to three inches on top with shorter sides, and request point-cutting through the crown so the waves separate into defined curls instead of one bulky mass. At home, the golden rule is to style soaking wet and avoid touching your hair while it dries — touching creates frizz. Use a microfiber towel instead of a terry one, and sleep on a satin pillowcase to preserve the curl pattern. Trims every six to eight weeks keep the shape tidy, and growing it out simply means letting the top keep going for a gorgeous curly pixie bob.
The Undercut Pixie
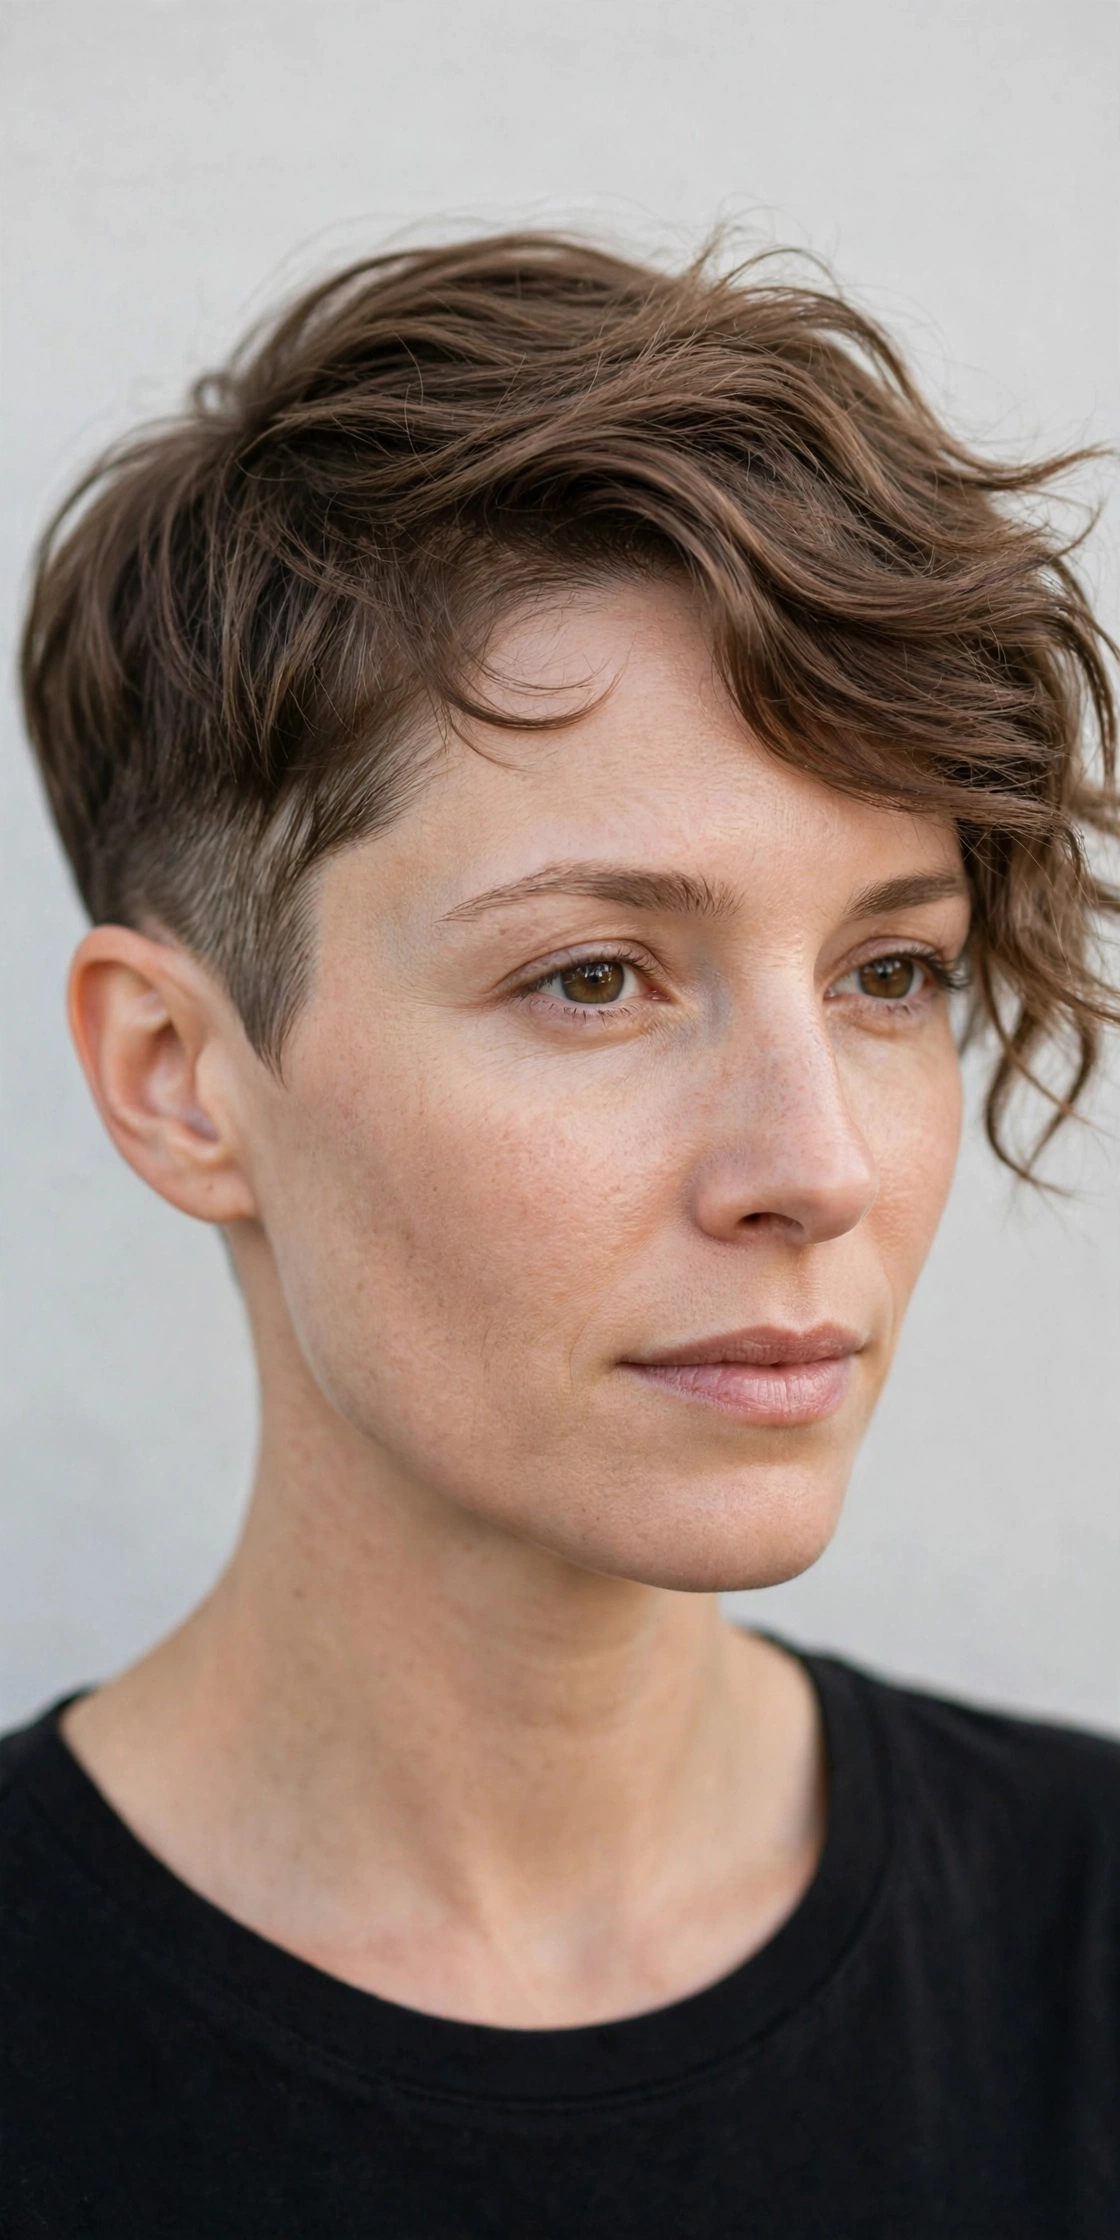
The undercut pixie pairs longer, wavier lengths on top with a closely clipped or tightly tapered section underneath, usually at the nape or along one side. For thin wavy hair, this contrast is surprisingly flattering: removing bulk from the underlayer makes the waves on top look dramatically thicker by comparison, and the edgy detail draws the eye away from any sparseness. This bold cut suits oval, round, and heart-shaped faces, since the height and texture on top elongate the face while the clean undercut adds a modern edge. It is a confident, fashion-forward choice that proves thin hair can carry serious attitude — and it dries in minutes.
- Work a pea-sized amount of pomade through the top for definition and shine.
- Blow-dry the crown forward or upward, leaving the undercut to air-dry.
- Create a deep side part to maximize the sweep of waves over the cut section.
- Tame regrowth fuzz on the undercut with a dab of edge-control cream.
Ask your stylist for a disconnected undercut — either a hidden nape panel or a bold side section — with at least two inches left on top for your waves to show. Be clear about how dramatic you want the contrast; a softer taper grows out far more forgivingly than a skin-tight clip. At home, keep the undercut line sharp with a trim every three to four weeks, while the top can go six weeks. Growing it out requires patience, but a soft taper version blends into a classic pixie within a couple of months.
The Asymmetrical Pixie

The asymmetrical pixie features one side noticeably longer than the other, creating a dramatic diagonal line that does wonders for thin wavy hair. The asymmetry tricks the eye into seeing more hair: waves stacked on the longer side build up volume and movement, while the shorter side stays sleek and sculpted for contrast. This cut is a dream for round and square faces because the strong diagonal line slims the face and adds edgy sophistication. Your natural wave keeps the longer side from lying flat, giving the style a dynamic, fashion-editorial feel. It is bold without being extreme — a conversation-starting cut that still works for the office.
- Blow-dry the longer side over to the opposite cheek for maximum sweep.
- Apply volumizing mousse at the roots of the longer section before drying.
- Define the wave tips with a small amount of shine wax for polish.
- Tuck the shorter side behind your ear to emphasize the asymmetry.
Ask your stylist for a clear one-to-two-inch difference between the sides, with the longer side cut at an angle that grazes your cheekbone. Bring photos, because “asymmetrical” means different things to different stylists — you want bold, not accidental. At home, always style the fringe and longer section while damp to lock in the direction. Trims every four to five weeks keep the line sharp. The grow-out is straightforward: let the short side catch up, and you will land at a beautifully layered pixie bob.
The Pixie Bob

The pixie bob — sometimes called the bixie — blends the best of both worlds: the short, flattering shape of a pixie with a little more length through the back and around the ears like a bob. For thin wavy hair, that extra length is strategic, giving your waves more surface to bend and twist around, which reads as fullness and body. It suits nearly every face shape, but it is especially lovely on oval and heart-shaped faces where the soft length around the jaw adds balance. This is the friendliest entry point into short hair if you are nervous about going very short, offering styling versatility — tuck it, wave it, sweep it — while still delivering the root-lifting magic of a pixie.
- Tousle with texturizing spray while scrunching for beachy, undone waves.
- Blow-dry with a round brush at the crown for a smooth, voluminous finish.
- Flip the ends outward with a flat iron for a playful retro twist.
- Air-dry with curl cream for soft, defined natural texture.
Ask your stylist for a pixie silhouette with bob-length pieces at the nape and in front of the ears, and request soft layering rather than blunt edges so the waves move freely. At home, this is a true wash-and-wear cut — most days need only a styling product and your fingers. Use a lightweight leave-in conditioner to keep the longer pieces silky. Trim every six to eight weeks to maintain the shape, and the grow-out is the easiest of all pixies: it simply becomes a short bob with lovely layers.
The Feathered Pixie
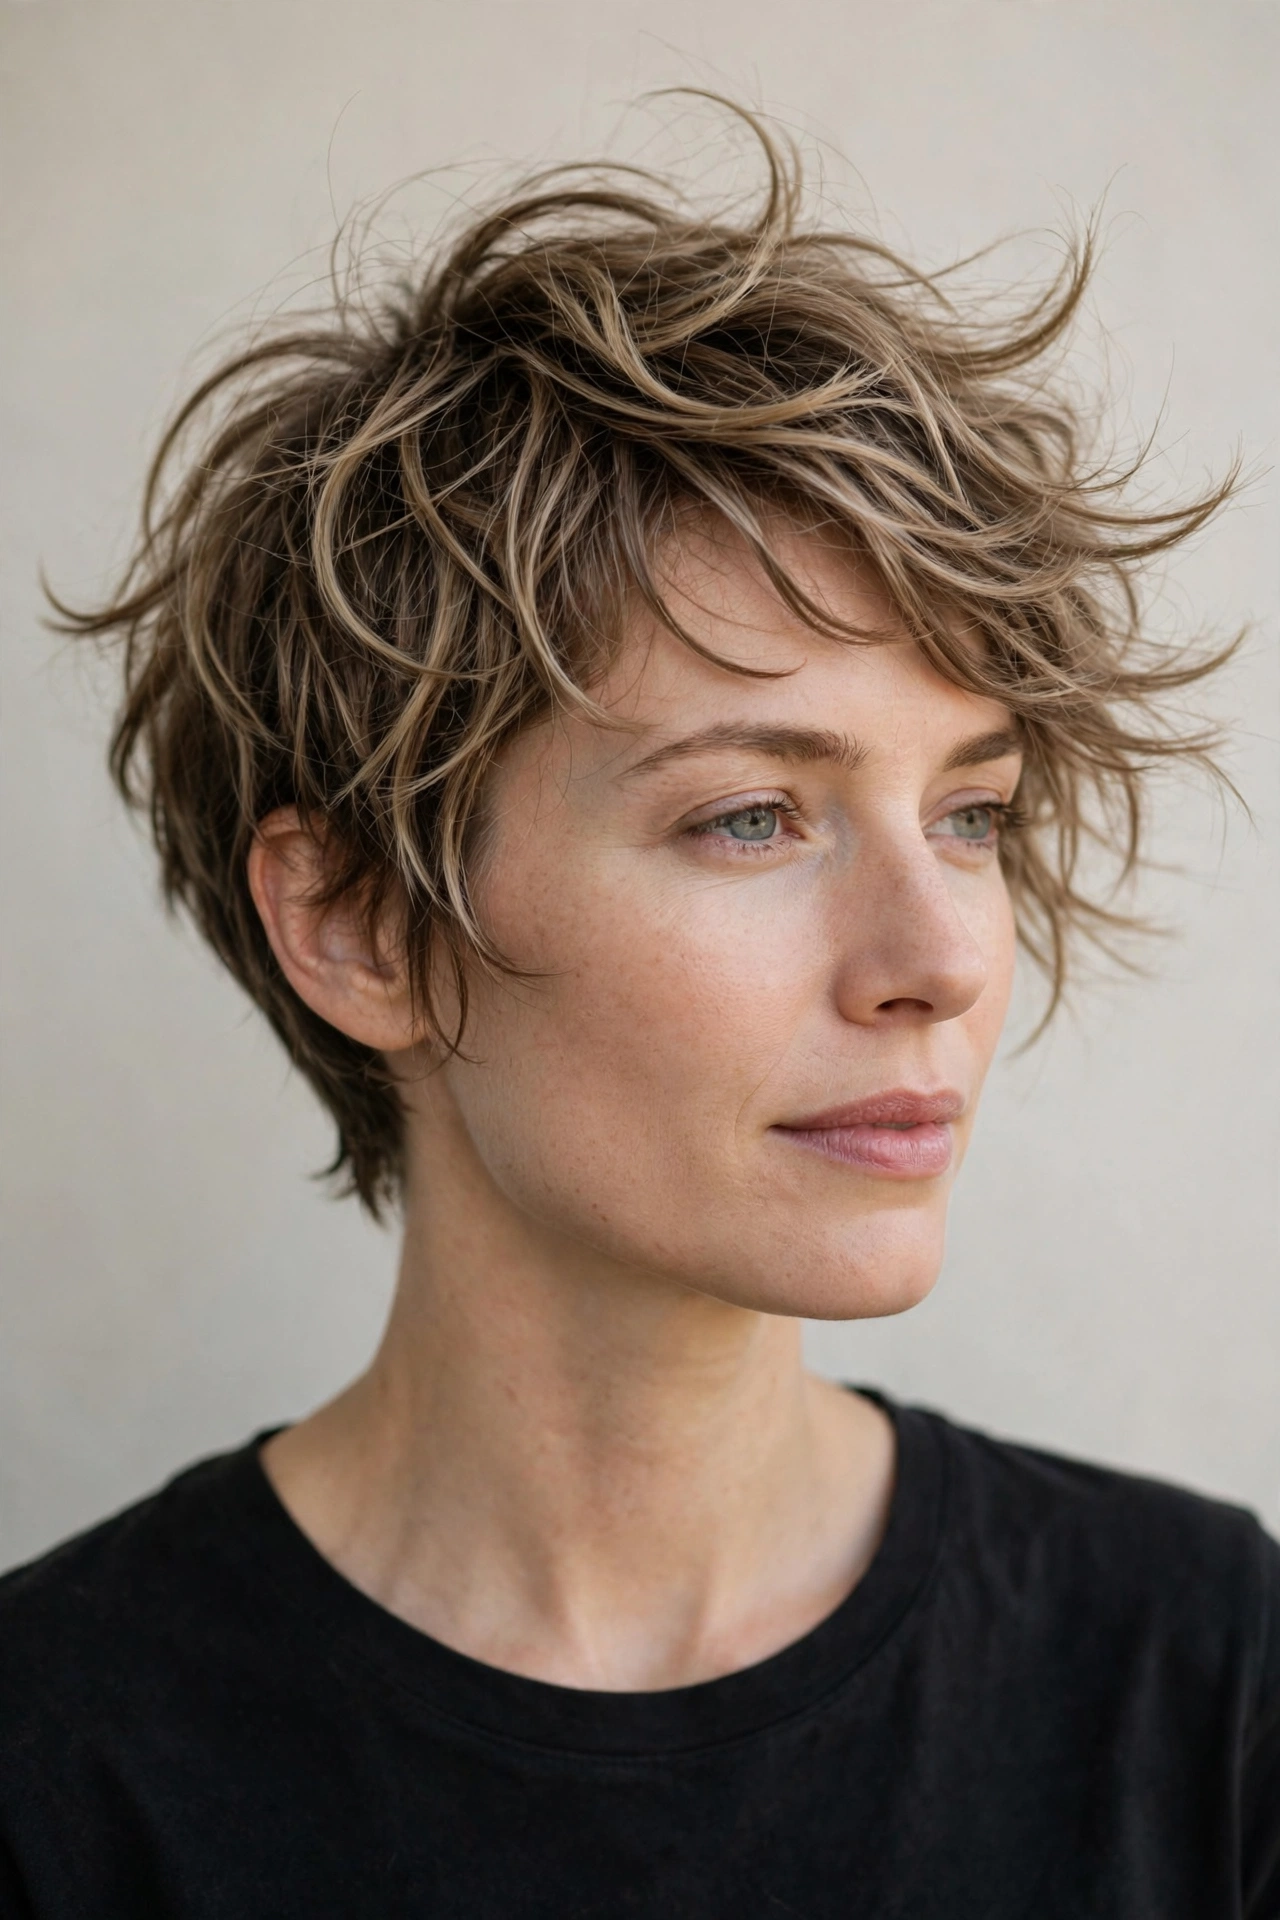
The feathered pixie uses soft, wispy layering sliced through the entire cut to create a light, airy finish that is pure gold for thin wavy hair. Feathering removes just enough weight at the ends so each wave can lift and flutter independently, giving the illusion of airy fullness rather than a single flat curtain. This cut flatters oval, oblong, and heart-shaped faces because the soft, feathery edges add gentle width exactly where you want it. It has a romantic, seventies-inspired feel that stays modern thanks to its texture, and it is wonderfully forgiving as it grows — the feathers simply get softer and prettier with time.
- Apply lightweight root-lifting spray before blow-drying upside down.
- Brush the top back and outward with a paddle brush for feathery movement.
- Flip small sections with a round brush to emphasize the flicked ends.
- Mist with flexible-hold hairspray to keep the feathers floating.
Ask your stylist for a feathered, razor-cut pixie with soft layers throughout, and make it clear you want wispy ends rather than blunt or choppy ones. At home, avoid heavy oils and butters that drag feathers down — a light mousse is your best friend. Blow-drying with a round brush brings out the signature flick, but air-drying with sea-salt spray gives a lovely casual version. Trim every five to seven weeks to keep the feathering crisp; grow-out is seamless, melting into a feathered shag.
The Pixie with Wispy Fringe
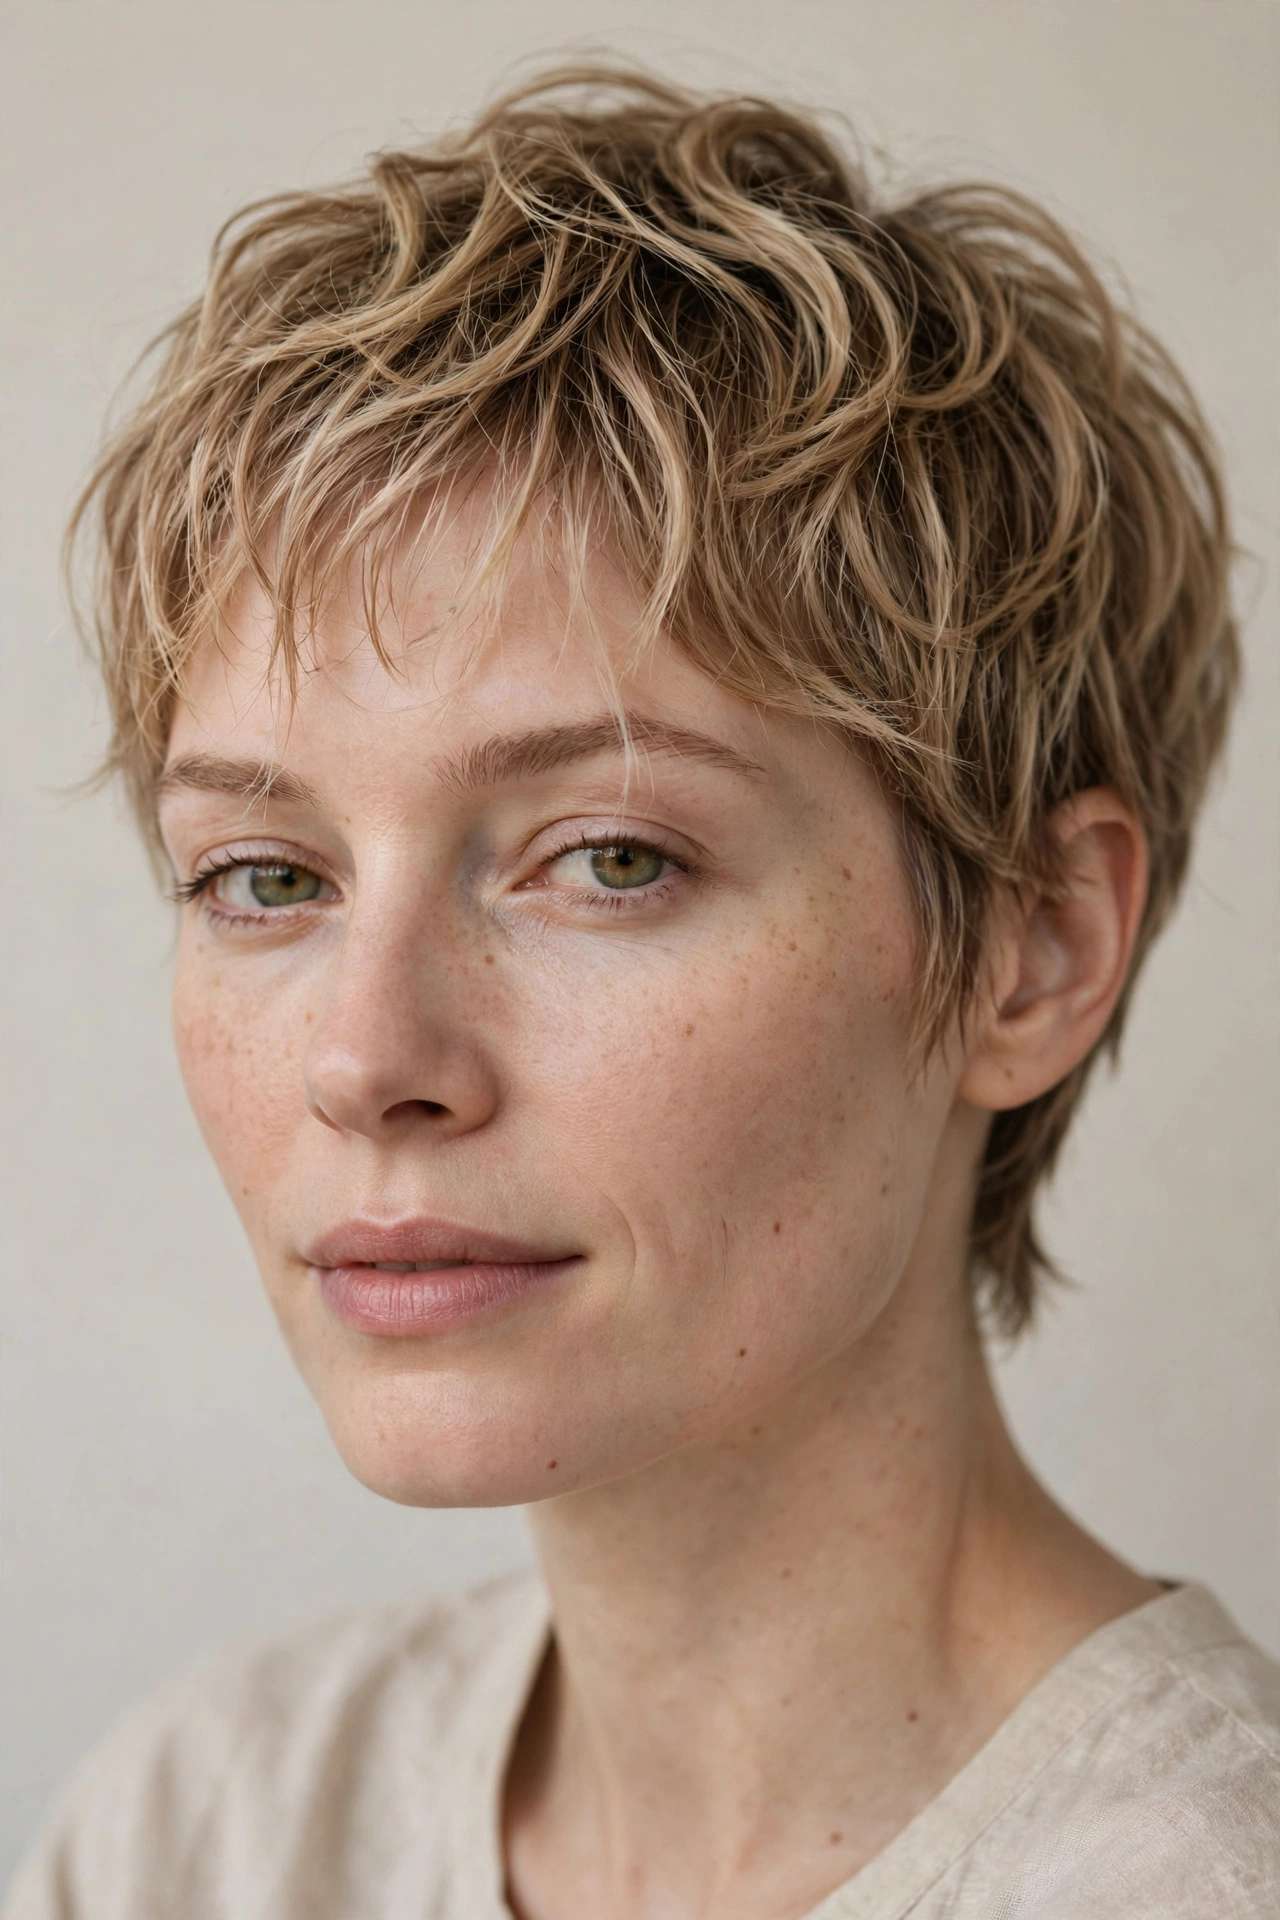
The pixie with wispy fringe pairs a short, textured pixie with a light, see-through fringe that grazes the forehead — and on thin wavy hair, that whisper of a fringe is perfection. A heavy bang would overwhelm fine hair, but a wispy fringe adds just enough coverage to frame the eyes while the natural wave keeps it soft and touchable. This style flatters high foreheads, heart shapes, and oval faces beautifully, since the fringe shortens the face visually and draws attention to your eyes. It is sweet, youthful, and feminine, giving thin wavy hair a delicate finish that feels romantic rather than sparse.
- Blow-dry the fringe forward with a small round brush for a soft curve.
- Apply a tiny amount of smoothing balm to the fringe to prevent flyaways.
- Pinch the fringe into tiny pieces with dry wax for a separated look.
- Refresh the fringe between washes with a quick dry-shampoo dusting.
Ask your stylist for a wispy, textured fringe — cut with a razor or point-cut for that airy finish — on top of a classic tapered pixie base. Emphasize that you want the fringe light and see-through, not blunt. At home, style the fringe first while it is dampest, since bangs set fastest. Keep it trimmed every three to four weeks; fringe grows out quickest and loses its wispy charm when too long. If you decide to grow it out, the fringe sweeps easily into side-swept bangs.
The Tousled Boyish Pixie
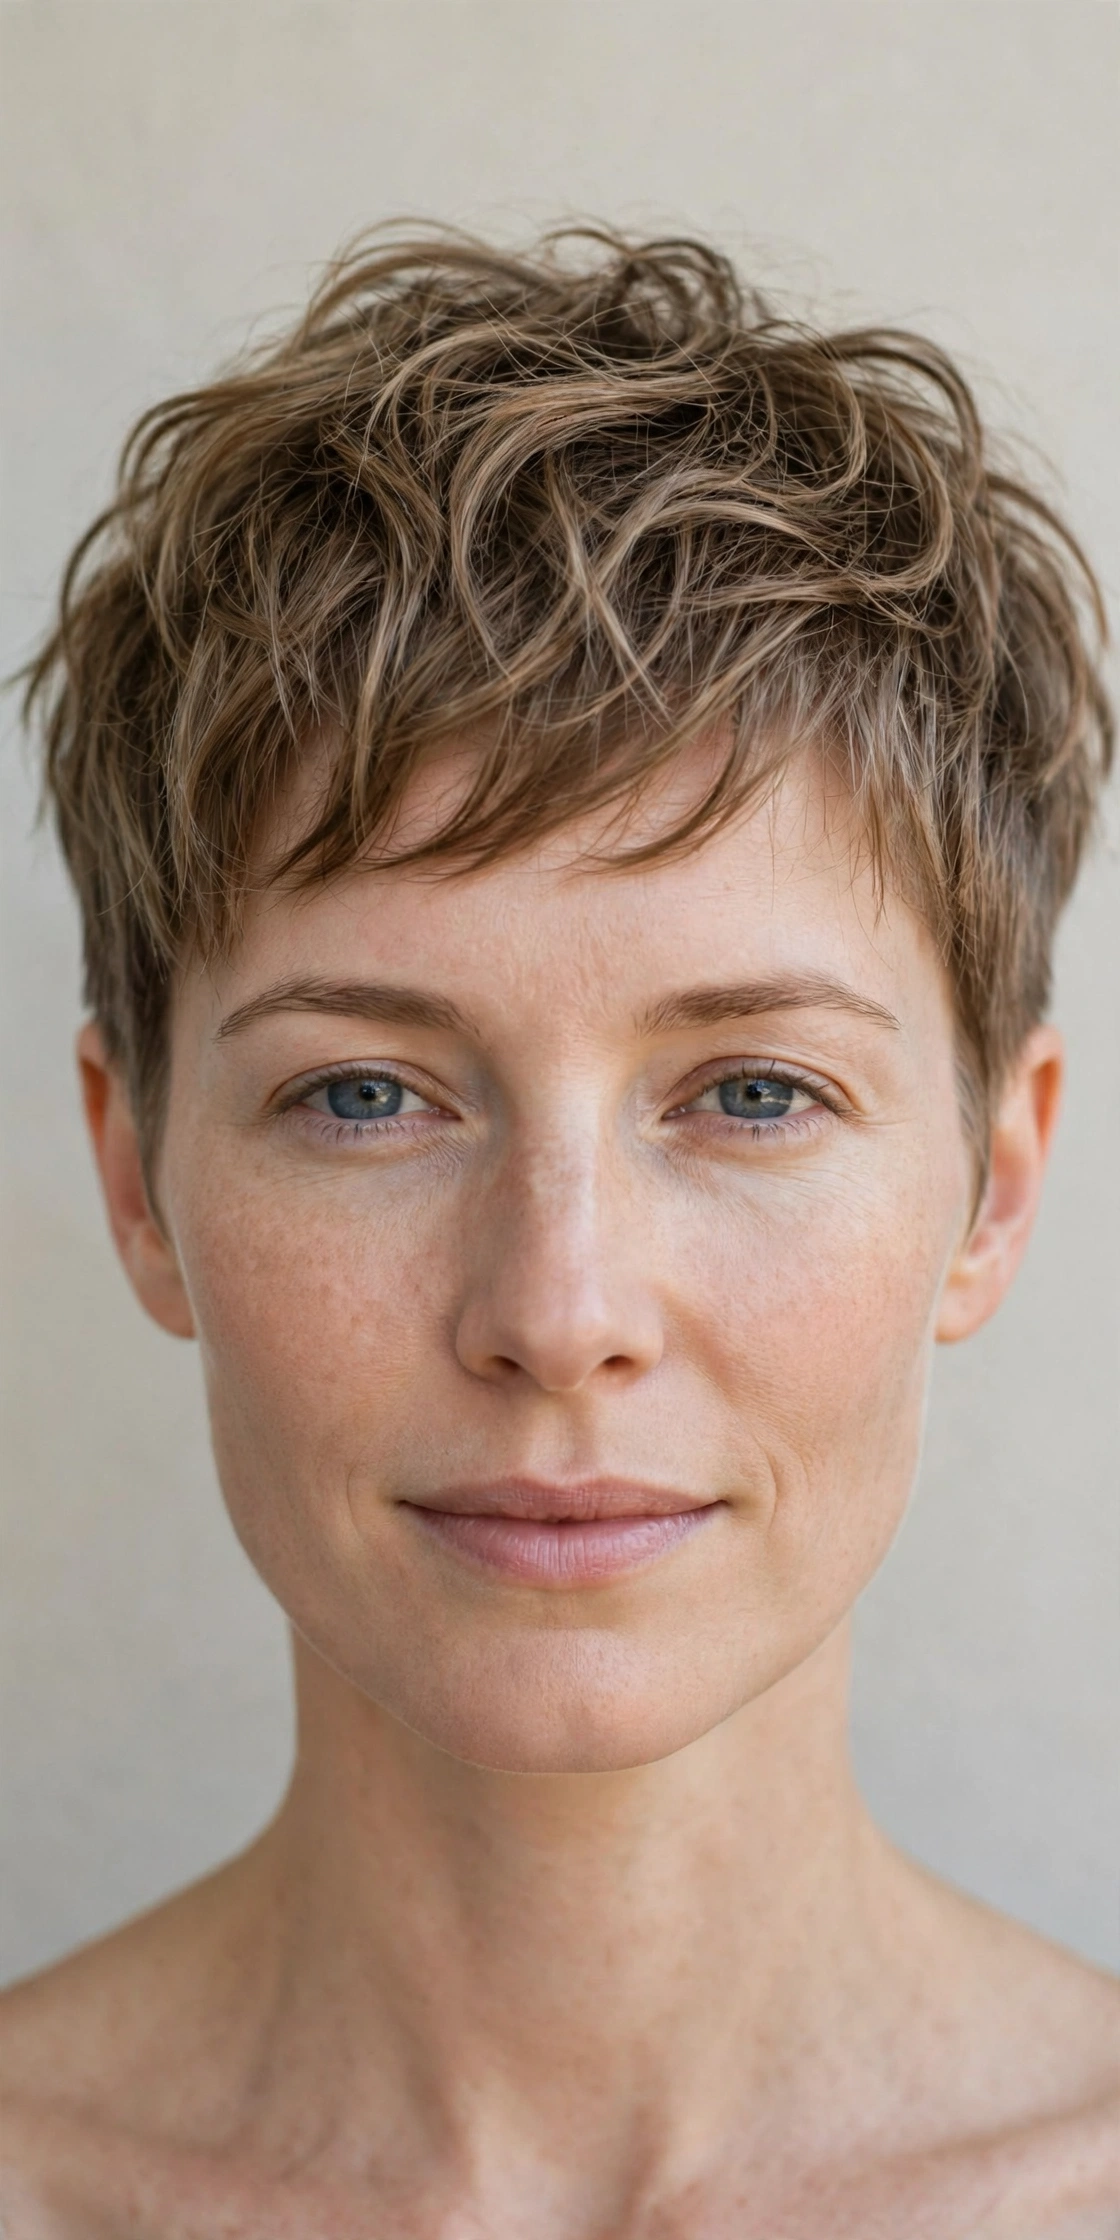
The tousled boyish pixie is a short, carefree cut with a longer, messy top and neatly trimmed sides — think effortless cool rather than fussy styling. On thin wavy hair, the deliberate messiness is a secret weapon: tousled texture breaks up the surface so the eye cannot tell where one thin strand ends and another begins, and the waves add natural lift that makes the whole cut look thicker. This androgynous style suits oval, heart, and square faces, and the longer top can be directed to flatter any forehead. It is the ultimate low-maintenance pixie with a cool, confident energy that looks better the less you fuss with it.
- Work matte paste through dry hair, pushing the top in different directions.
- Blow-dry the crown forward with your fingers for messy, natural lift.
- Sprinkle texturizing powder at the roots for instant gritty volume.
- Mess it up with your hands throughout the day — it only gets better.
Ask your stylist for a boyish pixie with two to three inches on top and clean, tapered sides, requesting lots of texture through the crown. At home, less is more: skip the round brush and let your fingers do the styling. A matte clay or paste is the only product you truly need. Trim every four to six weeks to keep the sides neat. Growing it out is easy — the messy texture camouflages every stage, eventually becoming a shaggy pixie.
The Deep Side-Part Pixie
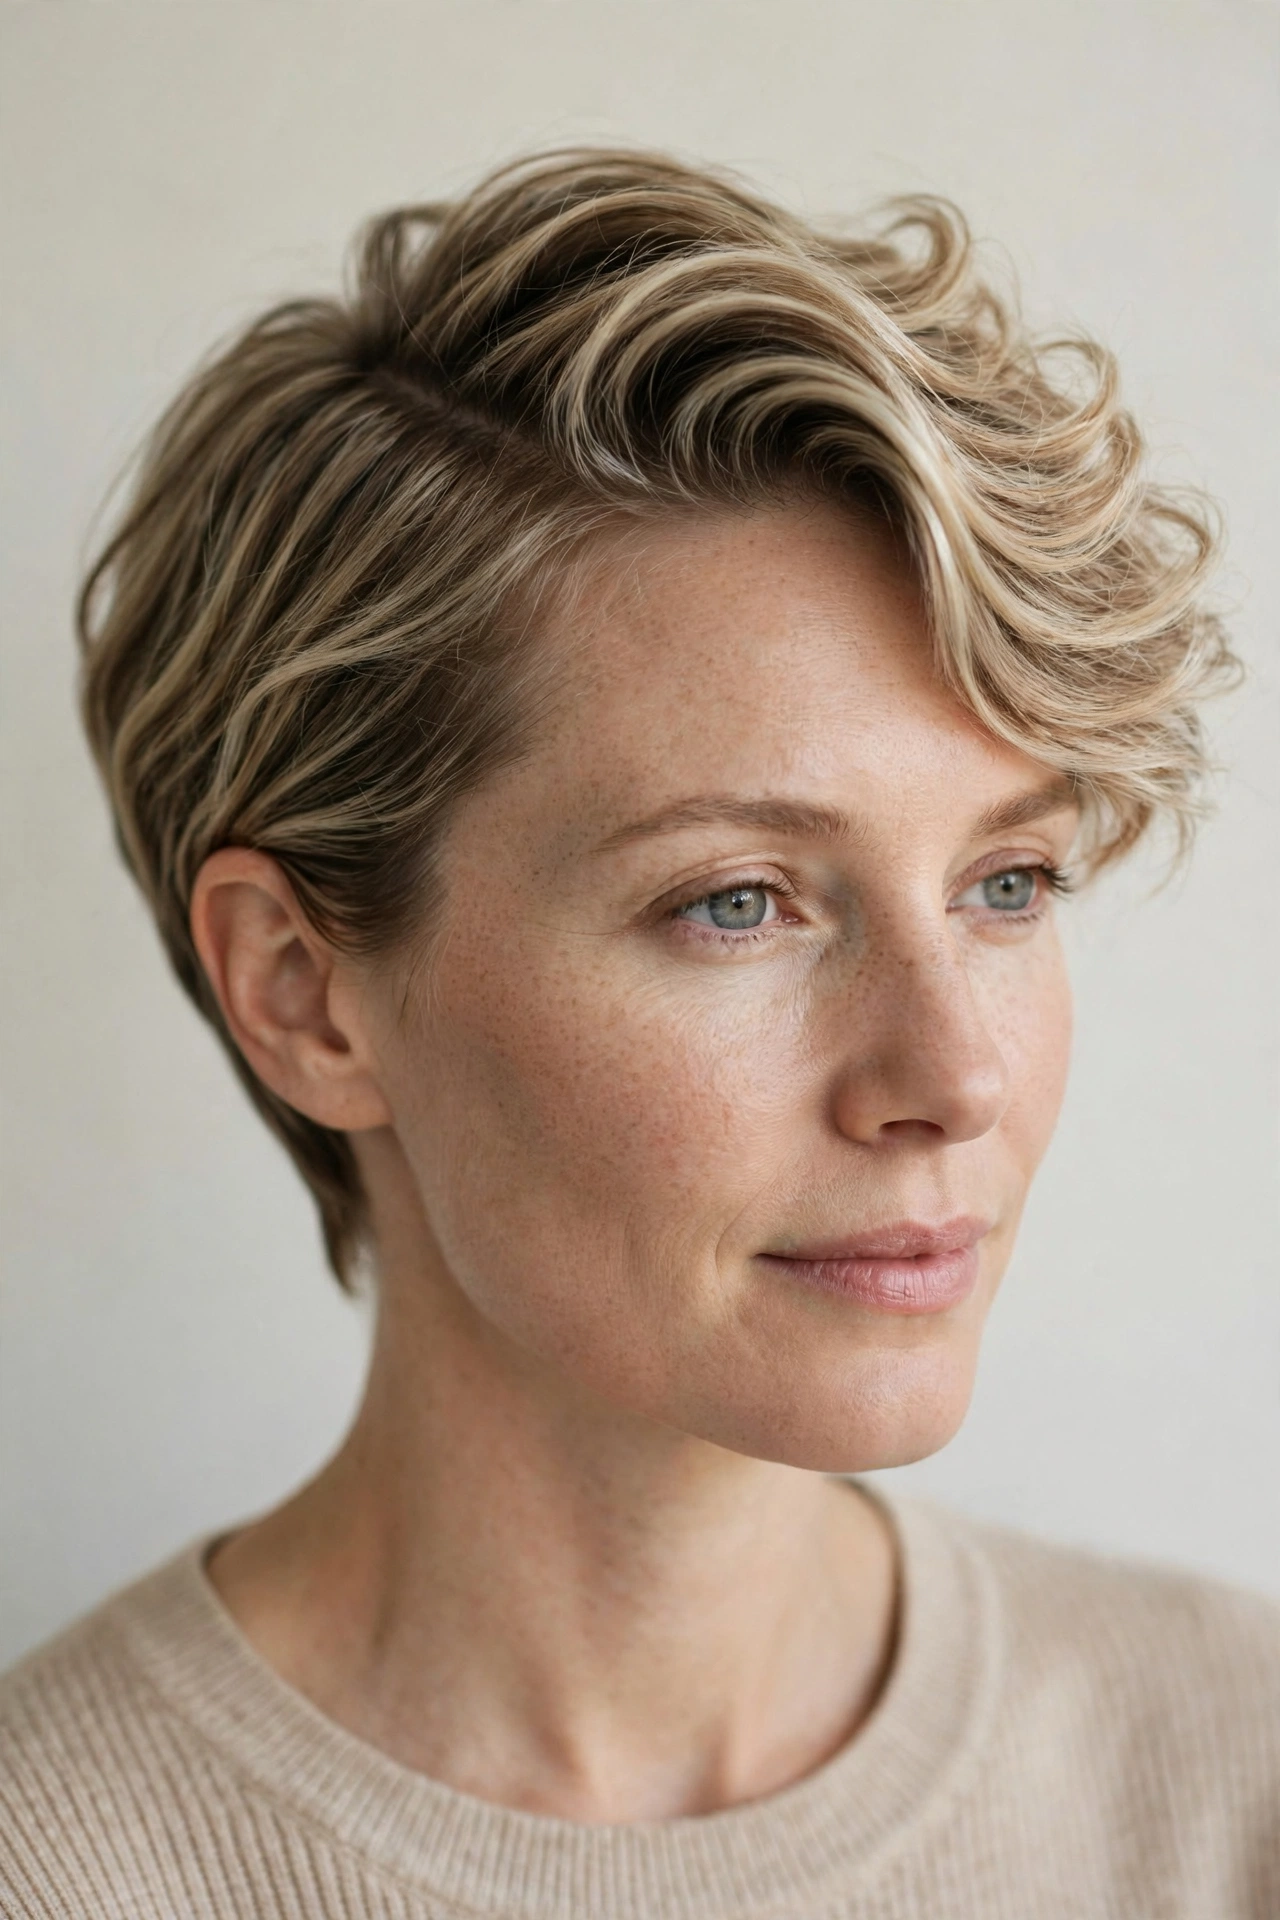
The deep side-part pixie creates instant drama and volume simply by shifting your part far to one side, sweeping most of your hair across the crown. For thin wavy hair, this single styling move is transformative: hair trained to lie flat at the part gets flipped against its natural direction, creating root lift and a gorgeous cascade of waves over one side. The style suits round, square, and heart-shaped faces especially well, since the diagonal sweep slims and elongates. It is elegant and versatile — polished enough for evening, easy enough for every day — and the deep part makes even the finest hair look dramatically fuller on top.
- Create the deep part while hair is wet, combing firmly to set the direction.
- Apply root-boosting mousse along the part line before blow-drying.
- Blow-dry the heavy side over to the opposite side for maximum lift.
- Clip the lighter side flat behind your ear for sleek contrast.
Ask your stylist to cut the pixie with a deep side part in mind, keeping the heavy side longer and the part side slightly shorter and tucked. At home, always establish the part on soaking-wet hair — it is much harder to retrain once dry. A root-lifting spray applied directly along the part line keeps the lift all day. Trim every four to six weeks. Growing out a deep-part pixie is graceful: the longer side simply gains length and can be swept into a side-swept bob.
The Volumizing Layered Pixie
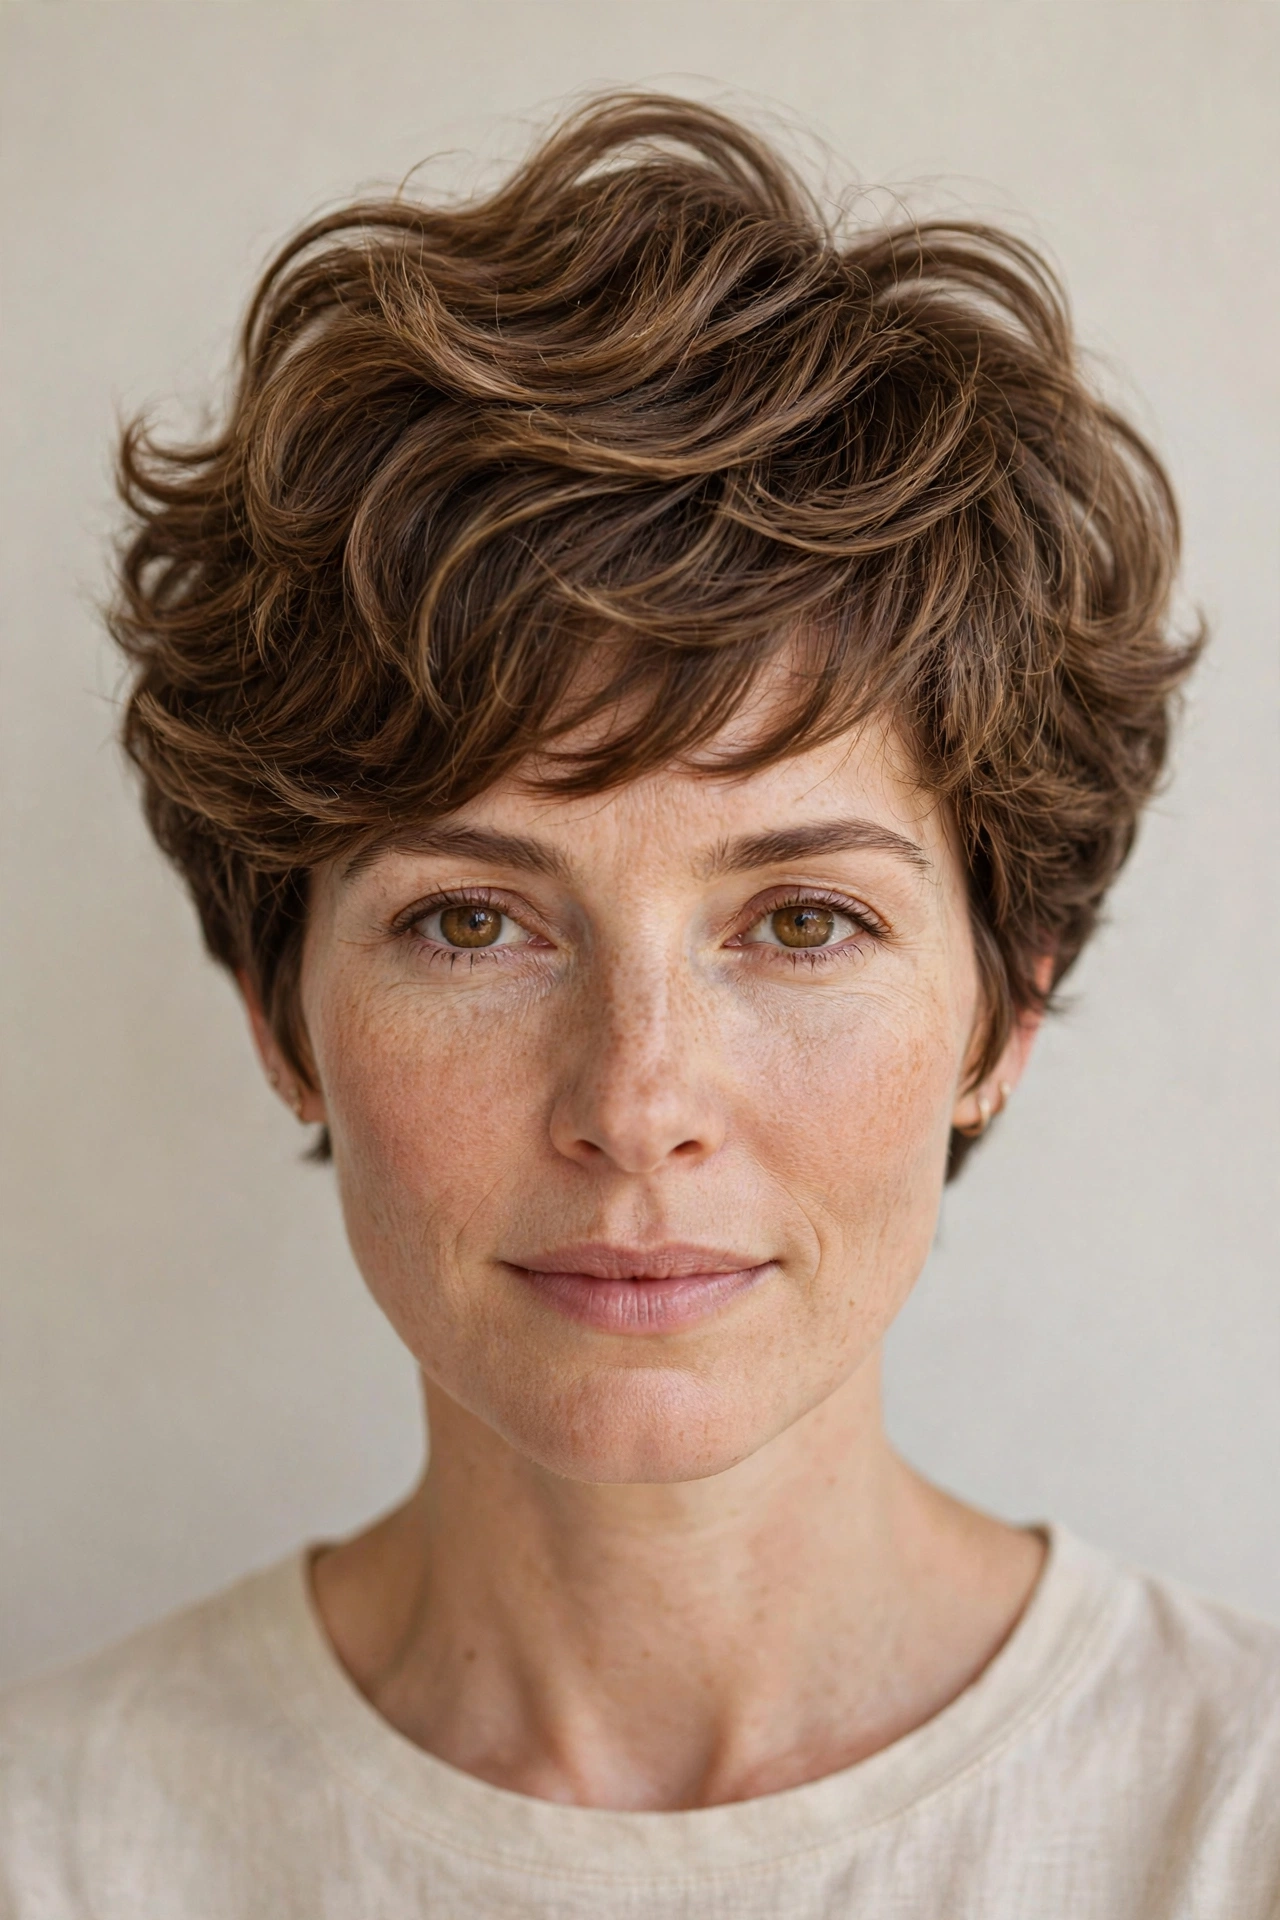
The volumizing layered pixie is engineered from the ground up to make thin wavy hair look its fullest, with stacked layers through the crown that build height and let waves spring from multiple levels. Each layer is cut slightly shorter than the one beneath it, so the waves stack on top of each other like shingles — and the result is a rounded, bouncy silhouette that can double the perceived thickness of your hair. This cut flatters oval, oblong, and diamond faces, where the crown height adds beautiful balance. If maximum volume is your goal, this is the pixie that delivers it, with a lush, salon-blowout look that holds its shape beautifully.
- Layer volumizing mousse from roots to ends on damp hair for all-over body.
- Blow-dry in sections with a round brush, lifting each layer at the root.
- Backcomb the crown lightly with a teasing comb for extra height.
- Finish with a volumizing hairspray misted from underneath the layers.
Ask your stylist for stacked, graduated layers through the crown with a rounded shape, emphasizing that volume — not length — is the priority. At home, invest in a good round brush and take the extra five minutes to blow-dry in sections; this cut rewards the effort enormously. Use dry shampoo at the roots between washes to maintain the lift. Trim every five to six weeks to keep the stacked shape crisp. Growing it out takes patience, but the layers collapse gracefully into a textured lob.
Conclusion
Thin wavy hair does not need to be a styling struggle — with the right pixie cut, your natural texture becomes your greatest asset, delivering the lift, movement, and fullness that longer styles only promise. From the timeless taper of a classic pixie to the bold sweep of a deep side part, these 12 ideas prove that going short is the smartest way to make waves look thicker and more alive. Pick the shape that matches your face, your personality, and your morning routine, then take it to your stylist with confidence. And if you want even more short-hair inspiration for fine textures, browse these 12 Shaggy Hairstyles for Women Over 50 with Thin Fine Hair for layered looks that share the same volume-boosting philosophy — your best hair days are just one great cut away. For more thin-hair-specific ideas, our 12 hairstyles for thin fine hair round up the most flattering options.


2 Comments