12 Layered Hairstyles for Medium Hair
Introduction
Medium hair is the sweet spot of versatility — long enough to style up, short enough to behave — and layered hairstyles for medium hair make it even better. If your shoulder-length cut is falling flat, looking heavy, or simply boring you, strategic layers add movement, shape, and dimension without sacrificing length. Below are 12 layered hairstyles for medium hair — who each suits best, how to style it at home, and exactly what to ask for in the salon chair. If you love cuts with extra texture and edge, browse these textured modern medium cuts too. Pick the one that matches your face shape and hair type, and you will walk out of your next appointment with a cut you actually love.
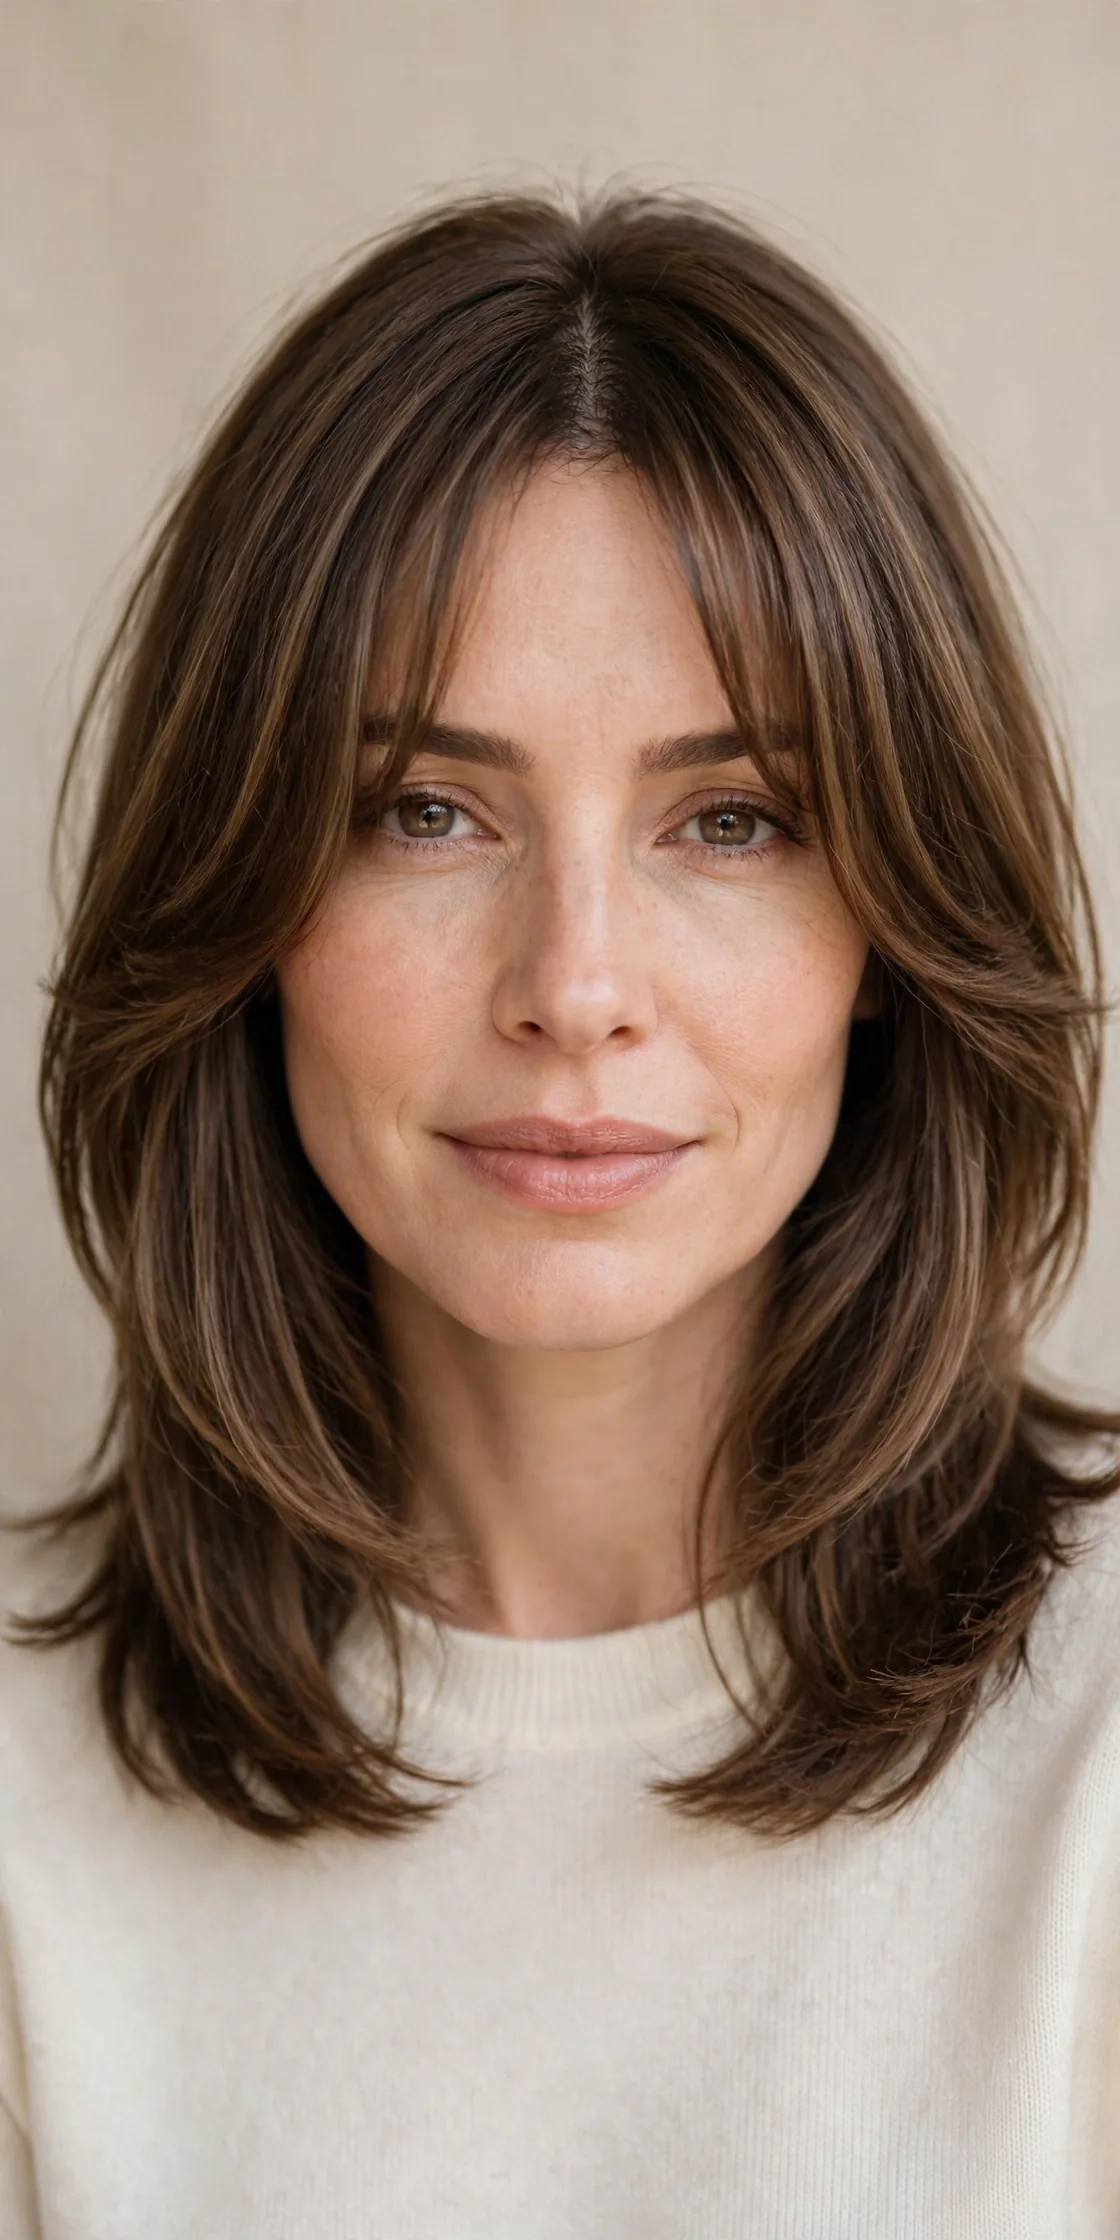
Soft Face-Framing Layered Hairstyle for Medium Hair with Curtain Bangs
This is the universally flattering layered look you have seen everywhere — and for good reason. Soft face-framing layers start around the cheekbones and melt into the rest of the cut, while curtain bangs split softly down the middle to frame your features like a picture frame. It suits nearly every face shape: the curtain opening elongates round faces, softens strong jawlines on square faces, and adds balance to longer faces. On fine hair, the graduated framing pieces create the illusion of fullness around the face; on thick hair, they break up the bulk so your medium layered cut feels lighter and moves beautifully. If your hair lies flat, this cut finally gives it life — every layer encourages natural swing around your face.
- Blow-dry your bangs first, while they are still damp, pulling them forward and side to side.
- Use a medium round brush on the face-framing pieces, rolling them away from your face.
- Apply a pea-sized amount of smoothing cream to the ends to keep them feathered, not frizzy.
- Set the shape with a light mist of flexible-hold hairspray once the hair has fully cooled.
Ask your stylist for face-framing layers that begin at the cheekbone, with curtain bangs that connect seamlessly into the layers — no harsh disconnection between the fringe and the sides. Bring reference photos showing the exact bang length you want, since “curtain bangs” can mean anything from brow-skimming to collarbone length. For at-home styling, this is a 10-minute blow-dry look; on second-day hair, revive the fringe with a quick pass of a round brush or flat iron. A lightweight texture spray adds separation without weight. Trim every 6-8 weeks to keep the face-framing pieces fresh; the rest can grow freely between visits.
One-Length Perimeter with Hidden Interior Layers
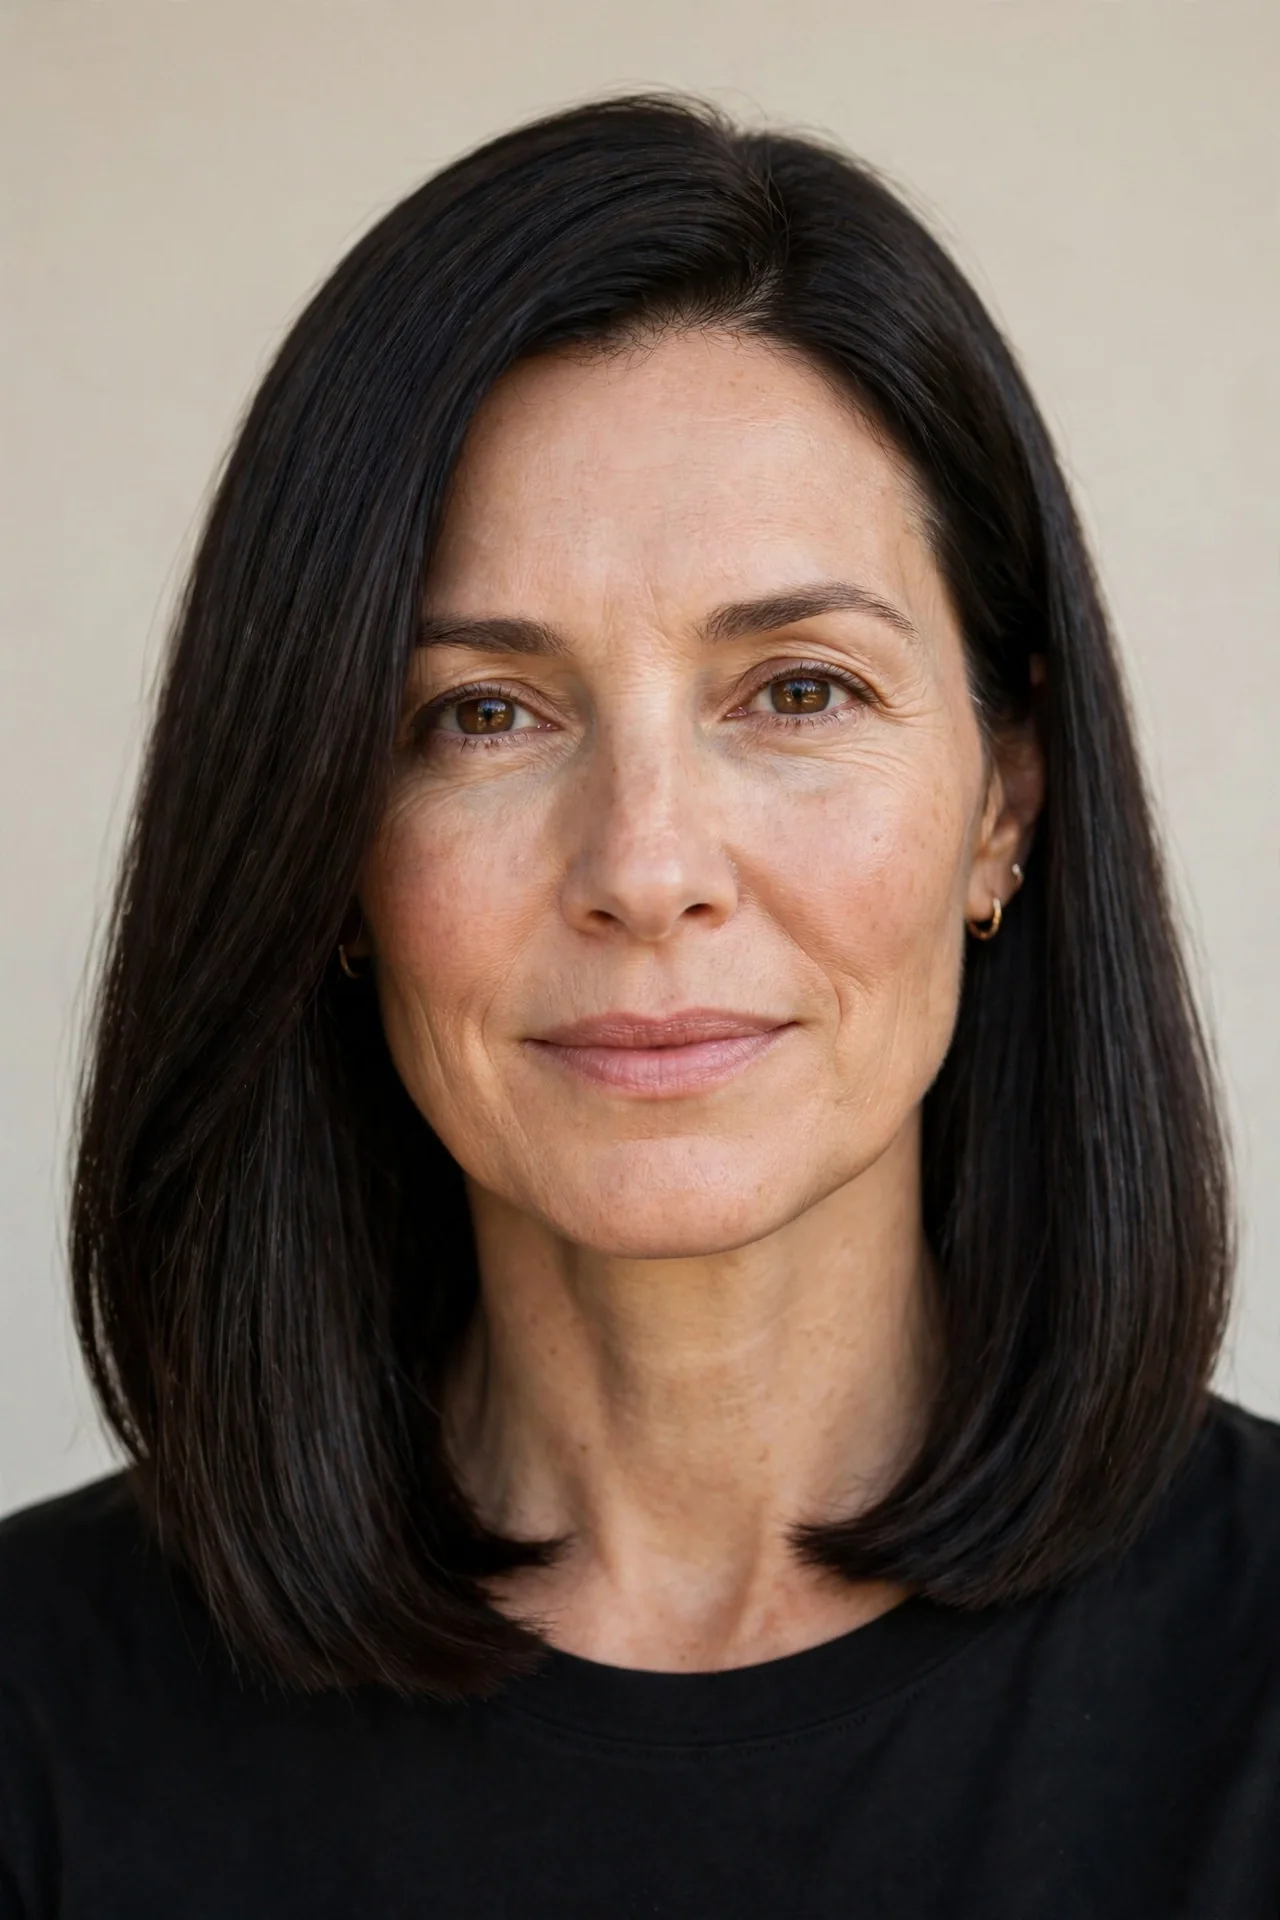
Love the clean look of a blunt cut but hate how heavy it feels? This clever approach keeps the bottom edge one length — so your ends look thick and healthy — while hidden interior layers remove bulk from underneath. Nothing about the cut looks “layered” at first glance, which makes it perfect if you work in a polished office environment or simply prefer understated elegance. It suits medium to thick hair best, where interior layers debulk quietly without thinning the visible perimeter. Oval, heart, and long faces wear it beautifully, and the consistent length makes growing your hair longer easy, with no stringy, shapeless phase.
- Blow-dry with a paddle brush for a sleek, smooth finish that shows off the blunt edge.
- Apply a heat protectant before any hot tools to keep the perimeter looking dense and polished.
- Flip the ends slightly under with a flat iron for a classic, tucked-in silhouette.
- Refresh the interior movement with a quick upside-down blow-dry on second-day hair.
Ask your stylist for interior layering — “invisible layers” cut underneath the top surface that remove weight while the bottom edge stays blunt and full. This is one of the lowest-maintenance layered hairstyles for medium hair: the hidden layers do the work even when you air-dry. Trim every 8-10 weeks to maintain the crisp perimeter. If you are ever tempted to chop shorter, try short layered bob hairstyles first — the same weight-removal trick applies beautifully at shorter lengths.
Feathered Layers for Fine, Thin Hair

If your hair is fine or thinning, feathered layers are one of the kindest cuts you can ask for. Instead of heavy layers that make thin hair look stringy, feathering slices wispy texture into the ends, creating soft, airy movement that reads as fullness. Layers concentrate through the mid-lengths and ends, leaving density at the crown for body. This suits oval and heart-shaped faces especially well, since the feathered ends soften a narrow chin and the airy texture balances wider foreheads. It is also wonderful for mature hair, which often thins with age — feathering disguises sparse ends far better than a blunt cut.
- Blow-dry with a small round brush, lifting at the roots for maximum volume.
- Apply a volumizing mousse to damp roots before drying to plump each strand.
- Use a lightweight dry shampoo at the crown on non-wash days for grip and lift.
- Finish ends with a tiny drop of lightweight oil, keeping it off the roots entirely.
Ask your stylist for point-cut feathered layering — texturized, wispy ends rather than chunky layers — and request maximum density at the crown. At home, the golden rule for fine hair is: volume products at the roots, smoothing products only on the very ends. Wash every 1-2 days to prevent oil from flattening the feathering. For gentle, expert-backed hair care guidance, the American Academy of Dermatology offers dermatologist-reviewed tips on caring for thinning hair and minimizing breakage. Trim every 6-7 weeks to keep the feathered ends fresh, since thin hair shows damage quickly.
Long Shaggy Layers with a Wispy Fringe
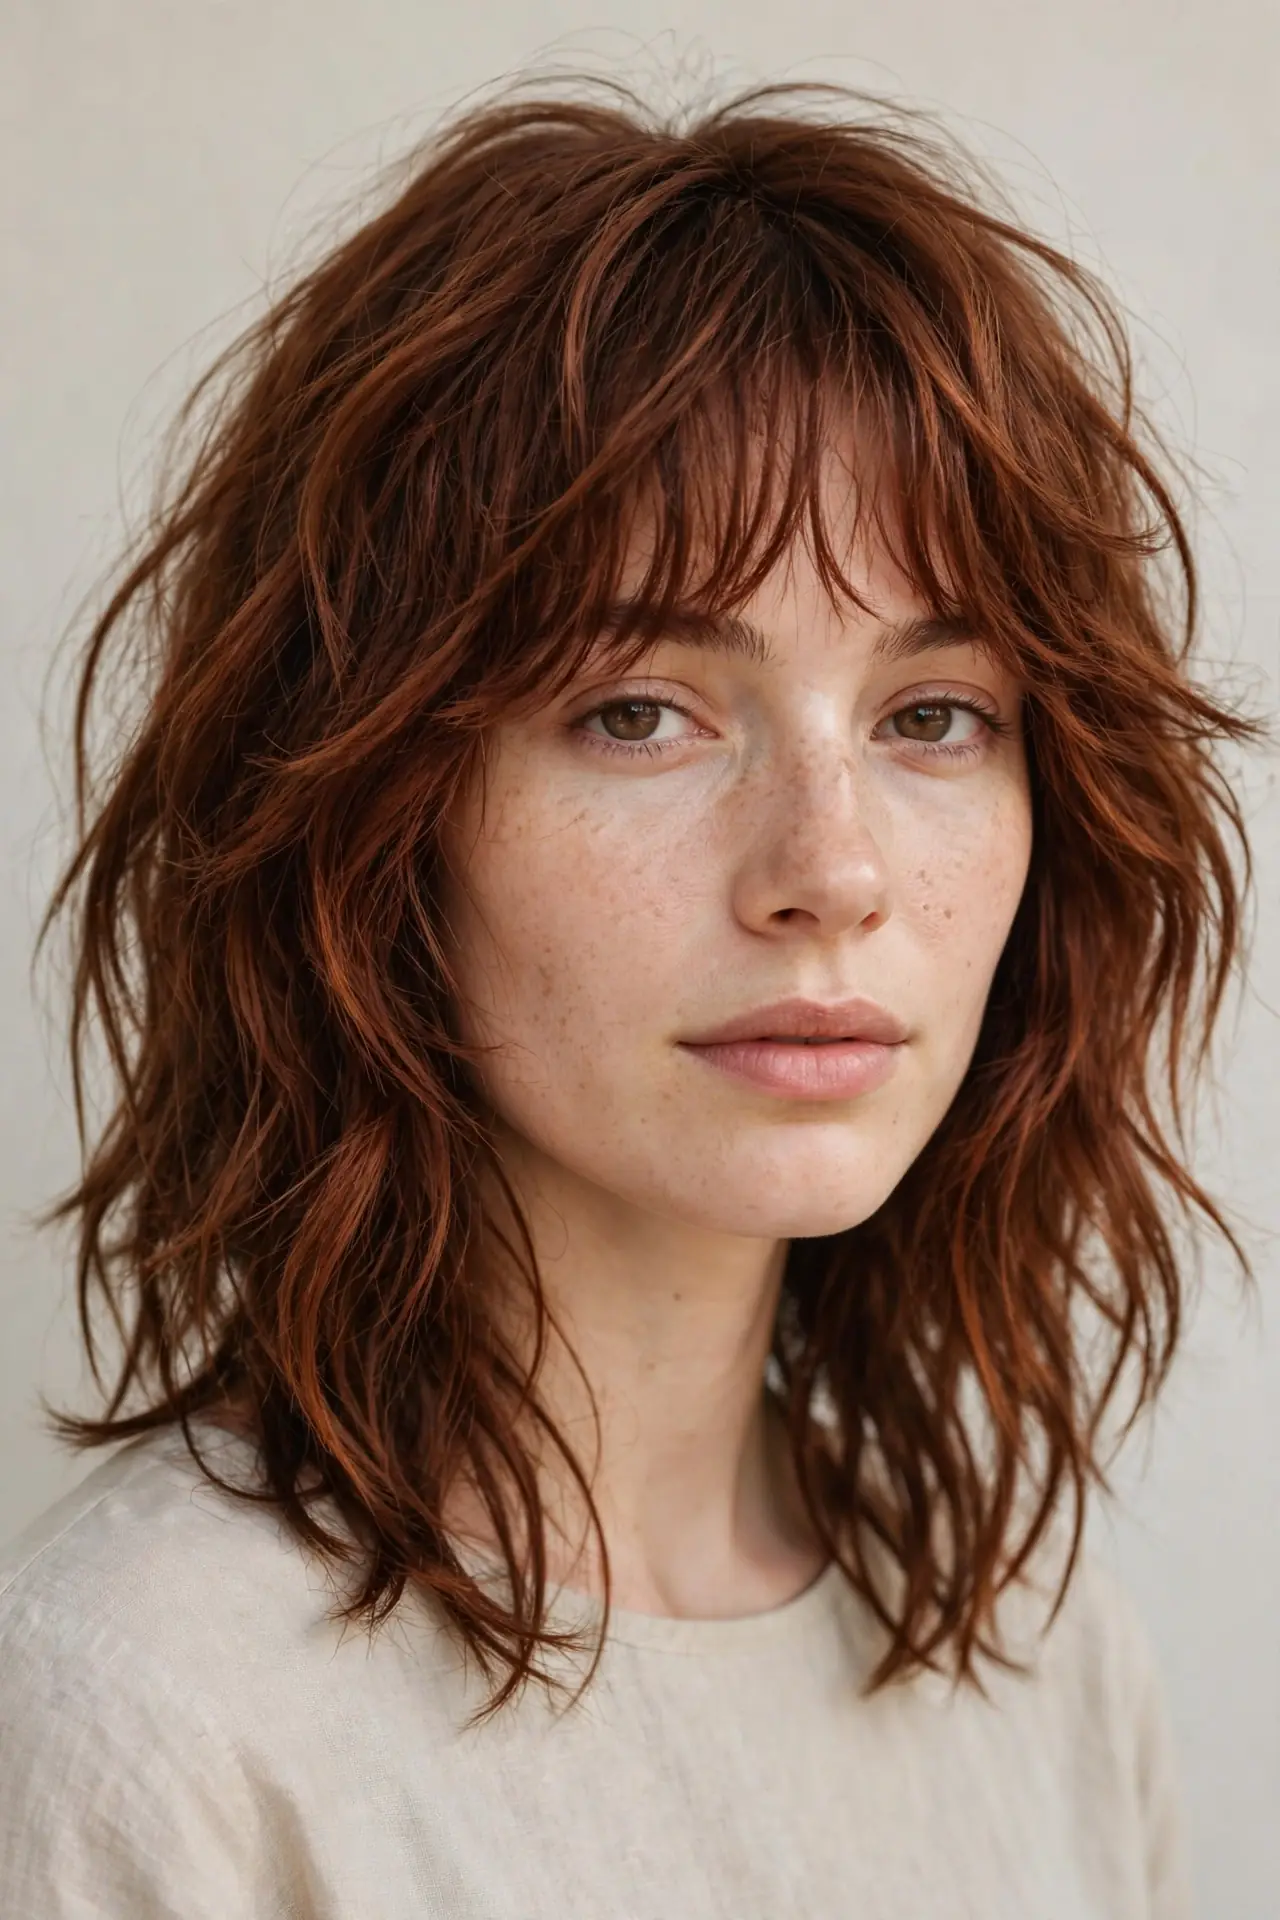
The shag is back — softer, longer, and more wearable than its rock-and-roll ancestor. This version keeps your medium length while layering generously through the crown and mid-lengths, then finishes with a wispy fringe that blends into the face-framing layers. It is ideal for wavy and curly textures, which thrive on the extra internal space, and it gives thick hair that coveted piecey, undone look. Round and square faces benefit most — crown volume and the wispy fringe elongate and soften. If your hair has any natural wave, this cut practically styles itself.
- Scrunch a curl-enhancing cream into damp hair and let it air-dry for effortless texture.
- Diffuse on low heat to build crown volume without creating frizz.
- Pinch the wispy fringe into pieces with a dab of matte pomade for definition.
- Sleep with hair loosely piled on top of your head to preserve the shaggy shape overnight.
Ask your stylist for a long shag: heavy layering through the crown, piecey texture through the ends, and a wispy fringe cut to sit around the eyebrows. Razor or point-cutting creates the signature shaggy edge. If your hair is naturally straight, you will need a salt spray or light mousse to coax out the texture — otherwise the shag can fall flat. Wash-and-go works most days; add a quick rough-dry with your fingers for extra lift. It grows out gracefully — trims every 8-10 weeks are plenty.
Weightless Layered Hairstyle for Thick Medium Hair
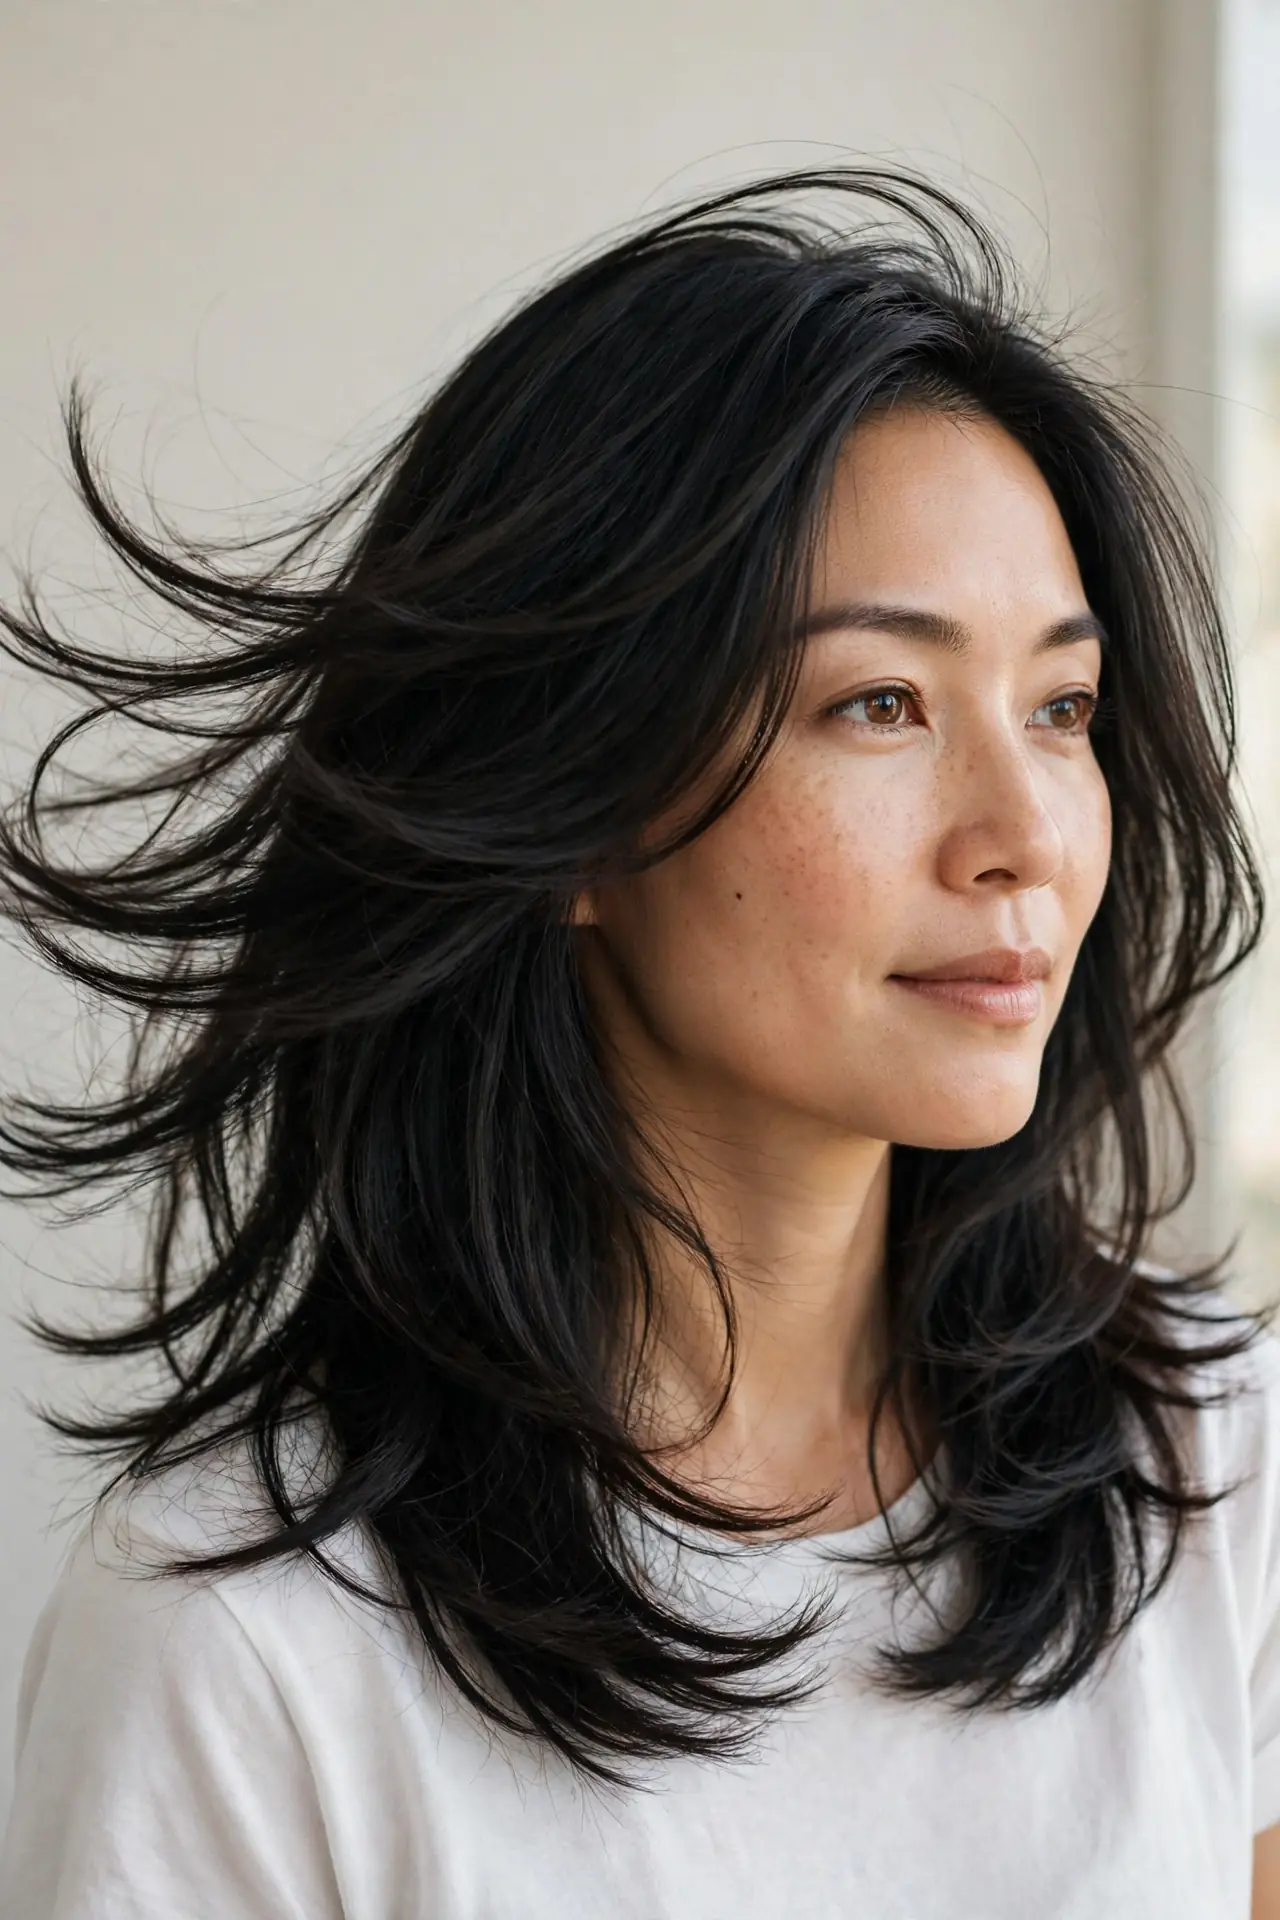
Thick hair is a blessing that can feel like a burden — heavy, hard to dry, and prone to the dreaded triangle shape. Weightless layering solves all three problems by removing bulk from the interior of your cut while keeping your visible length intact. Long, sweeping layers start below the chin and cascade through the ends, thinning out the weight so your hair moves instead of sitting like a helmet. It suits oval, round, and square faces equally well — long layers elongate, and reduced bulk slims the silhouette. Curly and wavy thick hair particularly benefits — the layers let curls stack instead of compressing into one heavy mass.
- Ask your stylist to thin with shears or point-cutting, never a razor on thick curly hair.
- Blow-dry in sections with a large round brush to smooth and control the volume.
- Apply a smoothing serum to the mid-lengths before drying to reduce puffiness.
- Braid damp hair overnight for soft, controlled waves with zero heat.
Ask for long interior layers with the shortest layer starting no higher than chin level, and specifically request bulk removal through the mid-lengths. If your stylist uses thinning shears, ask for mid-shaft use rather than at the ends, which keeps ends looking thick. At home, the biggest time-saver is drying in sections — thick hair dries faster and smoother this way. Expect drying time to drop noticeably compared to a one-length thick cut. Trim every 8-10 weeks; regular shaping keeps layers distinct instead of blurring into heaviness.
Collarbone-Grazing Layers with Flipped Ends
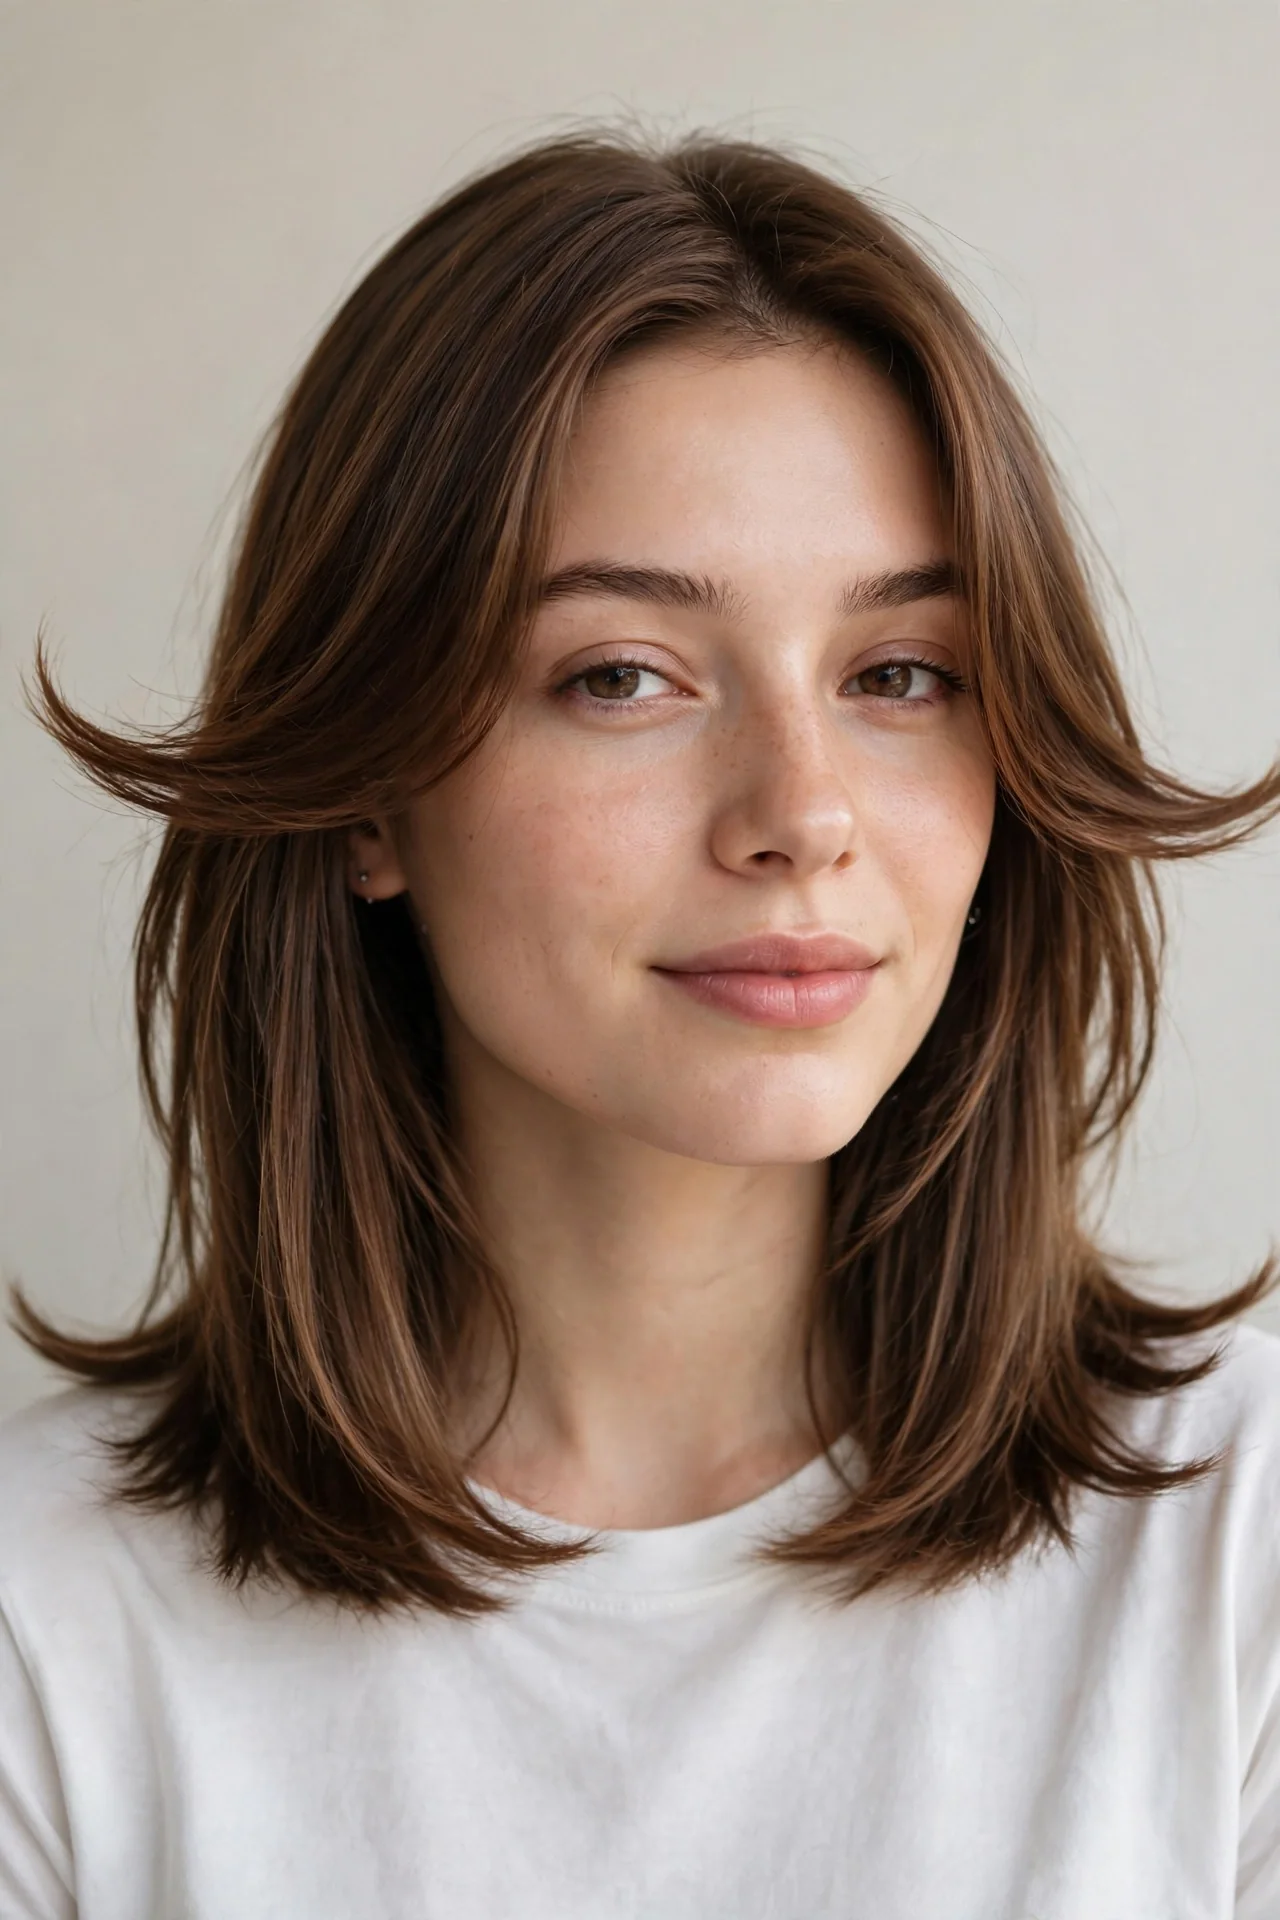
There is something irresistibly fresh about ends that flip outward — a retro nod that reads modern and playful. This cut sits right at the collarbone with light, bouncy layers through the last few inches, styled so the ends kick outward for a flirty, winged effect. It suits straight to slightly wavy hair best, since the flip needs smoothness to read clearly; on very curly hair, the same layering turns into beautiful curled-out volume instead. Heart and oval faces wear this especially well — the outward flip balances a narrower chin and adds width exactly where heart-shaped faces need it. It is a fantastic low-commitment change: the length stays the same, but flipped styling makes it feel brand new.
- Blow-dry with a medium round brush, rolling the ends outward instead of under.
- Use a flat iron to flick just the last two inches outward on days you skip the blow-dry.
- Apply a light-hold mousse before drying to help the flip hold its shape.
- Smooth the top with a paddle brush first so the contrast with the flipped ends pops.
Ask your stylist for collarbone-length hair with light layers through the bottom third, designed to be worn flipped out. The layers should be subtle — this is about the styling, not dramatic layering. Blowout technique matters more here than the cut — a great excuse to master the round brush. For fine hair, the flip creates an illusion of fuller ends. Maintenance is easy: the layers are shallow, so trims every 7-9 weeks keep the shape crisp.
Piecey Razor-Cut Layers for a Lived-In Look

If perfectly polished hair is not your thing, razor-cut layers deliver that cool, piecey, lived-in texture that looks like you just came from the beach — even in February. The razor creates soft, separated ends with natural-looking texture that a scissor cut simply cannot replicate. It works beautifully on straight to wavy medium hair of medium thickness — the razor needs enough hair to create the pieces, so very fine hair can look wispy. Square and oval faces suit it well, since the broken-up ends soften angular features. The aesthetic is effortlessly modern — think model-off-duty rather than salon-perfect. If you air-dry most days, this cut was made for you — it looks best a little undone.
- Embrace air-drying — this cut looks better slightly imperfect than perfectly styled.
- Work a pea-sized amount of texturizing cream through the ends for separation.
- Twist random sections while damp to encourage natural piecey definition.
- Refresh second-day hair with a salt spray instead of washing.
Ask your stylist for razor-cut layers through the mid-lengths and ends — piecey, separated ends rather than blunt or heavily thinned — and confirm they are comfortable with the razor technique. Skip the razor if your hair is very curly, fragile, or chemically damaged — it can encourage frizz and breakage. Grow-out is forgiving; trims every 8-10 weeks suffice. It is also one of the best medium layered cuts for anyone growing out a shorter style.
Bouncy Blowout Layered Hairstyle for Medium Hair
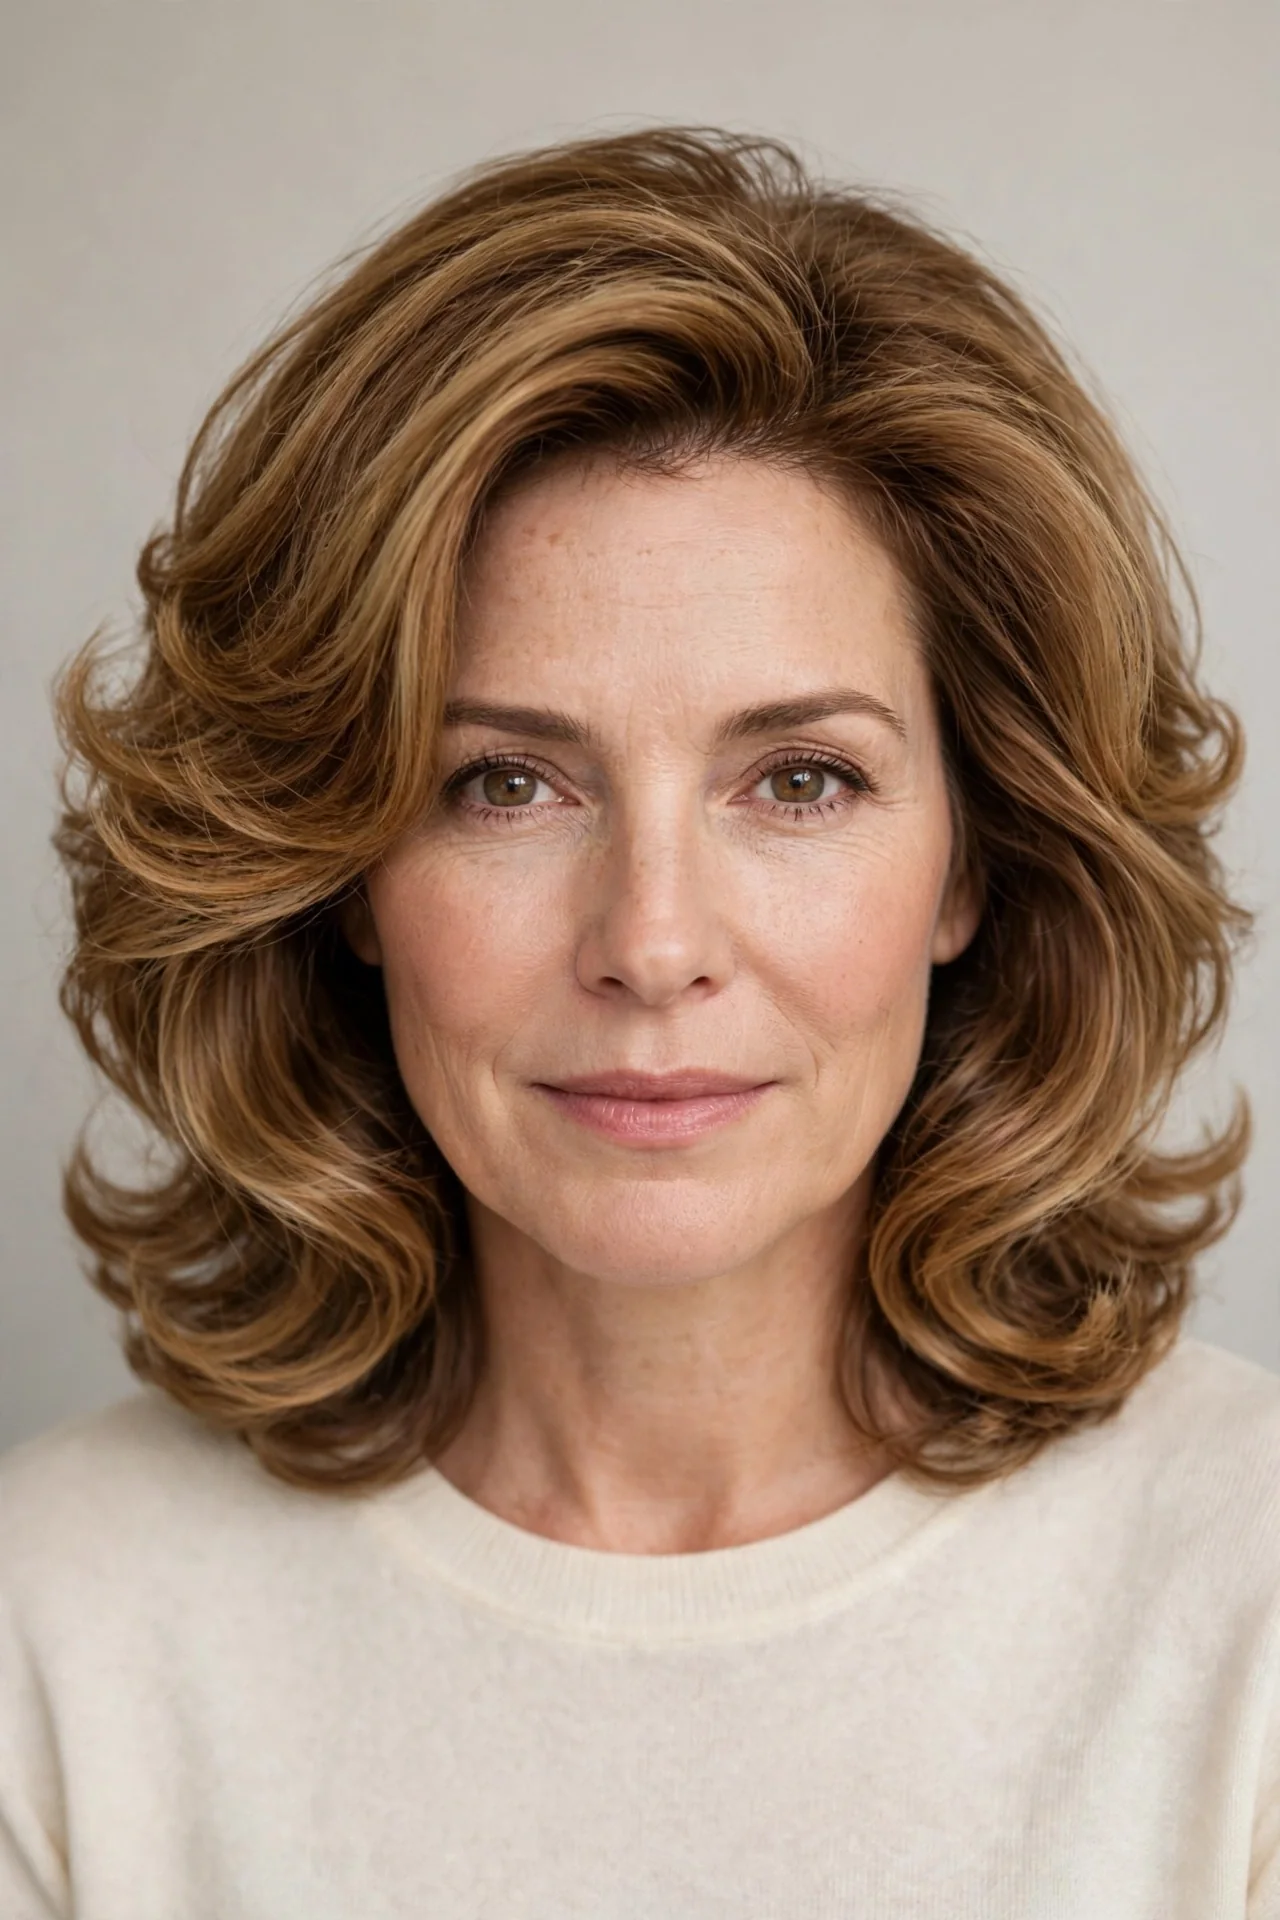
This is the salon blowout you wish you could recreate at home — and with the right layers, you actually can. The cut features graduated layers that get progressively shorter toward the crown, building in the volume and bounce that make a blowout look expensive. Every layer catches air from the brush, so the hair practically styles itself once you know the technique. It suits straight to wavy hair of medium density best, and it flatters round faces beautifully — crown height and movement elongate the face. If your hair is naturally flat, this layering pattern is the structural answer — the bounce is built into the cut, not dependent on a stylist’s hands.
- Apply a root-lifting mousse to damp hair before you pick up the dryer.
- Blow-dry upside down until 80% dry, then finish with a round brush in sections.
- Wrap each dried section around a large Velcro roller and let it cool completely.
- Shake the rollers out gently and finish with a flexible-hold spray, never a stiff one.
Ask your stylist for graduated layers with shorter pieces at the crown and longer lengths through the ends — essentially a modern take on the classic blowout cut. Bring a photo of the volume you want, since “bouncy” means different things to different people. The secret to recreating the salon look is cooling time: hair sets in the shape it cools in, so rollers (or clipped-up sections) do the heavy lifting. A round brush with a mix of boar and nylon bristles grips medium hair best. Trim every 6-8 weeks to keep the graduation precise — this cut loses its bounce if the layers grow out too far.
Side-Swept Layers for Round Faces
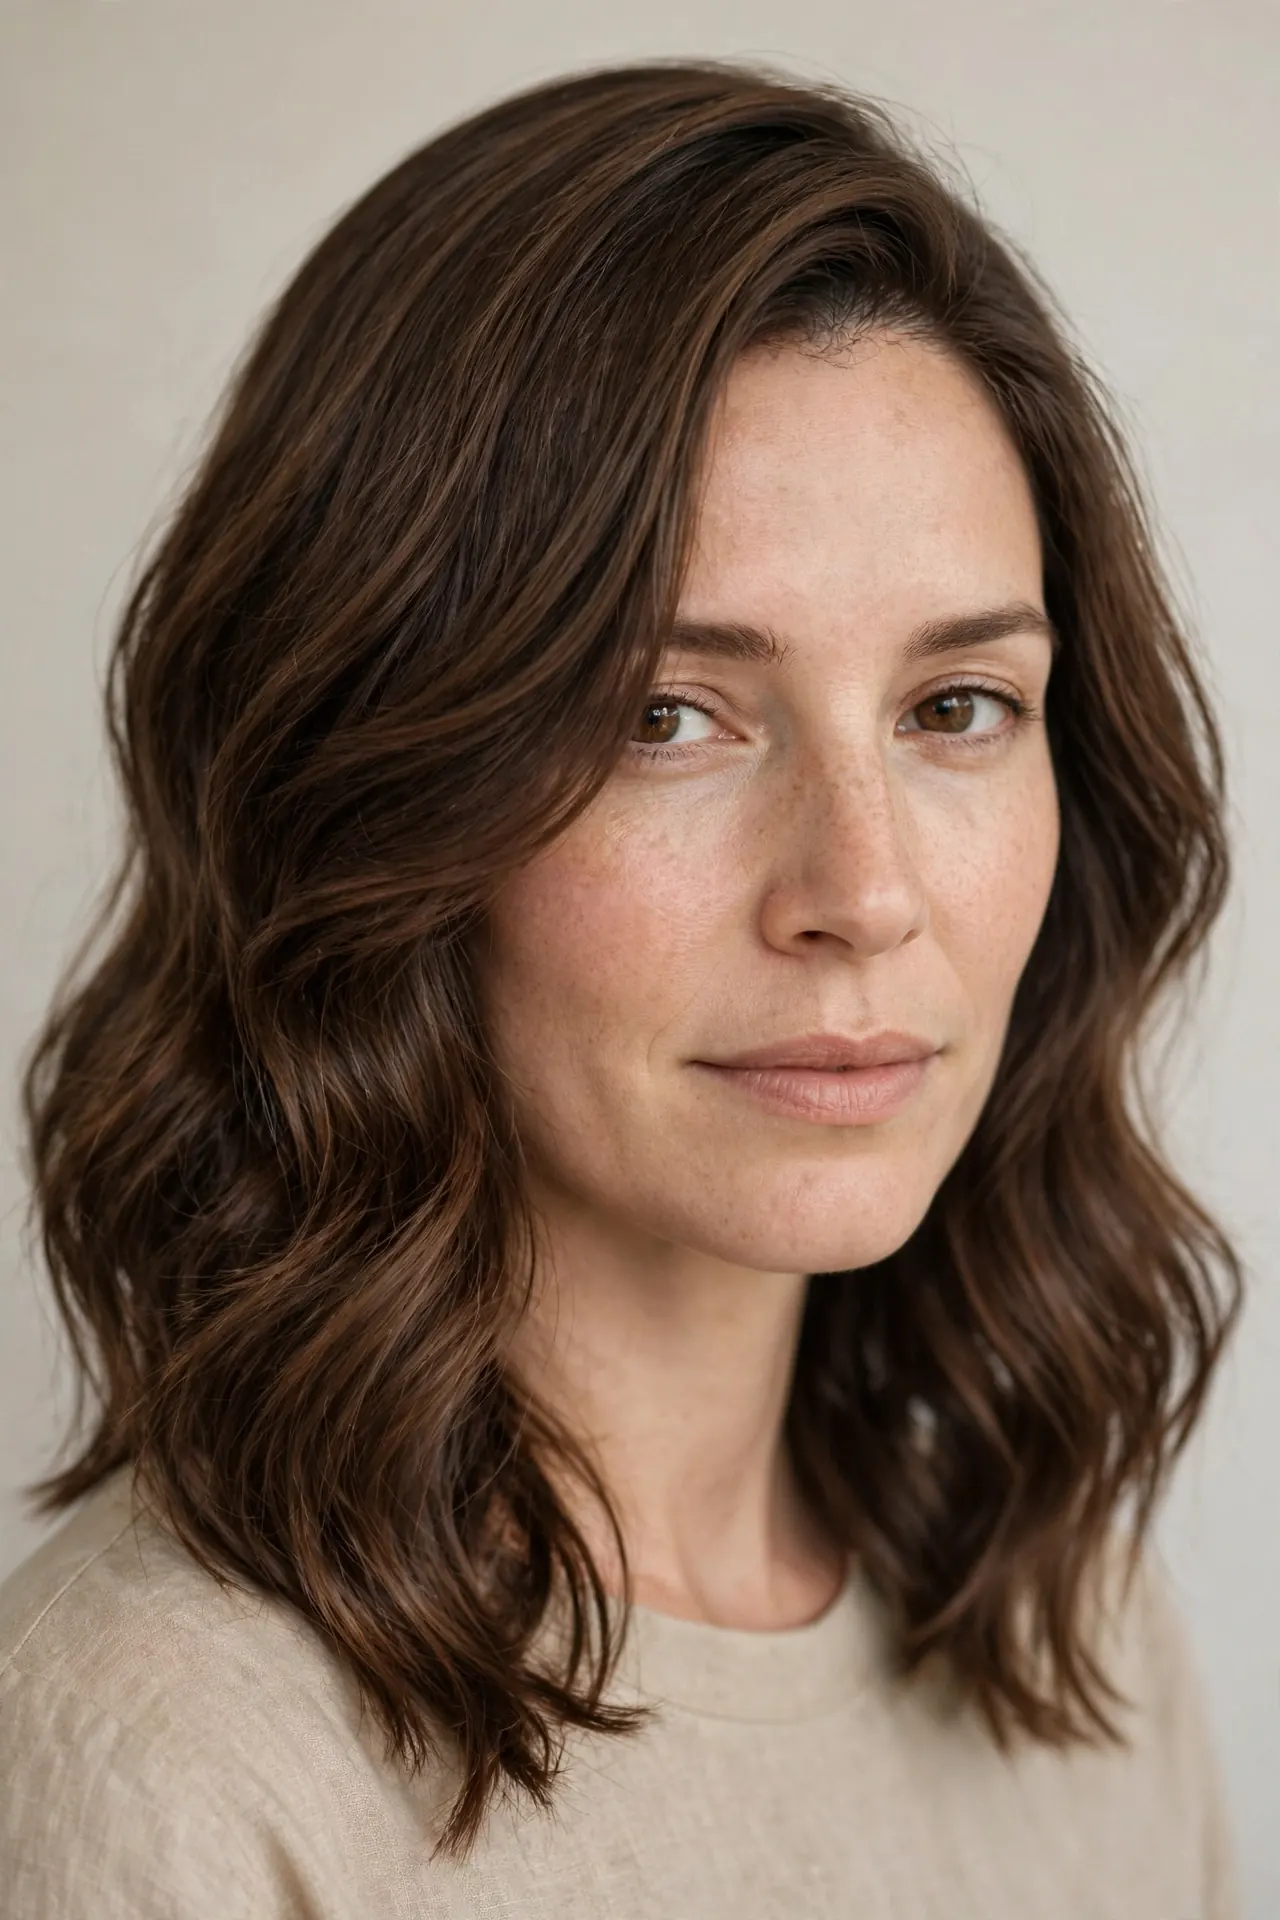
If you have a round face and want layers, this is the cut designed for you. Long, side-swept layers start at the cheekbone and angle diagonally across the face, creating the asymmetry and diagonal lines that visually slim and elongate round faces. A deep side part is the essential partner — it breaks up the symmetry that can emphasize roundness and gives the layers a natural direction to sweep. Layers stay long and smooth rather than short and choppy, avoiding extra width at the cheeks. It works on straight, wavy, and loosely curly hair alike — a polished, feminine silhouette.
- Create a deep side part while hair is damp and train it with a clip while drying.
- Blow-dry the front sections diagonally across the face with a round brush.
- Sweep the longer side behind one ear to show off the layered angle.
- Add a soft bend to the ends with a large-barrel curling iron for evening polish.
Ask your stylist for long diagonal layers that begin at the cheekbone on the heavier side of your part, with a deep side part as the foundation. The shortest layer should clear the chin to keep the diagonal line unbroken. Bring photos of side-swept styles you love — the sweep angle is personal. Commit to the deep part for a week and your hair will start falling that way naturally. A smoothing serum keeps the sweep sleek. Trim every 7-8 weeks to maintain the diagonal line; grown out, the layers just get softer and longer.
Textured Lob with Choppy Ends
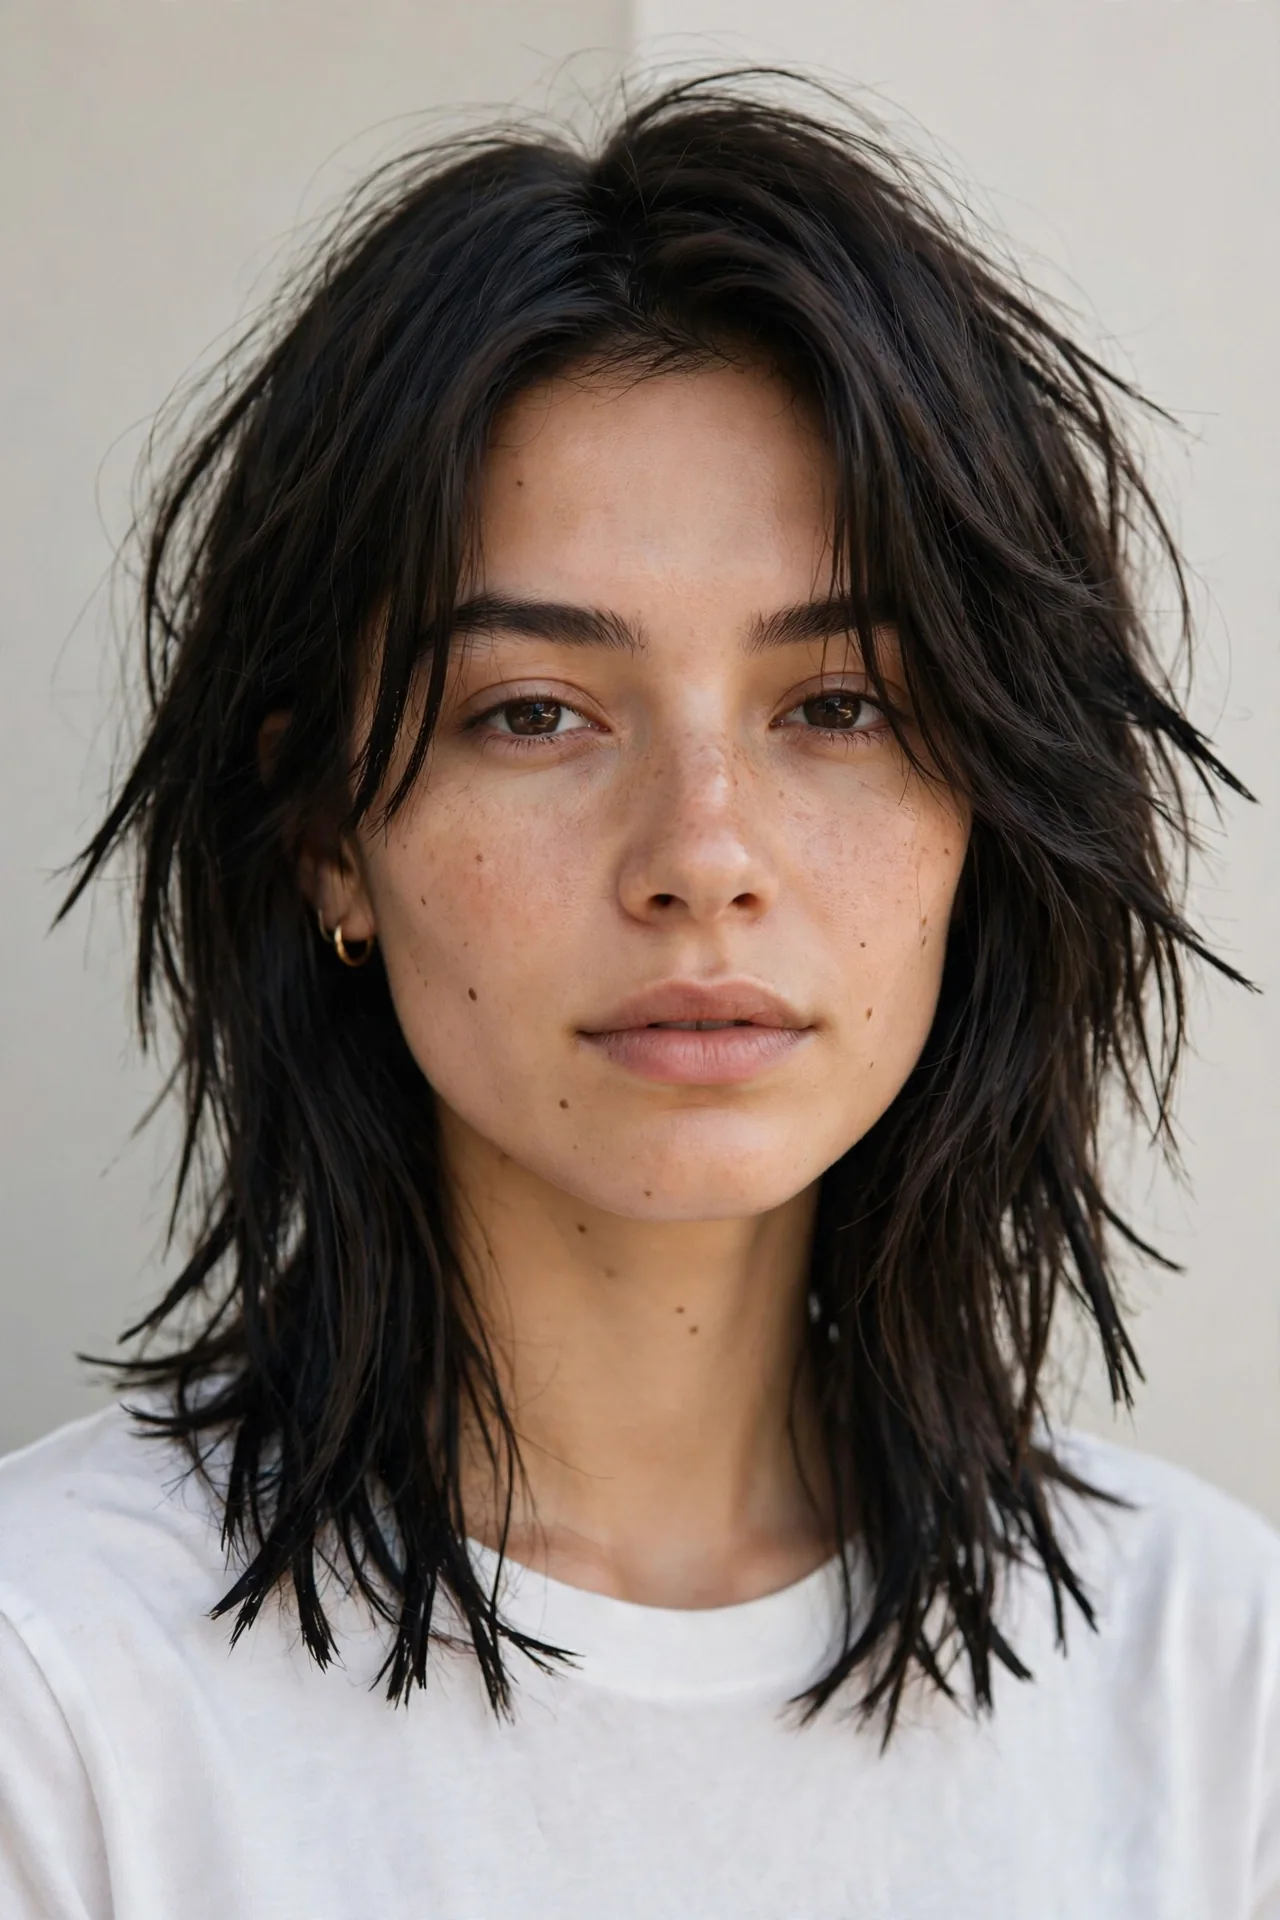
The lob — long bob — is the haircut that never really leaves, and the choppy, textured version is its most modern incarnation. Falling between the chin and collarbone, this medium layered cut uses disconnected, piecey ends to create edge and movement. It suits almost everyone, especially straight hair that needs visual interest and oval faces that carry a stronger, more graphic shape. The choppy ends keep it from looking like a “mom bob” — there is nothing safe or boring about this cut. It is the choice for medium hair that looks intentional, current, and a little bit cool.
- Tousle with a texturizing spray for a deliberately undone, piecey finish.
- Flat-iron small sections in alternating directions for lived-in waves.
- Tuck one side behind your ear to show off the choppy edge.
- Use a matte clay on the very ends for definition without shine.
Ask your stylist for a lob with choppy, point-cut ends and light texturizing through the mid-lengths — not heavy layering, just enough to break up the bluntness. Specify where you want the length to hit: chin-grazing reads edgier, collarbone reads softer. It needs minimal heat styling — a healthy choice for hair that needs a break. Wash, add texture product, and scrunch — genuinely the whole routine most days. Grow-out is graceful; trim every 8-10 weeks to keep choppy ends from looking ragged.
Curled-Under Classic Layers for the Office
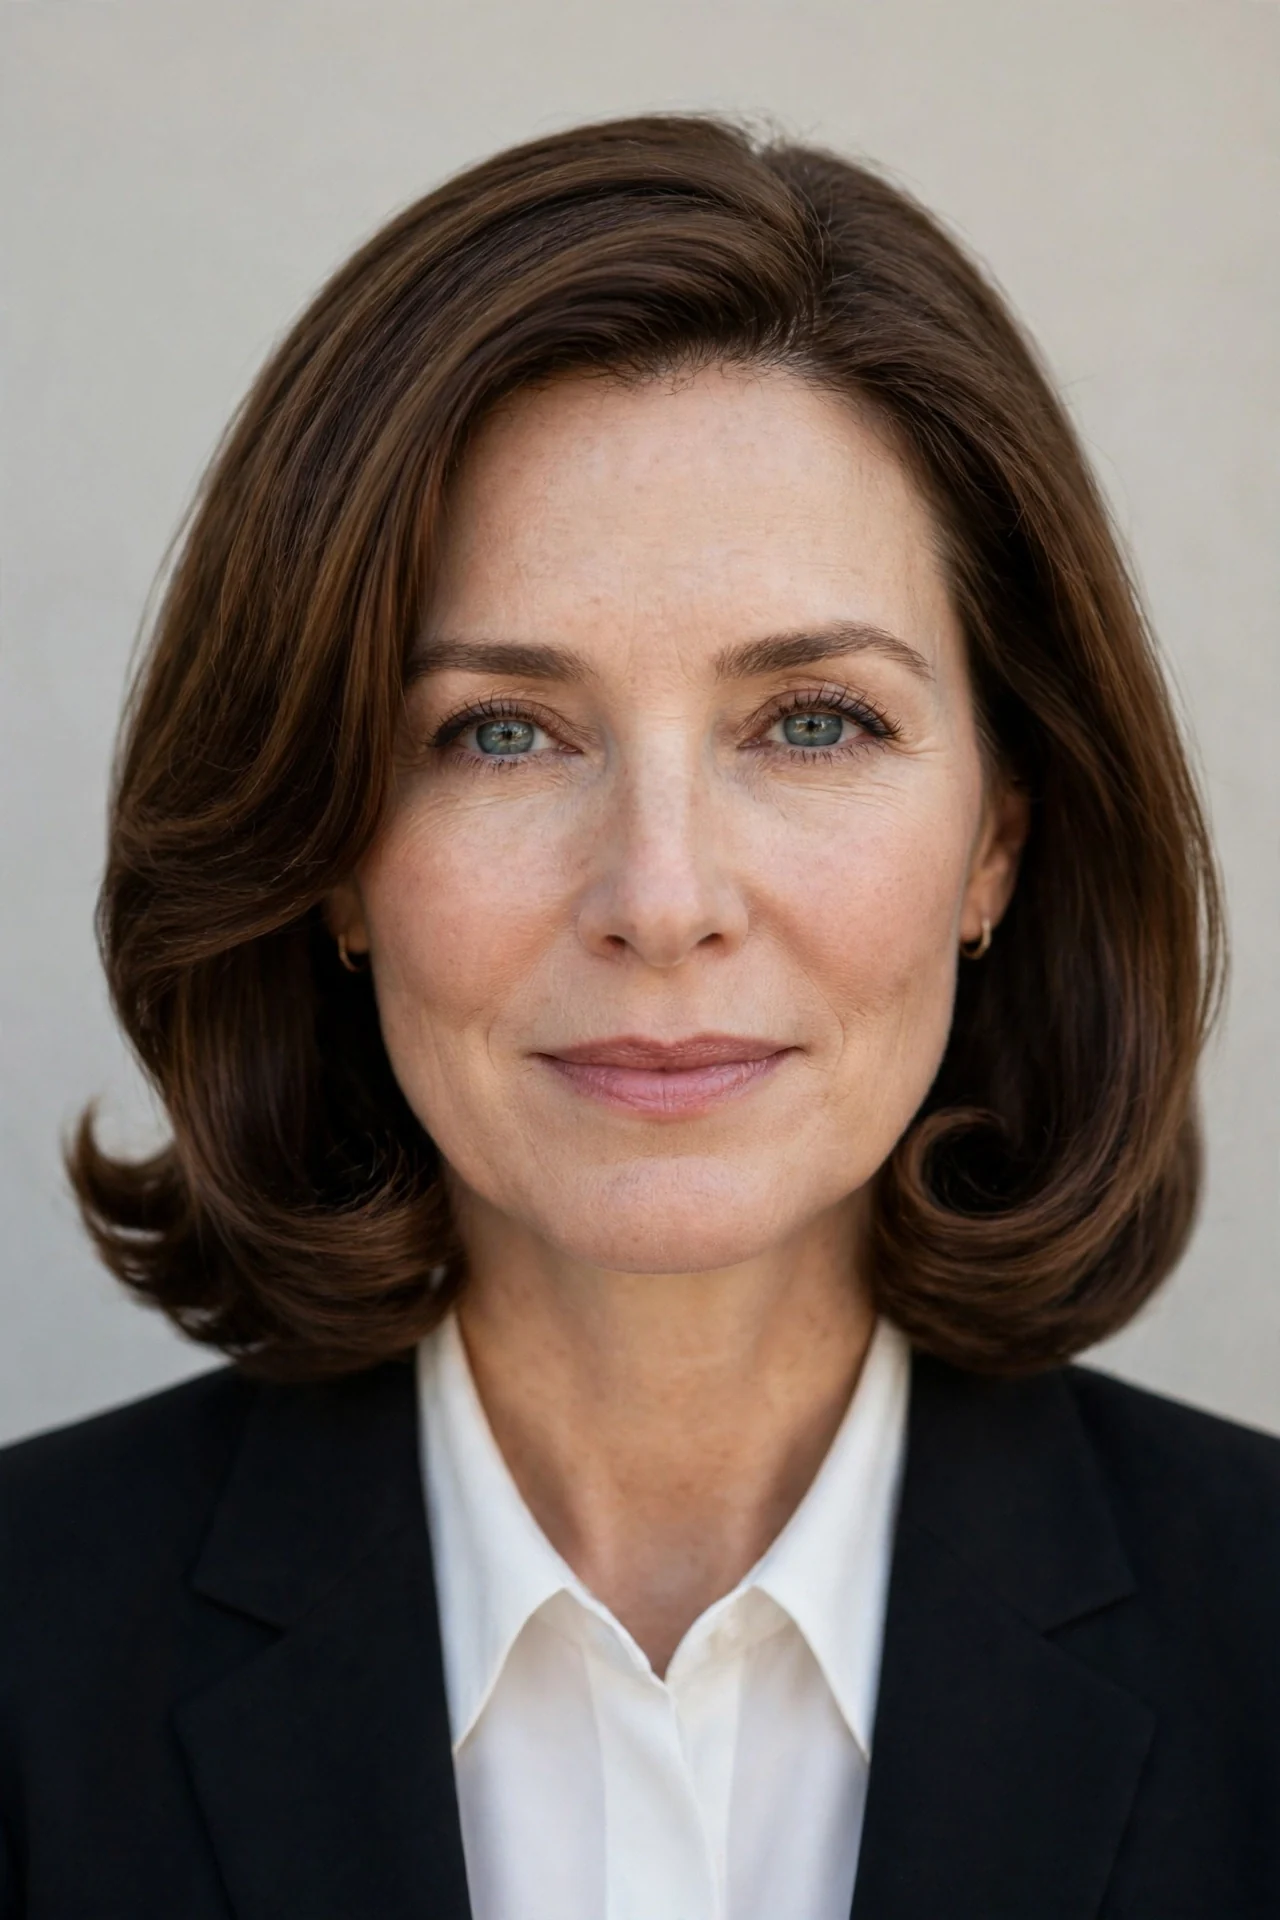
Some cuts simply always look right — this is one of them. Classic layers with the ends curled under create a smooth, polished, professional silhouette that works in every office, interview, and formal setting. The layering is subtle and seamless: shorter pieces around the face, gently graduated lengths through the back, and every end turned neatly under. It suits straight to wavy hair of medium density, and it flatters oval, heart, and long faces by adding soft fullness at the jawline. If your style leans classic and you want to look deliberate and put-together every day, this is your answer.
- Blow-dry with a large round brush, rolling the ends firmly under.
- Use the cool-shot button on your dryer to lock each section in place.
- Smooth a light serum over the finished style for a glossy, professional sheen.
- Tame flyaways with a clean mascara wand sprayed with hairspray.
Ask your stylist for classic graduated layers with the ends designed to turn under for a polished, professional finish. The layers should be long and blended, with face-framing pieces starting at the chin. A silk pillowcase reduces morning frizz and keeps the smooth finish intact. Trim every 6-8 weeks to keep the curled-under shape crisp — grown-out ends flip outward instead, which changes the look entirely.
Face-Flattering V-Cut Layers
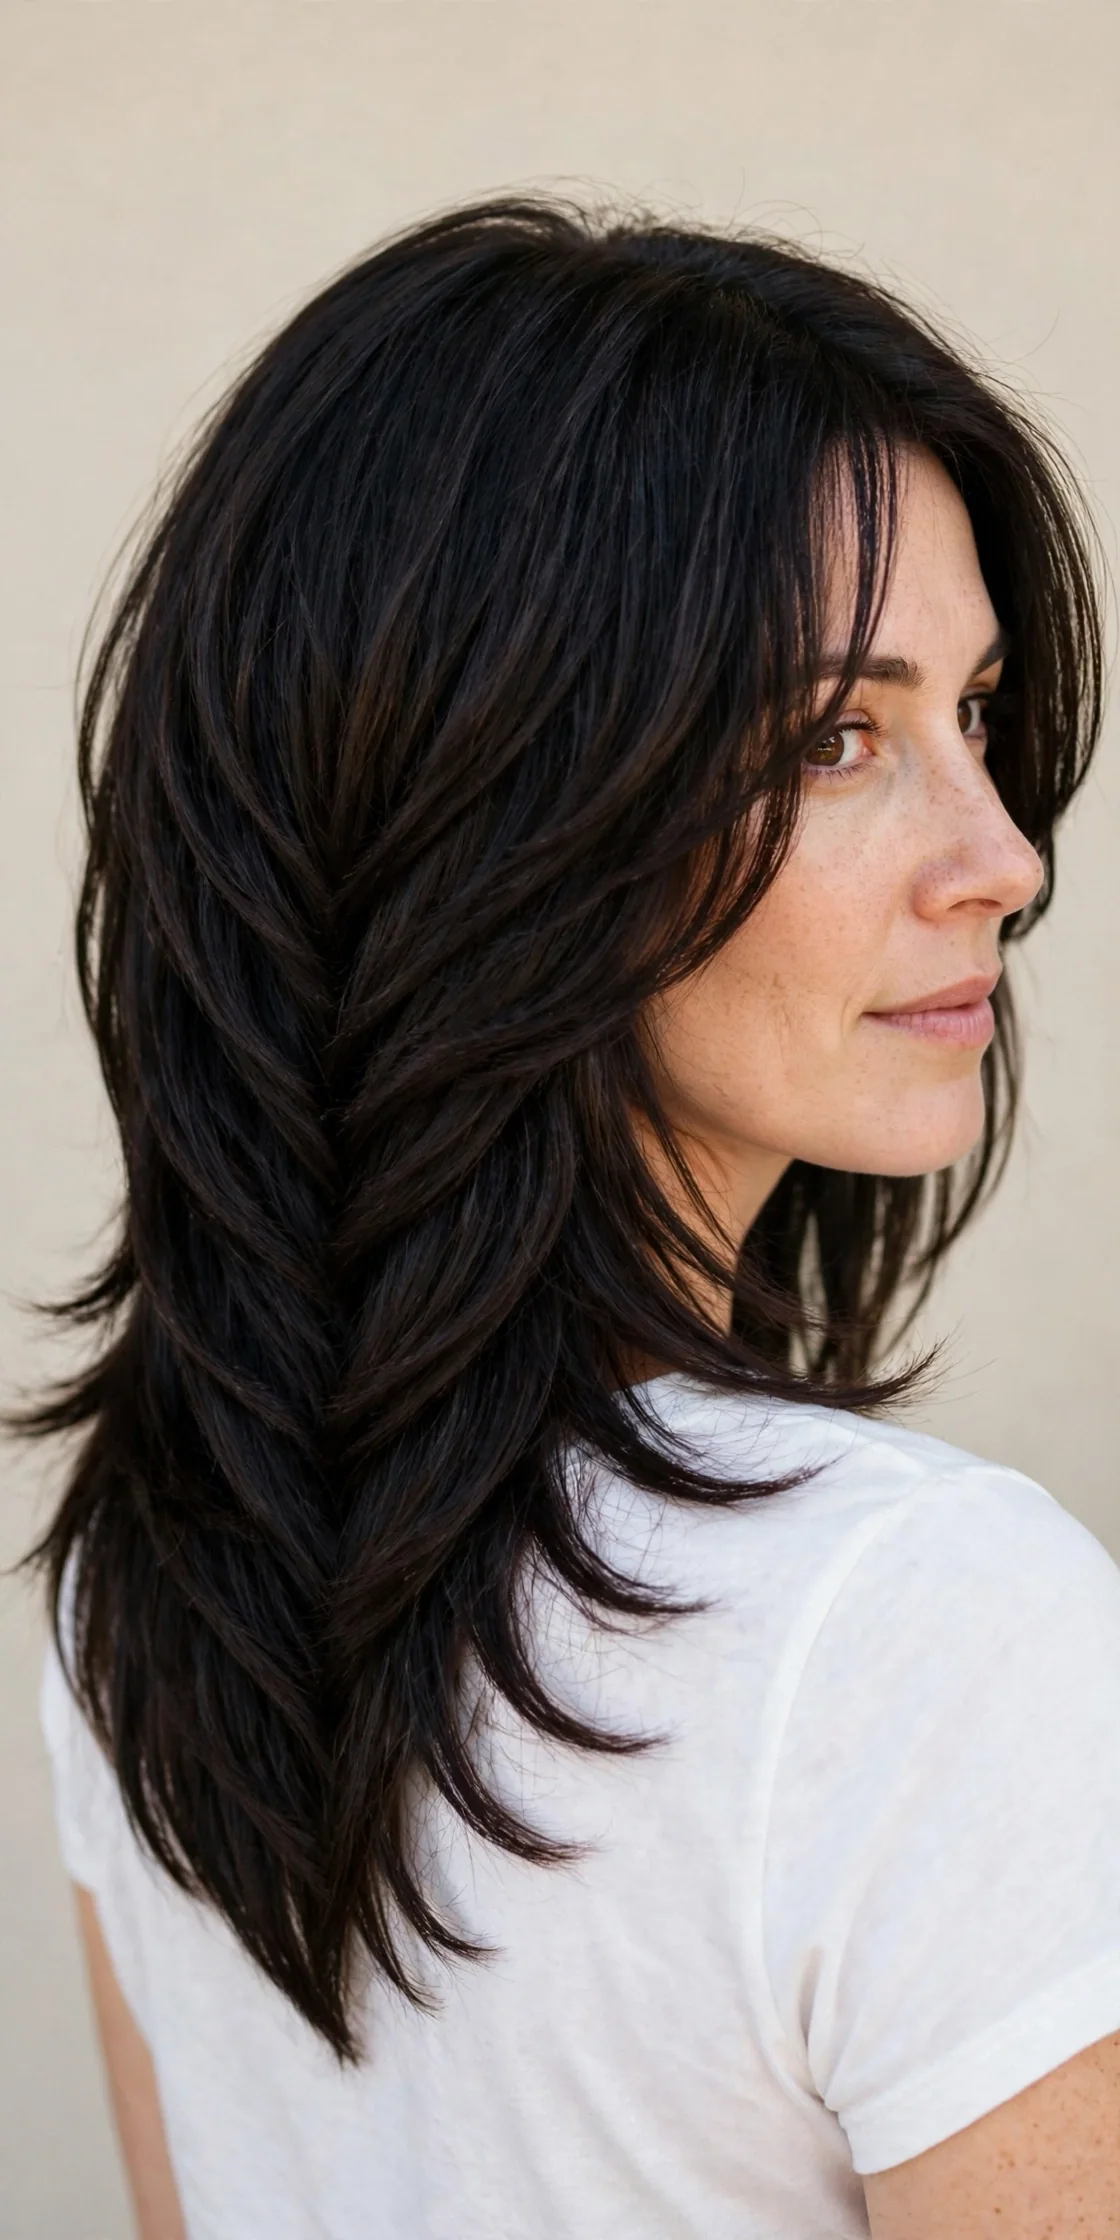
The V-cut is the drama queen of layered hairstyles for medium hair — in the best way. The back of the cut tapers to a soft V point, with layers cascading down from the crown to create length, movement, and a gorgeous waterfall effect from behind. From the front, the face-framing layers keep it soft and wearable. This cut is made for thick, long-medium hair that can support the shape; on very fine hair, the V point can look thin, so a U-shape is the safer sibling. It suits oval and round faces beautifully — the downward lines elongate the face and the V draws the eye vertically. If you love long, flowing hair but want shape and intention, the V-cut delivers maximum impact while keeping your length.
- Blow-dry the back sections straight down to emphasize the V silhouette.
- Add loose waves with a large curling iron, wrapping sections away from the face.
- Apply a shine serum to the ends to highlight the cascading layers.
- Gather hair over one shoulder to show off the V shape from the side.
Ask your stylist for a V-cut with the point hitting mid-back or just below, with cascading layers that connect the front framing pieces to the V. Be specific about how dramatic you want the V — a soft V is wearable daily, while a deep V is a statement. Because the shape lives in the back, ask your stylist to show you the finished cut with a hand mirror before you leave. The V needs healthy-looking ends, so a weekly deep-conditioning treatment is worth it. Trim every 8-10 weeks, and tell your stylist to maintain the V point rather than evening it out — an overzealous trim can accidentally turn your V into a U.
Conclusion
The right layered hairstyles for medium hair do more than change how you look — they change how your hair behaves every morning. Whether you choose feathered layers for fine hair, weightless layers for thick hair, or a classic curled-under cut, the common thread is this: layers give medium hair movement, shape, and personality that one-length cuts cannot. Take this list to your stylist and use the exact “what to ask for” language from each section so nothing gets lost in translation. And if your texture leans curly, these long curly haircuts with layers for women are the perfect companion read. Your best hair is one good haircut away — book the appointment. If you love lived-in texture, our 12 choppy shag hairstyles for medium hair show how choppy layers turn the same length into pure rocker-chic movement.


2 Comments