12 Long Curly Haircuts with Layers for Women
Introduction
If your long curls have started to feel heavy, shapeless, or frizzy at the ends, you are not alone — that is exactly what happens when length piles up without the right structure underneath. Long curly haircuts with layers for women solve this beautifully: layers remove the weight that pulls your curls flat, let each coil spring back to its natural pattern, and create a shape that flatters your face instead of hiding it. Unlike the risky jump to a dramatically shorter cut (if you ever considered pixie cuts for thin wavy hair, you know how big that decision feels), long layers keep the length you love while adding movement, volume, and definition. Below are 12 layered haircut ideas for curl patterns from 2C waves to 4A coils, each with styling tips and exactly what to ask your stylist for.
Face-Framing Layers with Soft Long Lengths
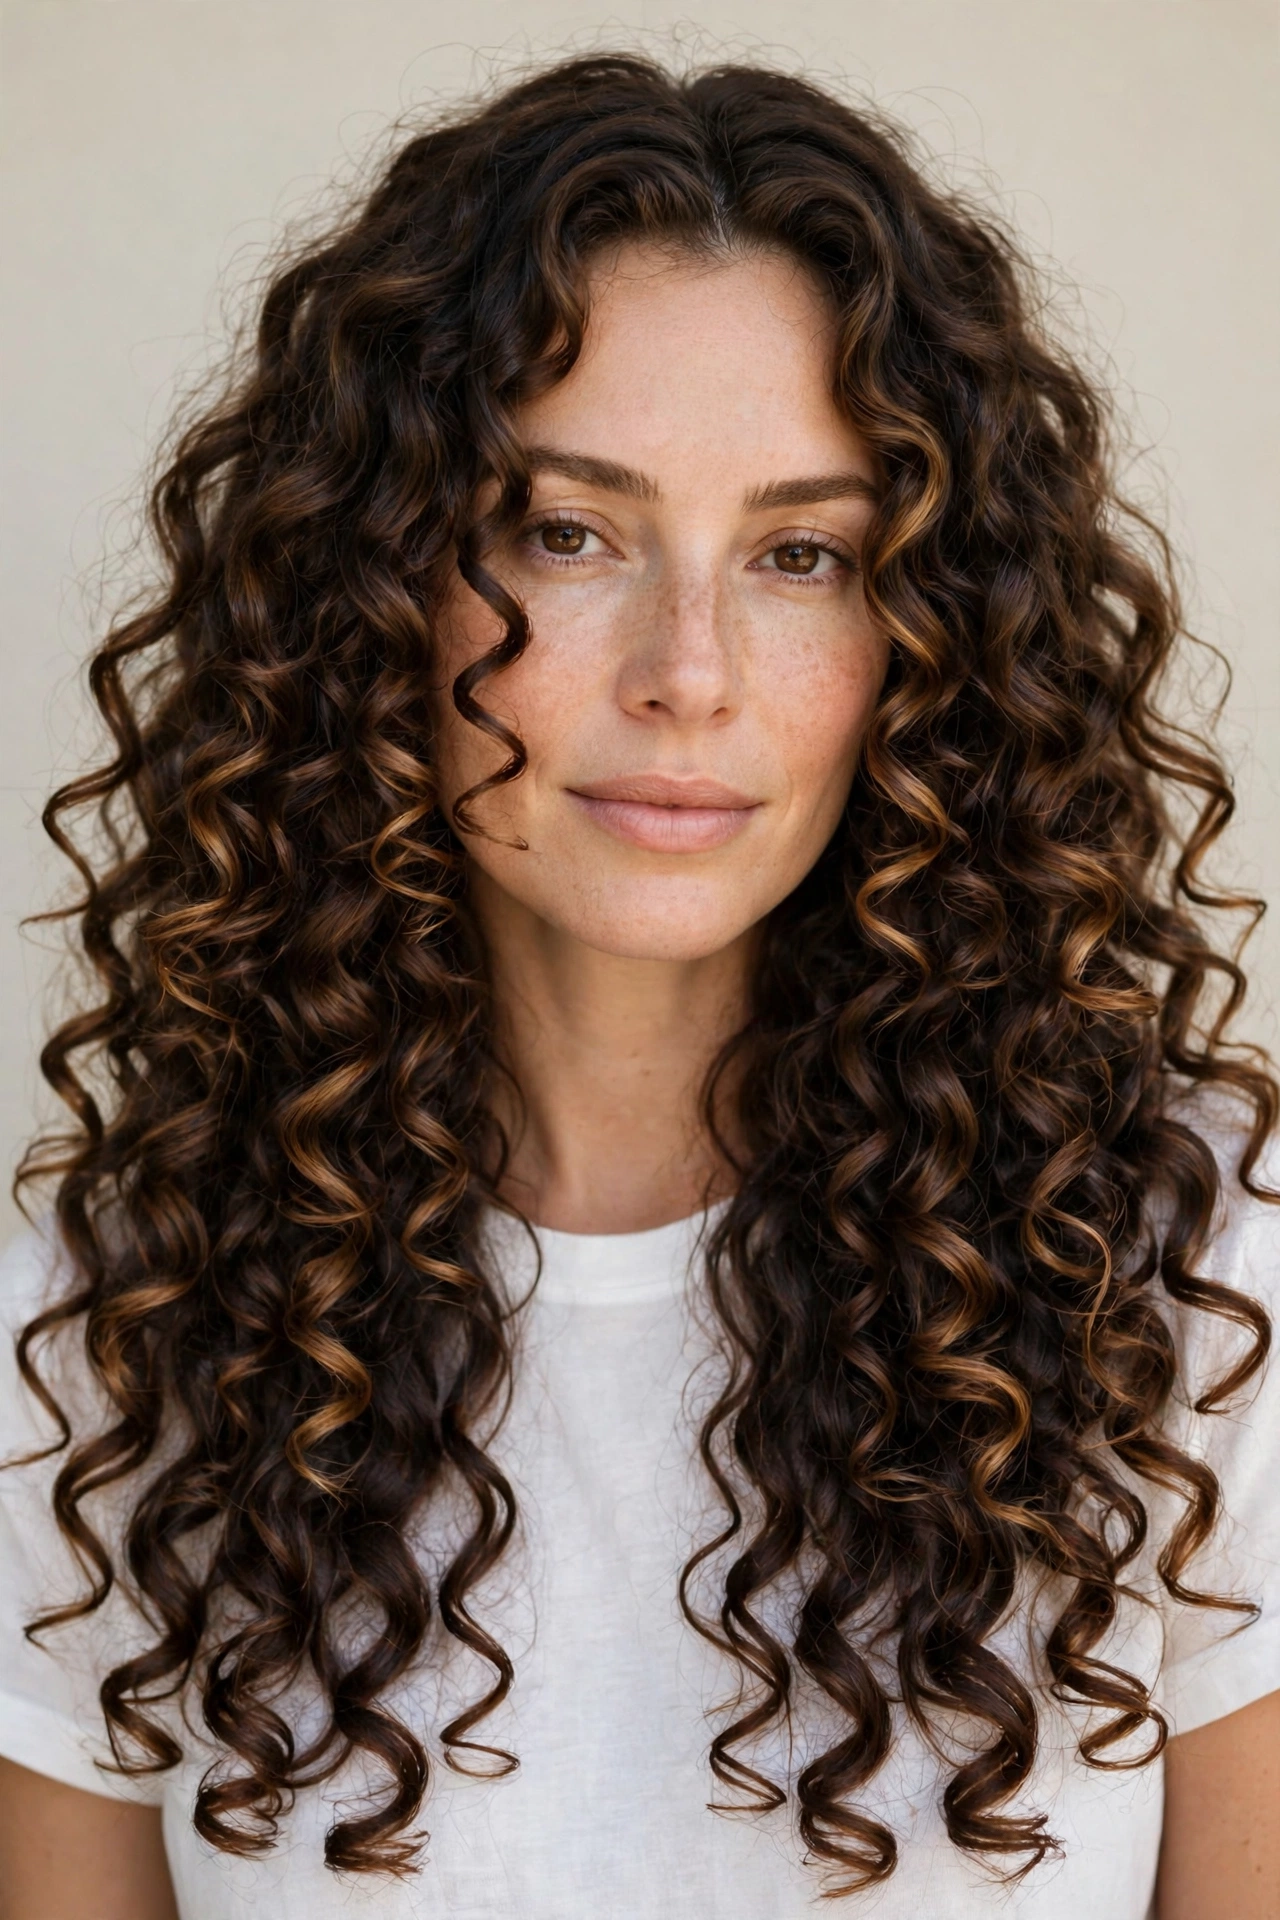
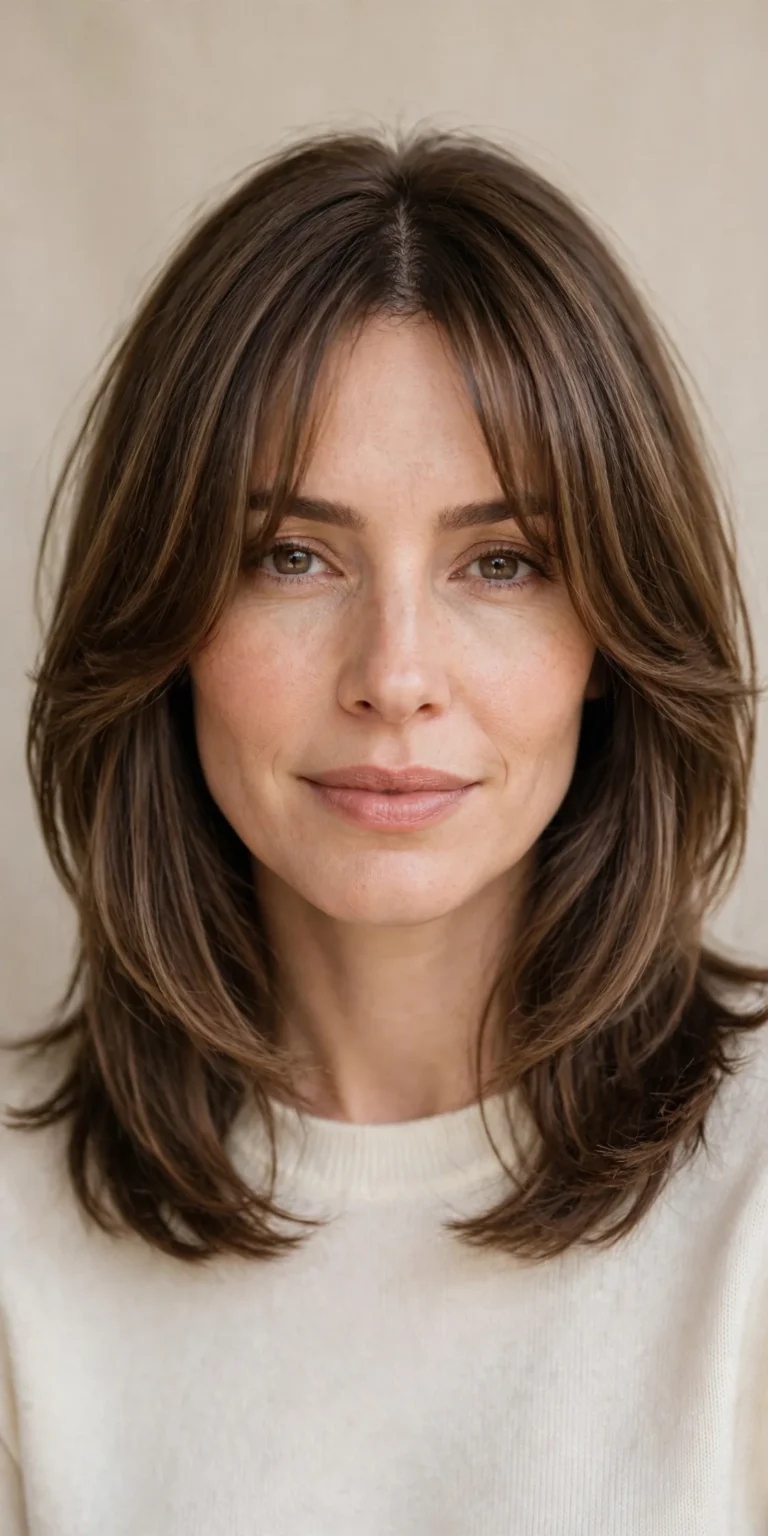
The most universally flattering option — and the one stylists recommend first when you want change without losing length. Hair stays long through the back while shorter, feathered layers are carved around the face, starting at the chin or cheekbones, so the front opens up and curls shine where everyone sees them. It suits oval, round, square, and heart faces because the starting point can slim, soften, or balance your features. They add bounce and movement one-length hair never delivers.
- Apply curl cream to damp hair so face-framing pieces stay smooth and defined.
- Scrunch front layers upward toward the ear to tighten the curl pattern.
- Diffuse front sections with the dryer tilted down for a frizz-free finish.
- Mist and re-scrunch the face-framing pieces on day two to refresh them.
Ask your stylist for long layers with face-framing pieces beginning at chin level, cut on dry or barely damp curls so each ringlet’s true fall is visible. At home, sleep with the front pieces pinned up or in a silk scarf, and use a light leave-in to fight frizz without weight. Trim every 10 to 12 weeks to keep the face frame crisp; once the pieces pass your shoulders they blend in, so grow-out is graceful.
The Curly Shag with Choppy Crown Layers
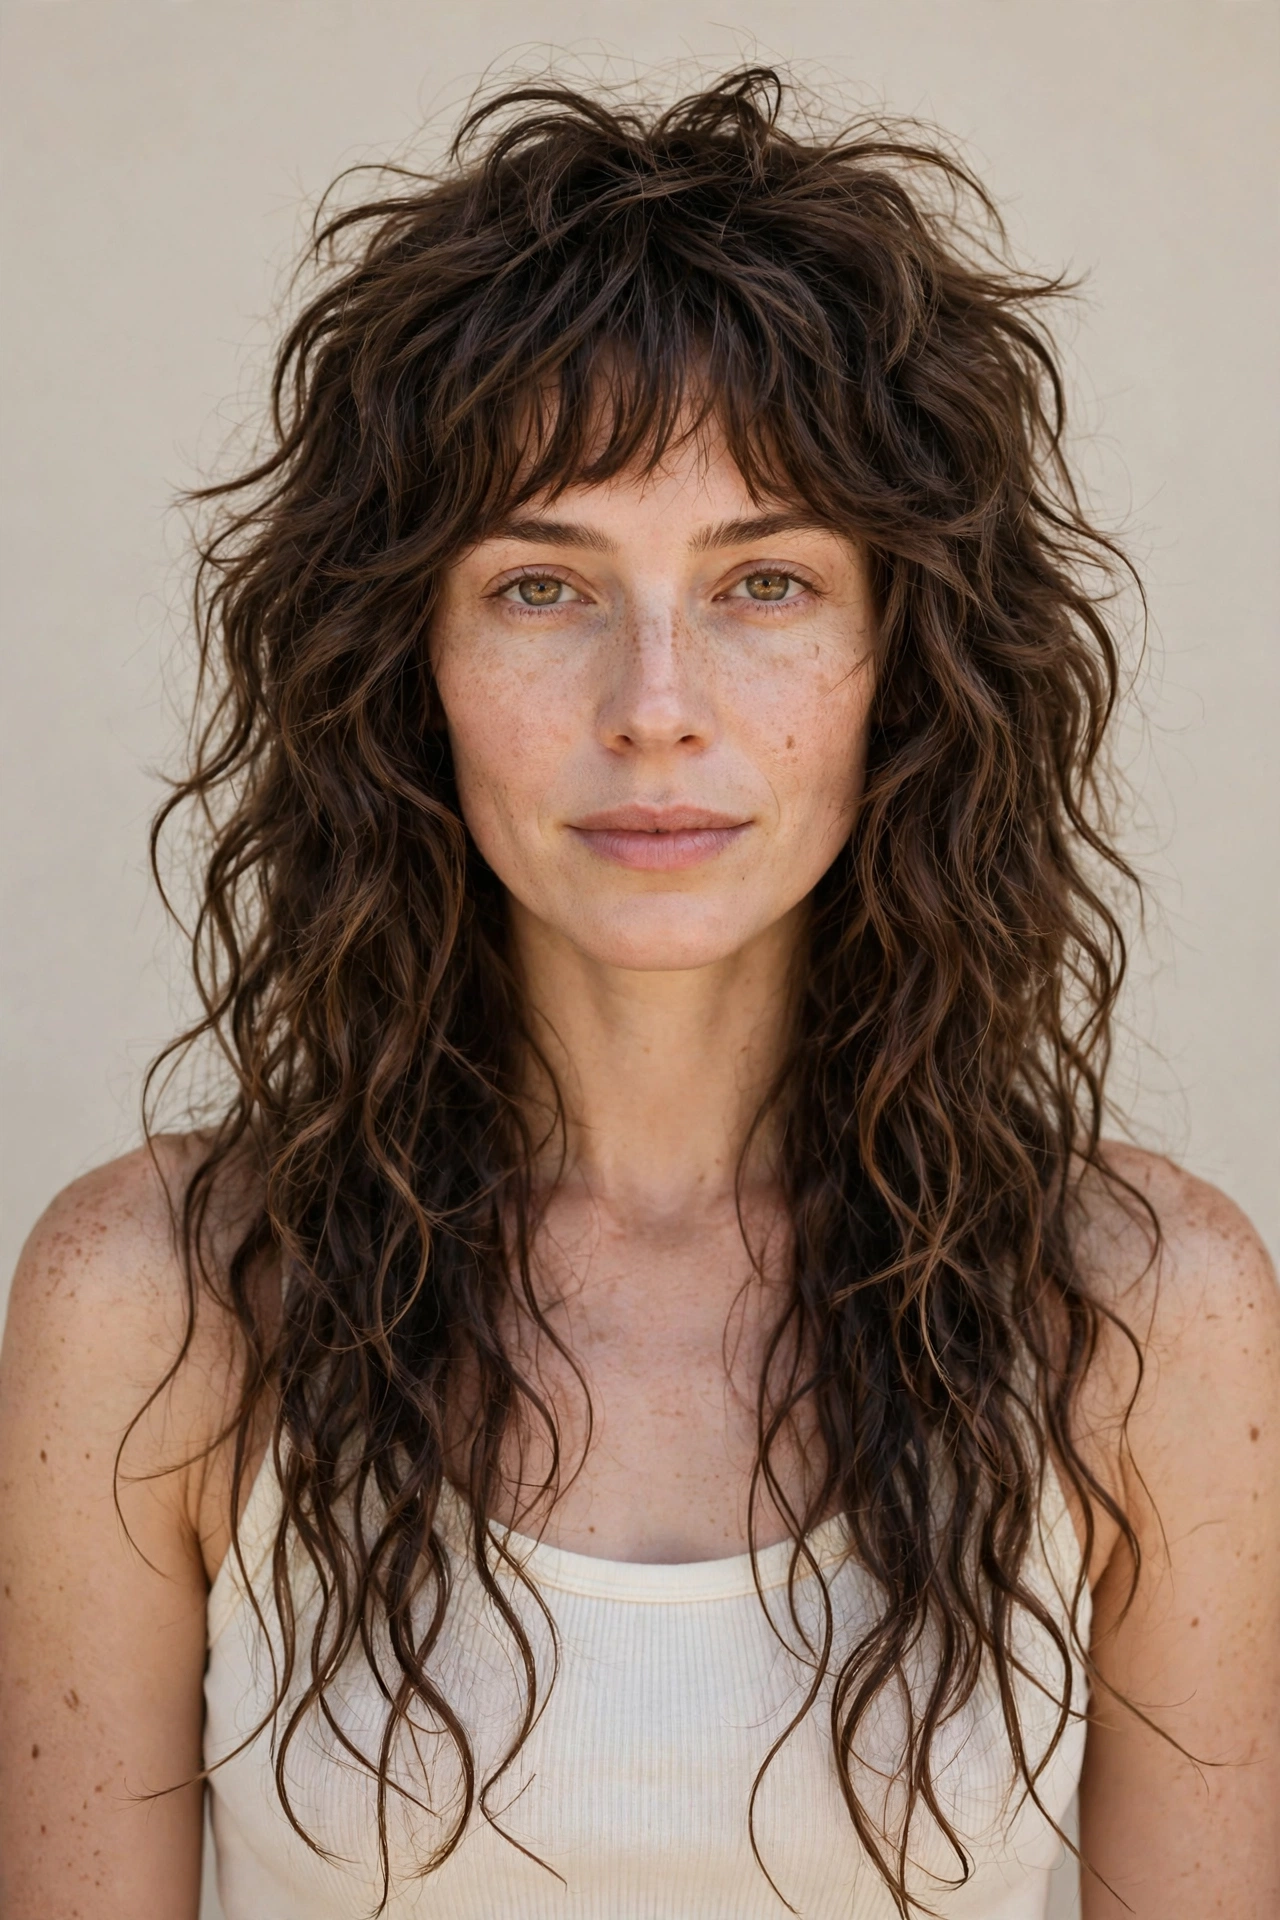
The curly shag takes everything you love about long layered cuts and turns the volume up to maximum. Shorter, choppy layers stack through the crown and mid-lengths while the bottom keeps long, wispy ends — creating effortless rock-star texture that works gorgeously on 3B to 4A curls and adds instant body to fine 2C or 3A hair. It is the best choice if your hair looks weighed down or stringy, because the aggressive crown layering forces volume where curls naturally collapse.
- Apply volumizing mousse at soaking-wet roots to build lift that lasts.
- Scrunch the crown layers aggressively upward to set volume before diffusing.
- Diffuse with your head flipped upside down for maximum root lift.
- Break up dry curl clumps with your fingers for piecey, lived-in texture.
Tell your stylist you want a long shag: heavy layers through the crown starting around the temples, piecey texture through the mid-lengths, and long ends kept wispy rather than blunt. Ask for it cut dry or on stretched curls so the lengths are honest. At home this cut thrives on second-day texture — skip daily washing and revive with a water-and-conditioner mist. Trim every 8 to 10 weeks since choppy layers grow out visibly; as it grows, the shag softens into face-framing long layers, a beautiful in-between stage.
V-Cut Layers for Cascading Curl Length
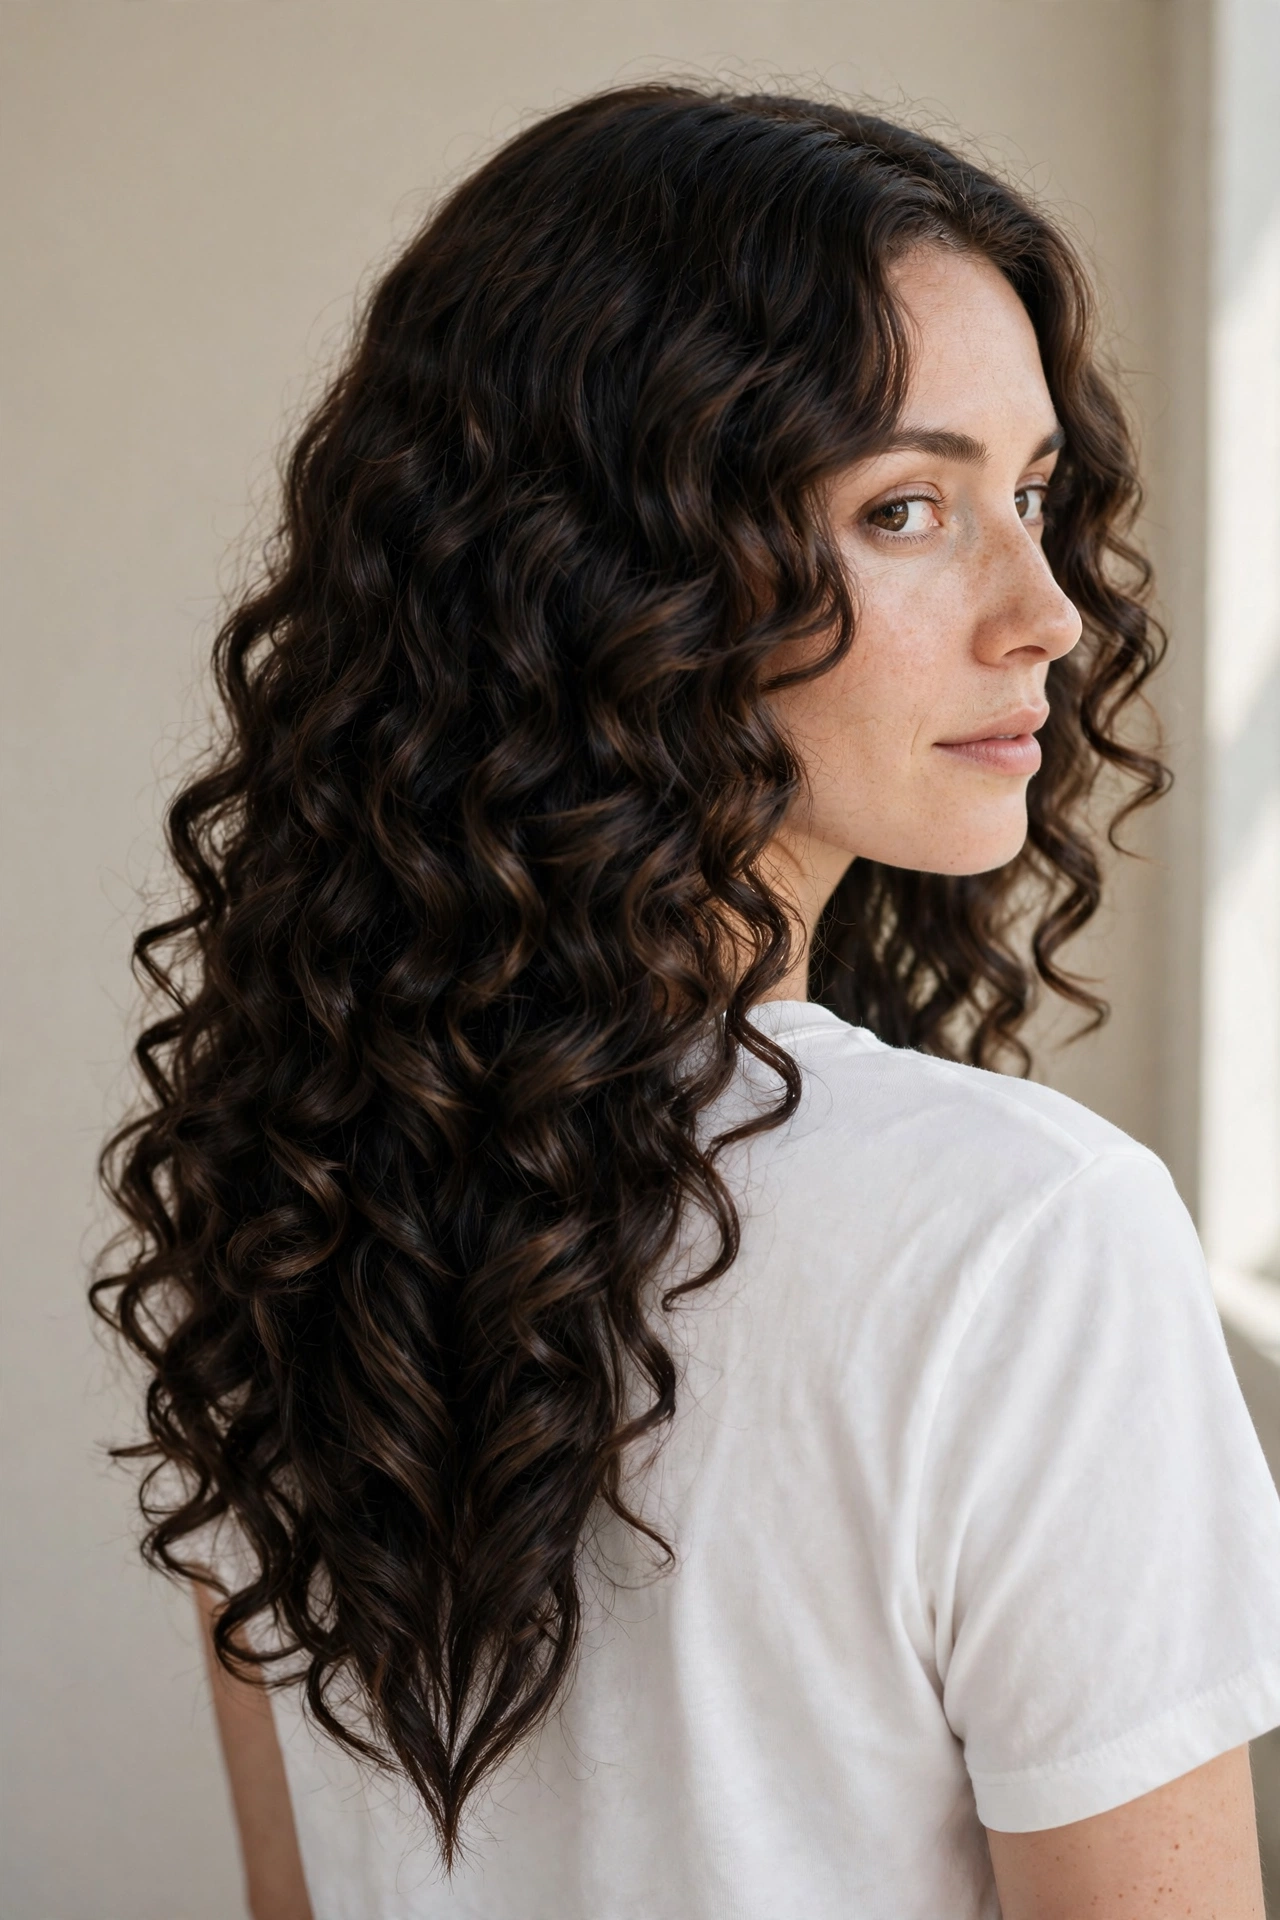
The V-cut is the secret weapon for women whose dream is genuinely long, waist-grazing curls without the flat, lifeless shape that usually comes with extreme length. Layers form a V at the back: the shortest sit near the shoulders and the length tapers to a point at the center, letting curls cascade and stack over each other instead of hanging in one heavy sheet. This works beautifully on 3A to 3C curls, where the tapering creates a waterfall effect, and on 2C waves, where it builds the illusion of thicker ends. If your long curls look thinner at the ends than at the roots, this cut fixes it by design.
- Apply rich curl cream from mid-lengths to ends to keep the V smooth.
- Scrunch the ends in sections so the V point keeps its shape.
- Diffuse the back sections last, lifting them up and away from the neck.
- Smooth a drop of oil over the V point on dry hair to polish the ends.
Ask for a V-cut with long internal layers through the mid-lengths — emphasize keeping maximum length at the center back while the sides graduate upward. It should be cut on dry, defined curls so the point of the V lands exactly where you want it. At home, protect those long ends with weekly masks and a silk pillowcase, since the V point takes the most friction. Trim every 12 weeks to maintain the shape; grow-out is the easiest of any layered cut because the V simply gets longer and softer, never shapeless.
Rounded U-Cut Layers for Balanced Volume
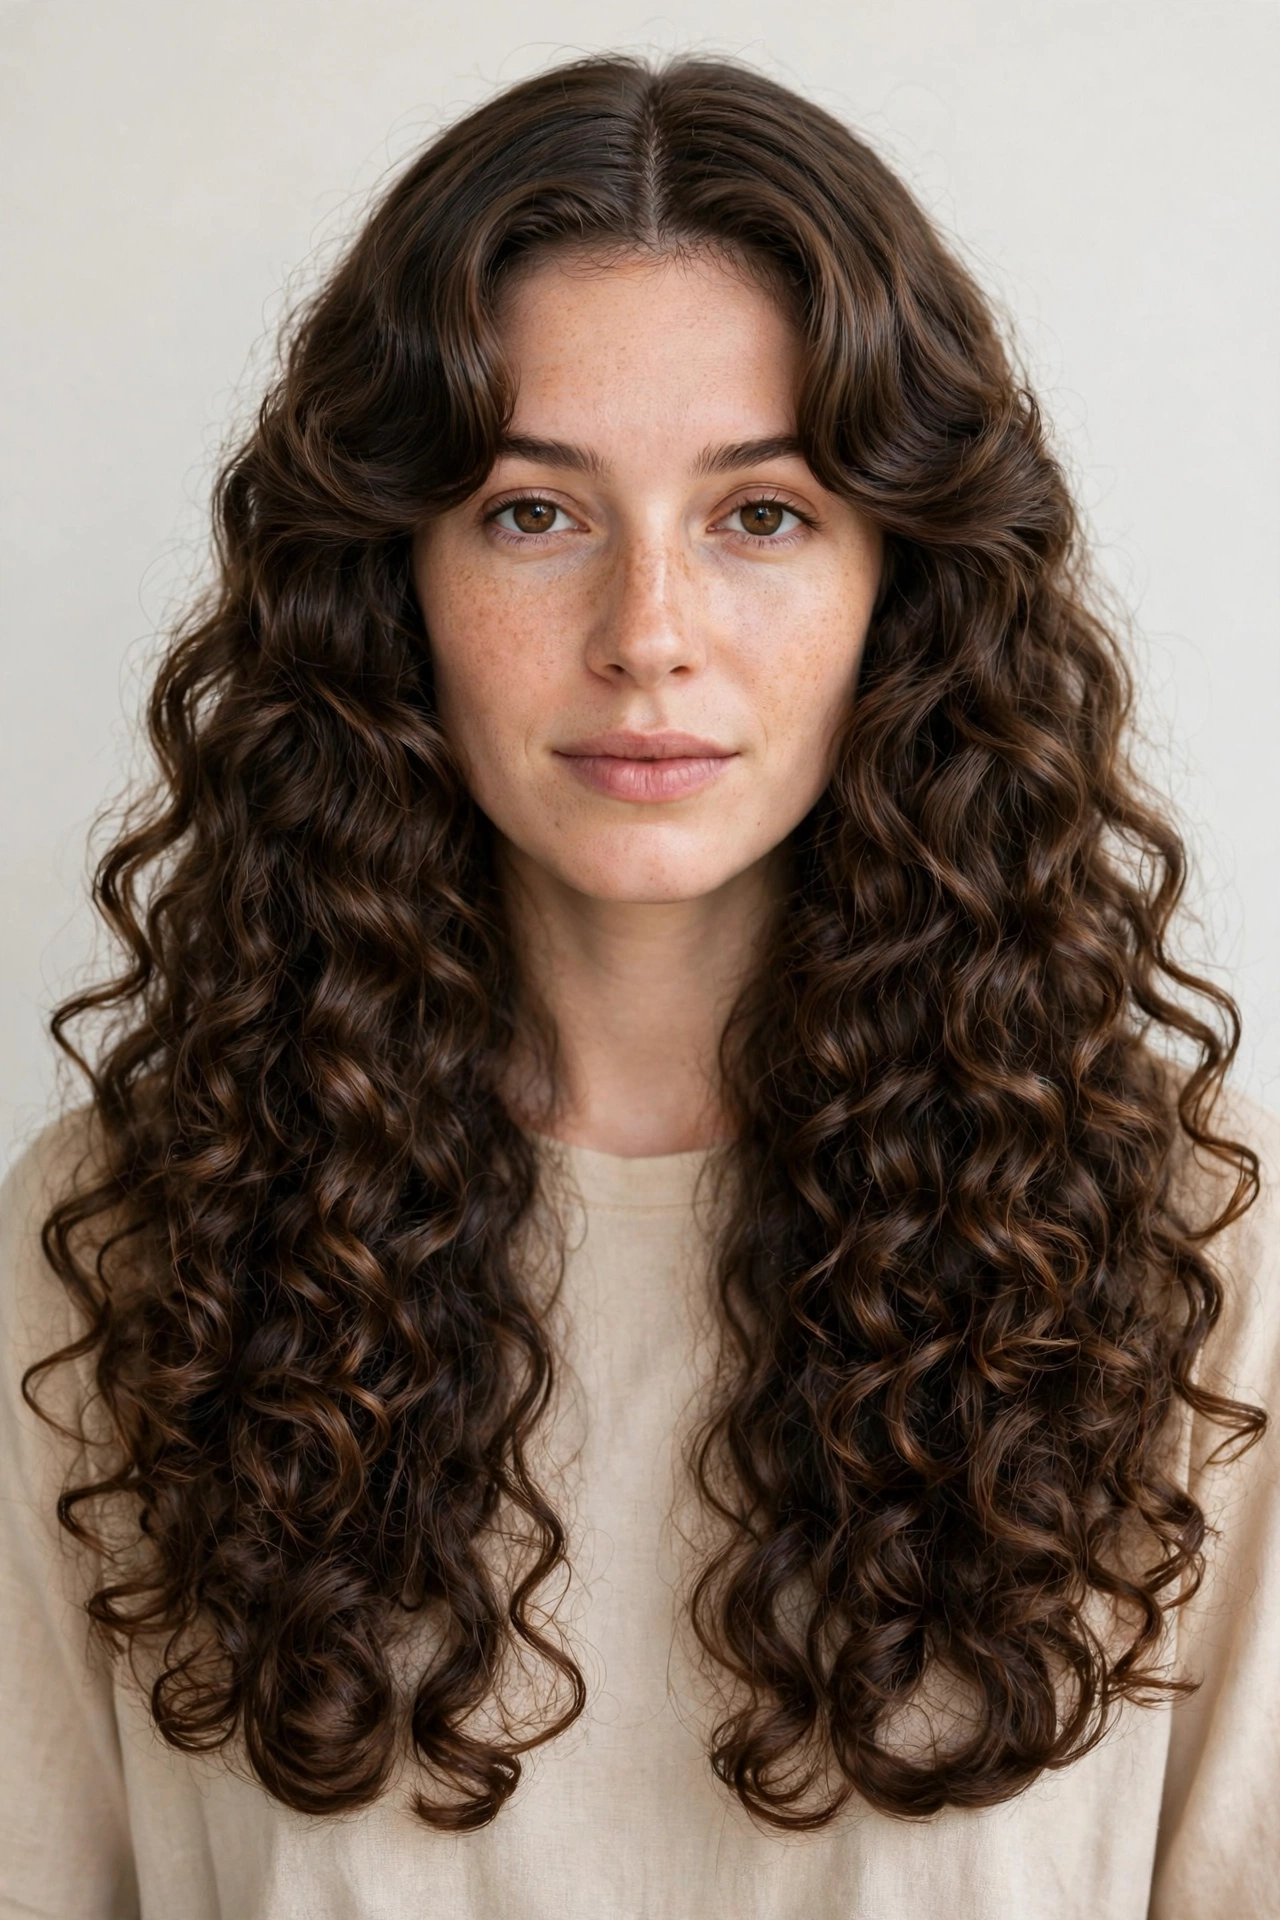
If the V-cut feels too dramatic, the rounded U-cut gives you the same length with a softer, more balanced finish. Instead of tapering to a point, the layers curve in a gentle U across the back, distributing volume evenly and keeping the silhouette full rather than pointy. This is one of the most forgiving long curly haircuts with layers for women because the rounded shape suits every face shape — it never pulls the eye too far down or creates sharp angles. It shines on 3B to 4A curls, where even layering stops the bottom from bulging while keeping density through the sides, and it gives 2C to 3A hair a plush, healthy-looking thickness.
- Apply leave-in conditioner evenly through all layers to prevent frizz.
- Scrunch from the ends upward in horizontal sections for equal bounce.
- Diffuse side sections forward over the shoulders to check both sides match.
- Fluff dry roots with an Afro pick to even out the rounded silhouette.
Ask your stylist for a U-cut with graduated long layers, cut on dry curls so the curve reads correctly once the hair shrinks. At home, this cut is wonderfully low-maintenance: a simple wash-and-scrunch routine keeps it looking intentional, with a microfiber towel to reduce frizz and a light gel for hold. Trim every 10 to 12 weeks; the rounded shape grows out evenly, so you can stretch appointments without the cut looking neglected.
Butterfly Layers for Bouncy Curly Movement
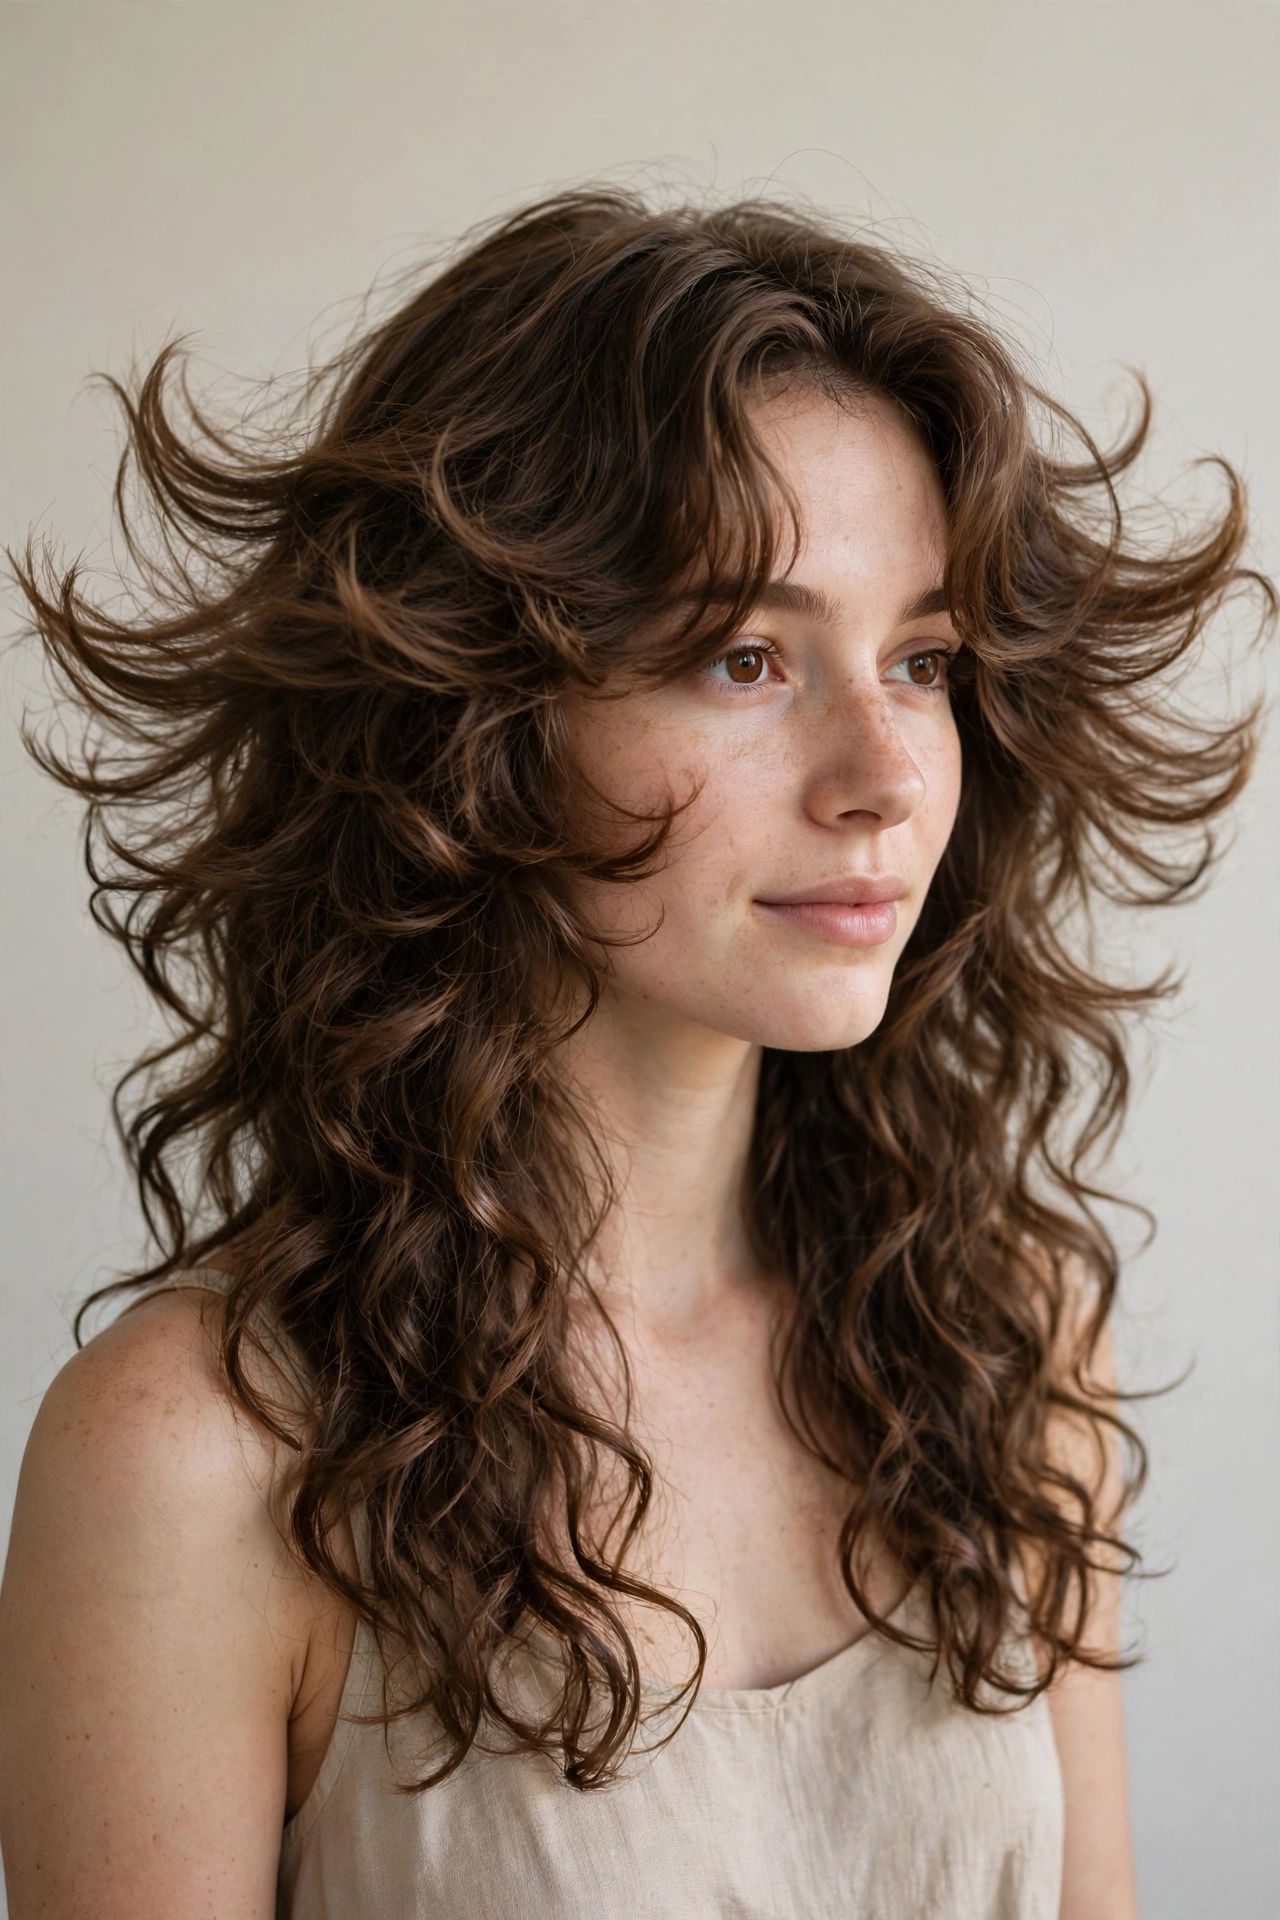
Butterfly layers create the illusion of shorter, bouncy hair around the face while the back stays long — and on curls, the effect is pure magic. The top layers are cut short enough to flip and bounce at the chin and cheeks while the underneath length stays intact, so 3A to 3C ringlets get that airy, winged movement the cut is named for. This suits heart and oval faces beautifully, since the short top layers widen a narrow chin area, and it gives fine curly hair the appearance of much more density. If your long curls feel heavy and one-dimensional, these layers inject life at exactly the right height.
- Apply root-lifting spray to the short top layers on dripping-wet hair.
- Scrunch the butterfly layers outward and away from the face for winged flip.
- Diffuse the top sections with a round brush attachment for extra bounce.
- Shake your head gently once dry to blend the short top with the lengths.
Ask your stylist for butterfly layers adapted for curls: short, bouncy layers through the crown and face frame (chin to shoulder length), with the back length preserved and only lightly layered. At home, the top layers need a little more product — a dab of mousse on the butterfly sections keeps them springy, and pineappling at night protects the short top from flattening. Trim every 8 to 10 weeks to keep the contrast crisp; as it grows out, it simply becomes a classic face-framing layered cut.
Layered Curtain Bangs with Long Curls
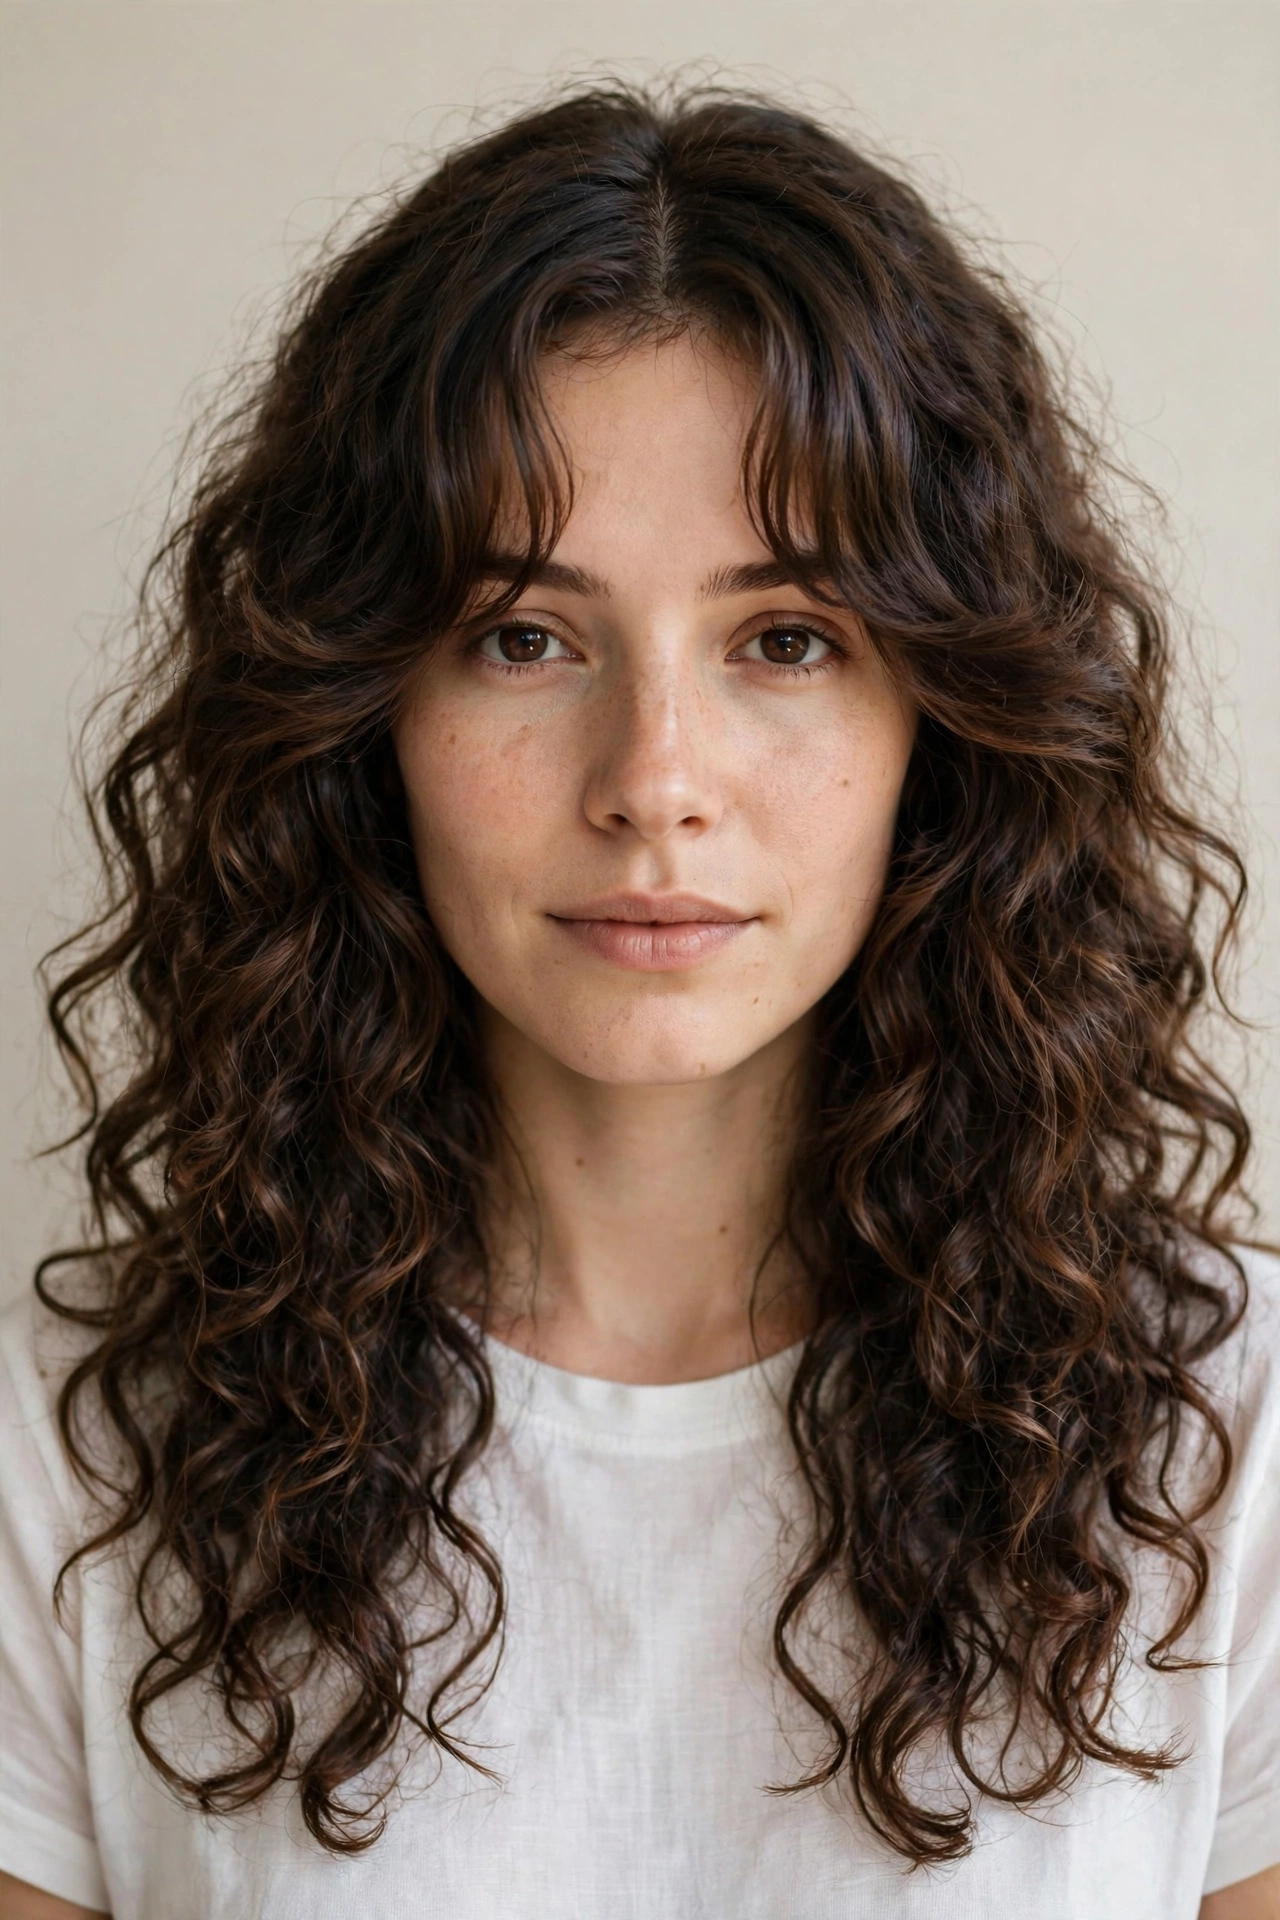
Curtain bangs paired with long curly layers are the combination that launched a thousand salon appointments — and for good reason. The bangs part in the middle and sweep to each side, blending seamlessly into the face-framing layers, so they grow out gracefully and never hit an awkward in-between stage. On 2C to 3B curls, curtain bangs soften the forehead, balance a long face, and draw attention to the eyes and cheekbones; on tighter 3C to 4A patterns, slightly longer curtain pieces give the same framing effect without the shrinkage shock of true short bangs.
- Apply styling cream to the bangs separately so they stay defined, not frizzy.
- Scrunch each bang section outward and down, away from the forehead.
- Diffuse the bangs with the nozzle pointed down to smooth roots and set the part.
- Twist each damp bang curl around your finger for a clean, ribbon-like coil.
Ask your stylist for curly curtain bangs cut dry, starting at the cheekbones and blending into the face-framing layers — never cut them wet, because shrinkage will make them far shorter than planned. At home, bangs need daily attention: mist, re-scrunch, and go, or clip them back on lazy days, with a tiny amount of gel on the bang roots to prevent halo frizz. Trim the bangs every 4 to 6 weeks; the rest of the layers can go 10 to 12 weeks, and grow-out simply turns the bangs into more face-framing layers.
Dry-Cut Round Layers for Even Curl Definition
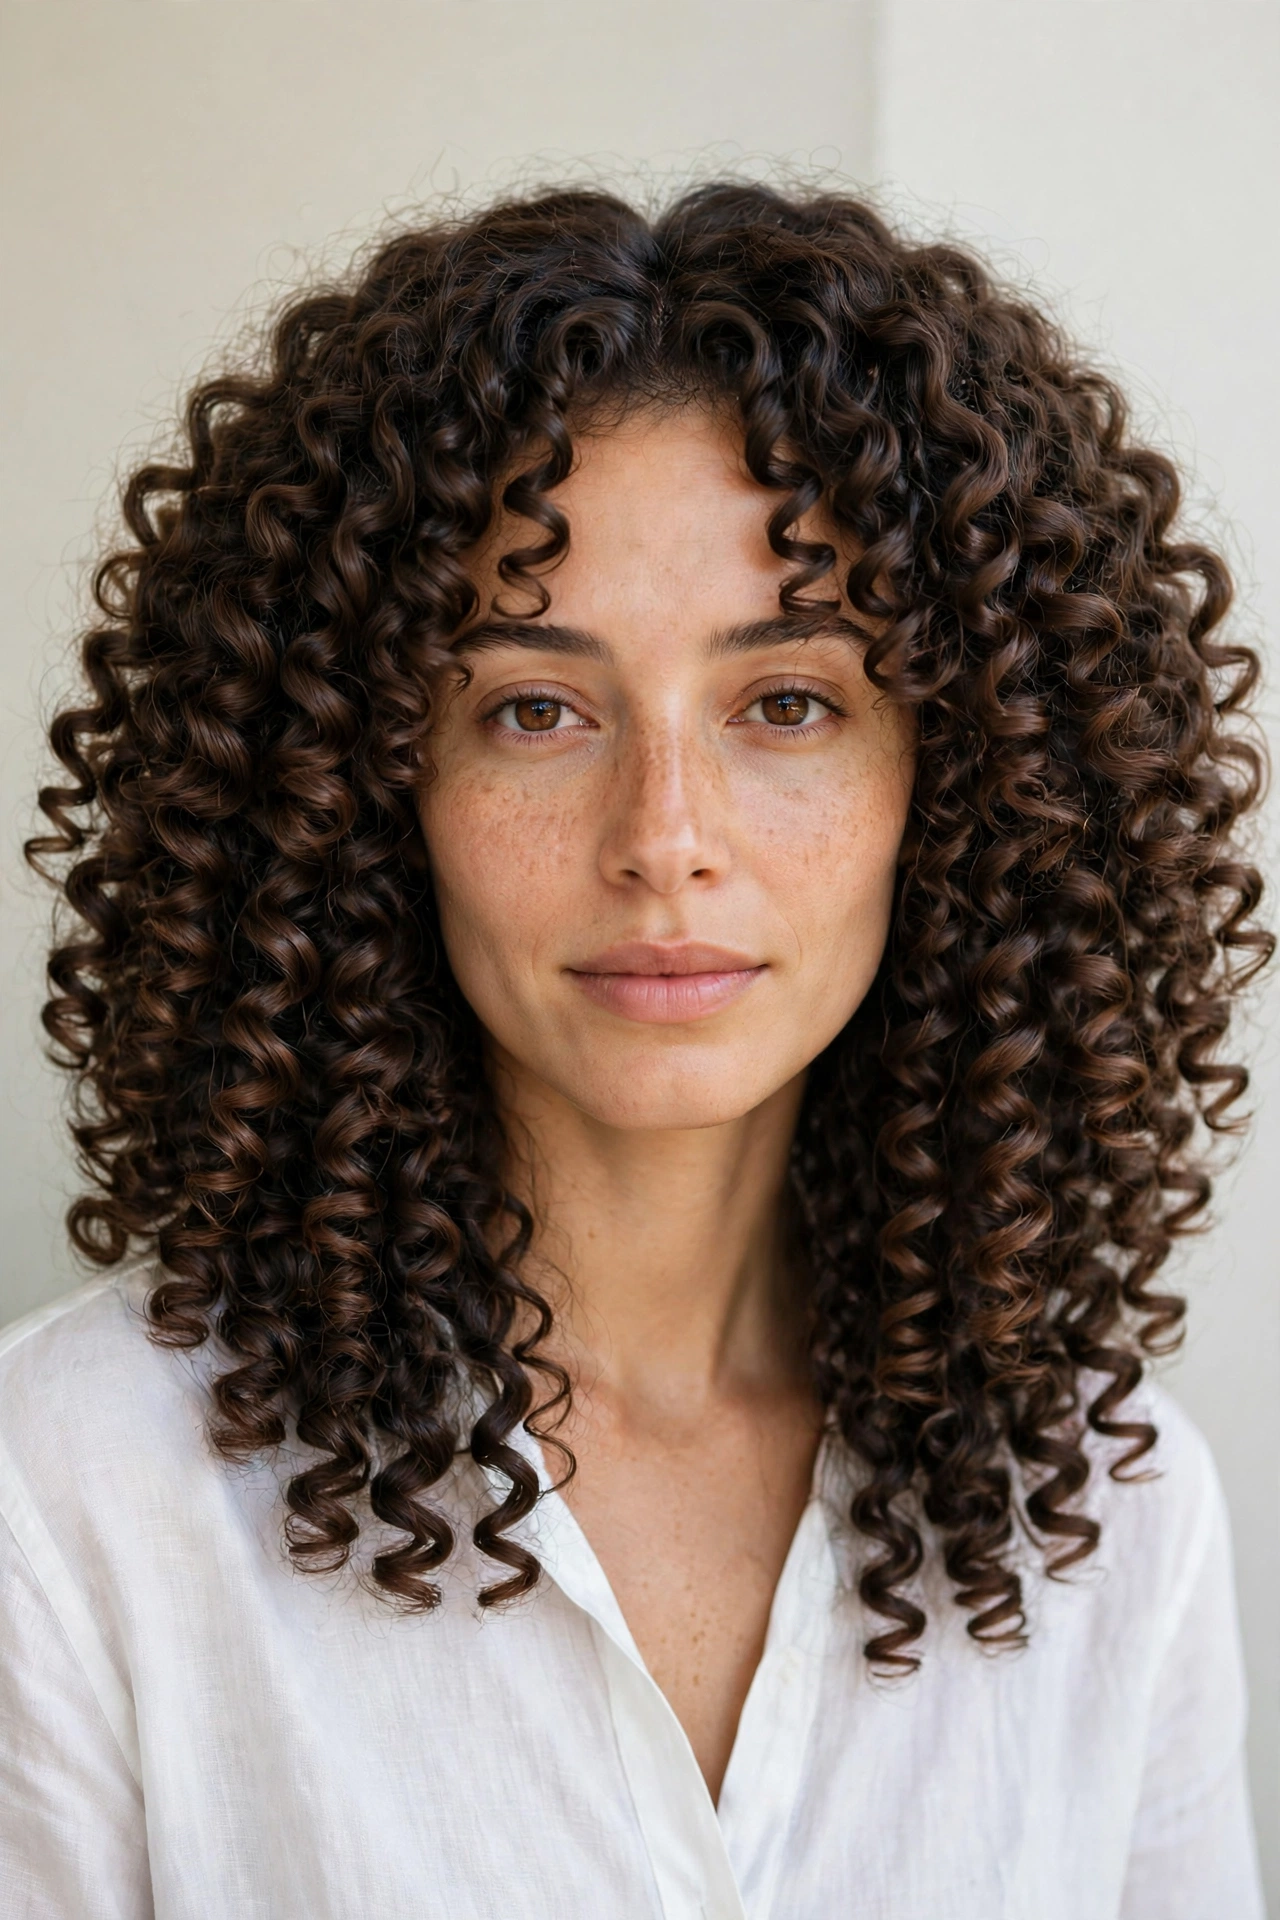
The dry-cut round layer technique — popularized by curl specialists — is less a style and more a philosophy: curls are cut one by one, dry and in their natural state, so every snip respects your true curl pattern. The result is a rounded, even silhouette with layers that fall exactly where your coils want to live, making this one of the most reliable long curly haircuts with layers for women with unpredictable shrinkage. It is ideal for 3C to 4A curls, where wet cutting is a gamble, and transformative for 2C to 3B hair that never dries the same way twice. If you have ever left a salon with layers that looked perfect wet and chaotic dry, this method ensures that never happens again.
- Arrive with hair styled as you normally wear it for a true-pattern cut.
- Scrunch in your usual products after the cut to settle the fresh layers.
- Diffuse gently on low heat to set the shape without disturbing the curls.
- Avoid brushing for the first week to keep the layers individually defined.
Book with a curl specialist and ask for a dry curl-by-curl cut with rounded long layers — specify that you want to keep your length while removing bulk and building shape. This cut works with your natural routine, not against it. Keep up with deep conditioning so the freshly cut ends stay healthy, and sleep in a silk bonnet to preserve the sculpted shape. Trim every 12 to 16 weeks — dry-cut layers grow out more gracefully than wet-cut ones, so you can stretch the time between visits.
Short Crown Layers for Lifted Roots
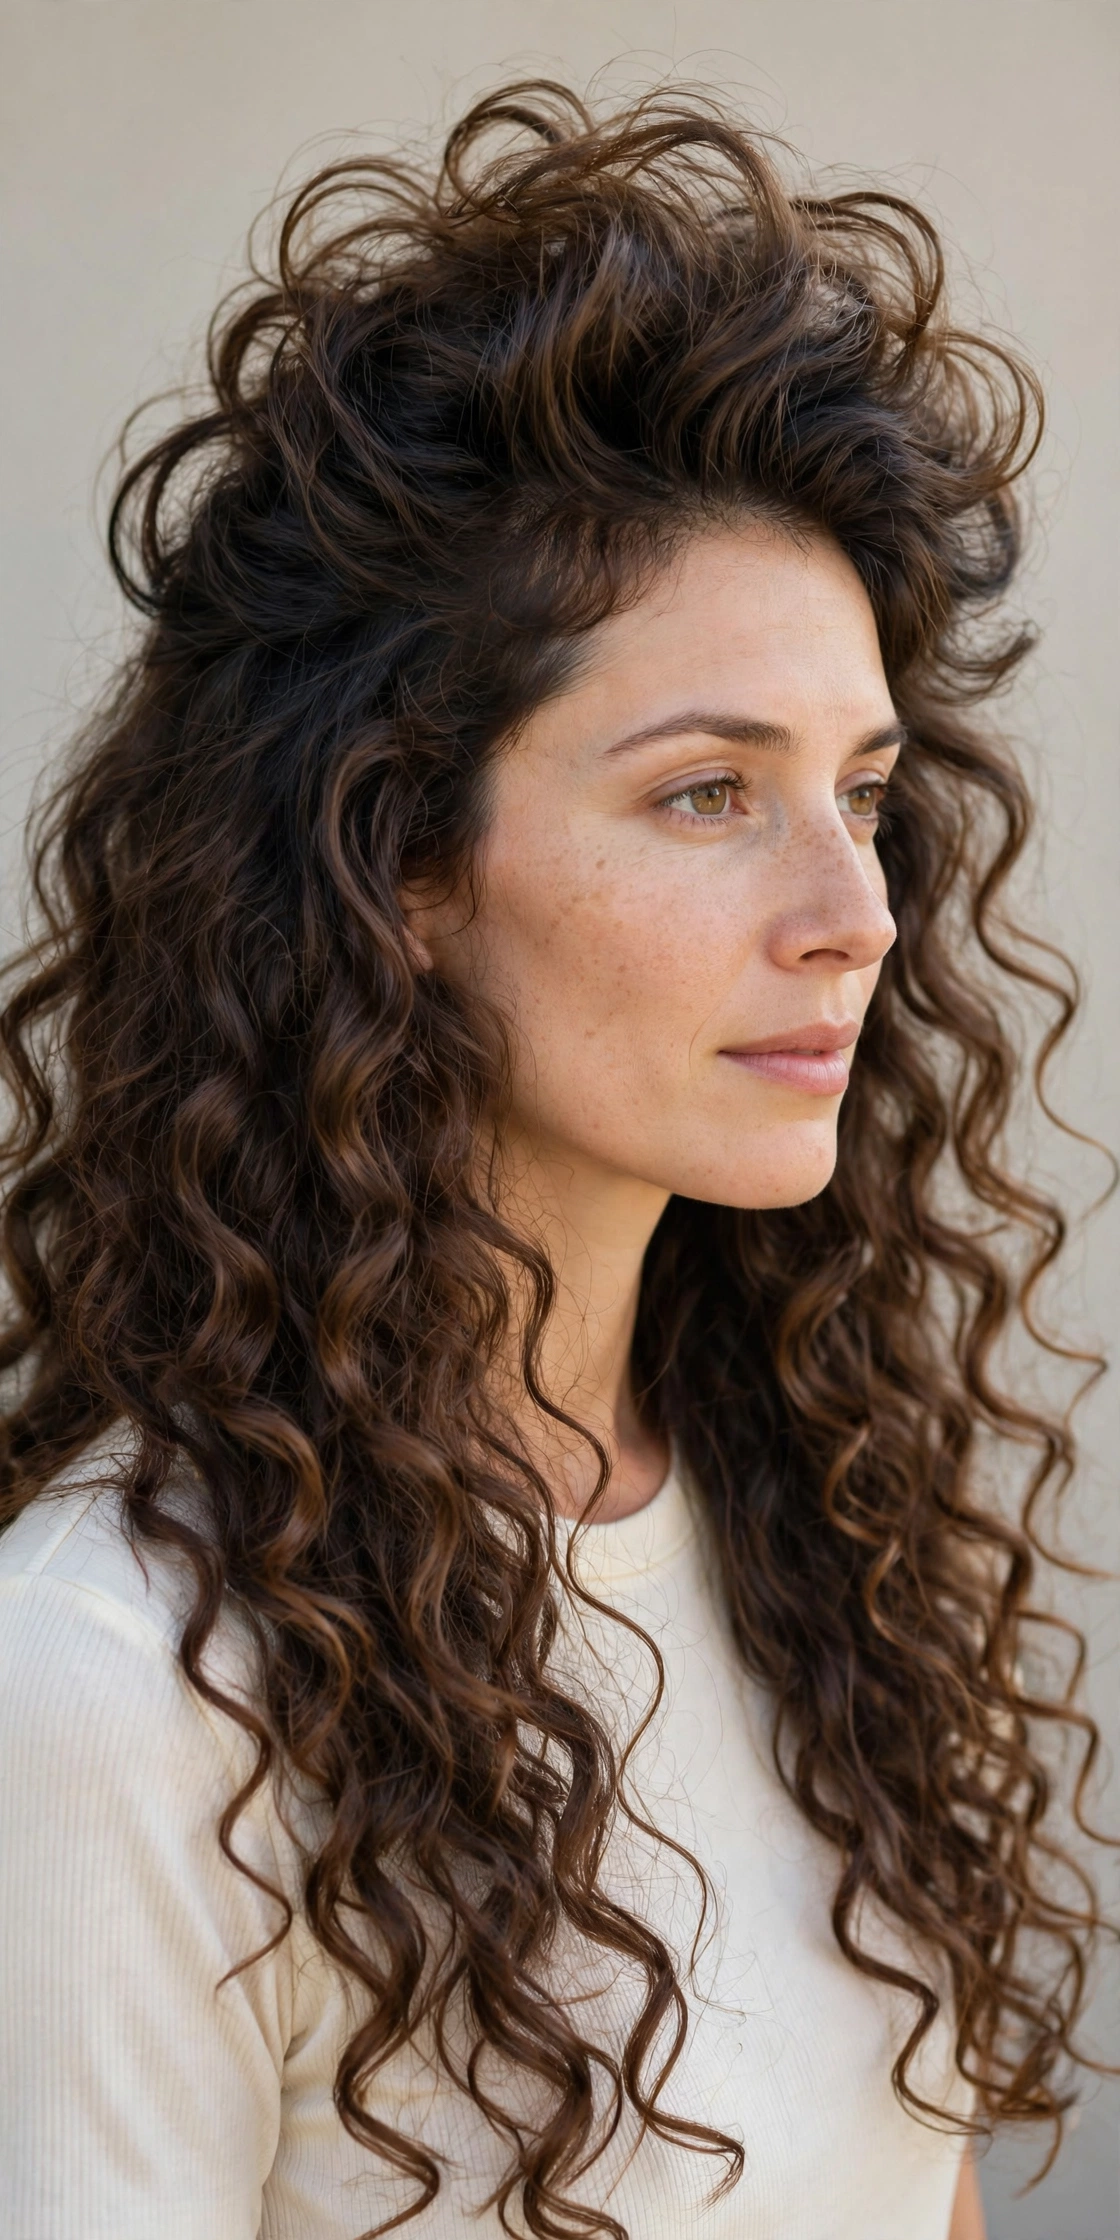
Flat roots with heavy ends is the number-one complaint among women with long curly hair, and short crown layers are the direct fix. While the overall length stays long, the top section is layered significantly shorter — usually between the ears and shoulders when stretched — removing the weight that presses roots flat and letting the crown spring up with natural volume. This is a game-changer for 3A to 4A curls weighed down by density, and for fine 2C or 3A hair that collapses by midday. Round and square faces benefit most, since the added height on top creates the illusion of a longer, slimmer face.
- Apply volumizing foam directly to crown roots on soaking-wet hair.
- Scrunch the crown layers upward with strong motions to lock in lift.
- Diffuse the crown first, head flipped over, before touching the lengths.
- Clip crown roots with small clips while air-drying for all-day volume.
Ask your stylist for hidden short layers through the crown only, keeping the perimeter and overall length untouched — you want lift, not an overall shorter haircut. At home, refresh root volume each morning: flip your head, shake at the roots, or mist with water and re-scrunch just the crown, with dry shampoo at the roots on day two for grit and lift. Trim every 10 weeks to maintain the contrast; as the crown grows, it blends into the mid-lengths and the cut simply becomes a classic long layered style.
Feathered Layers with Soft Wispy Ends
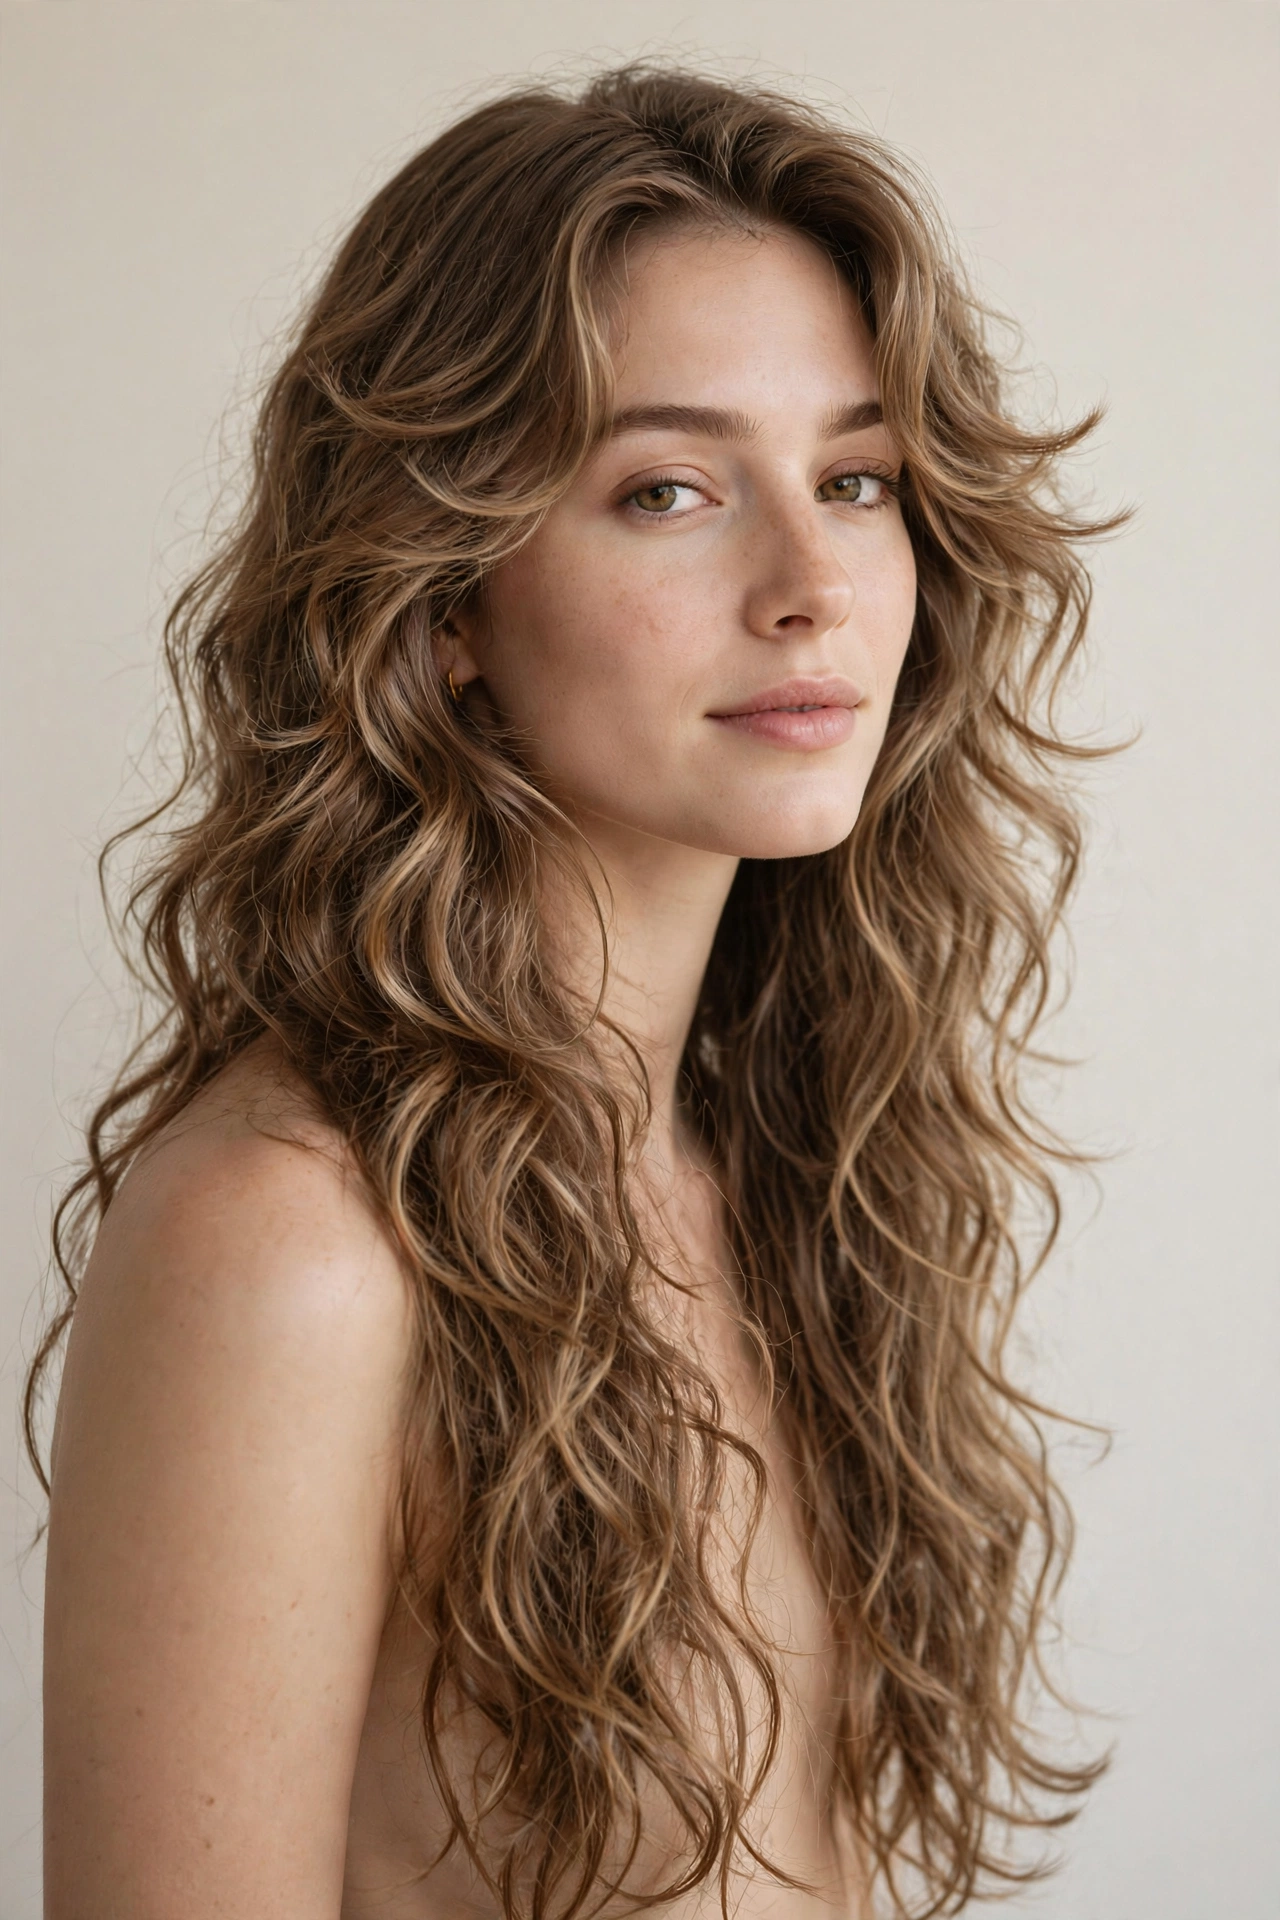
Feathered layers bring a soft, romantic finish to long curly hair — each layer is thinned and tapered so the ends fall like feathers rather than landing in a blunt line. This technique is perfect for 2C to 3B curls that tend to look bulky or shelf-like at the bottom, because the feathering removes density exactly where heaviness collects. It flatters heart and square face shapes by softening angles, and it gives thick hair a lighter, airier feel without sacrificing the long silhouette. Among long curly haircuts with layers for women, this is the most low-maintenance option: the soft ends disguise split ends and uneven growth, so the cut looks intentional for months.
- Apply lightweight serum to the ends before styling for a wispy finish.
- Scrunch the ends loosely, not tightly, to keep the feathered texture airy.
- Diffuse on medium heat with the ends lifted to separate the layers naturally.
- Smooth the very tips with a drop of oil on dry hair for a polished effect.
Ask your stylist for long feathered layers with thinned, tapered ends — the key word is “soft,” not “choppy” — with feathering starting below the chin so the top keeps its fullness while the bottom gets the airy treatment. At home, protect those delicate tips with regular trims and a weekly hydrating mask; wispy ends dry out faster than blunt ones, so avoid heavy butters that clump the feathers together. Trim every 8 to 10 weeks to keep the ends fresh; grow-out is forgiving because feathered ends simply get softer and more blended over time.
Invisible Internal Layers for Weight Removal
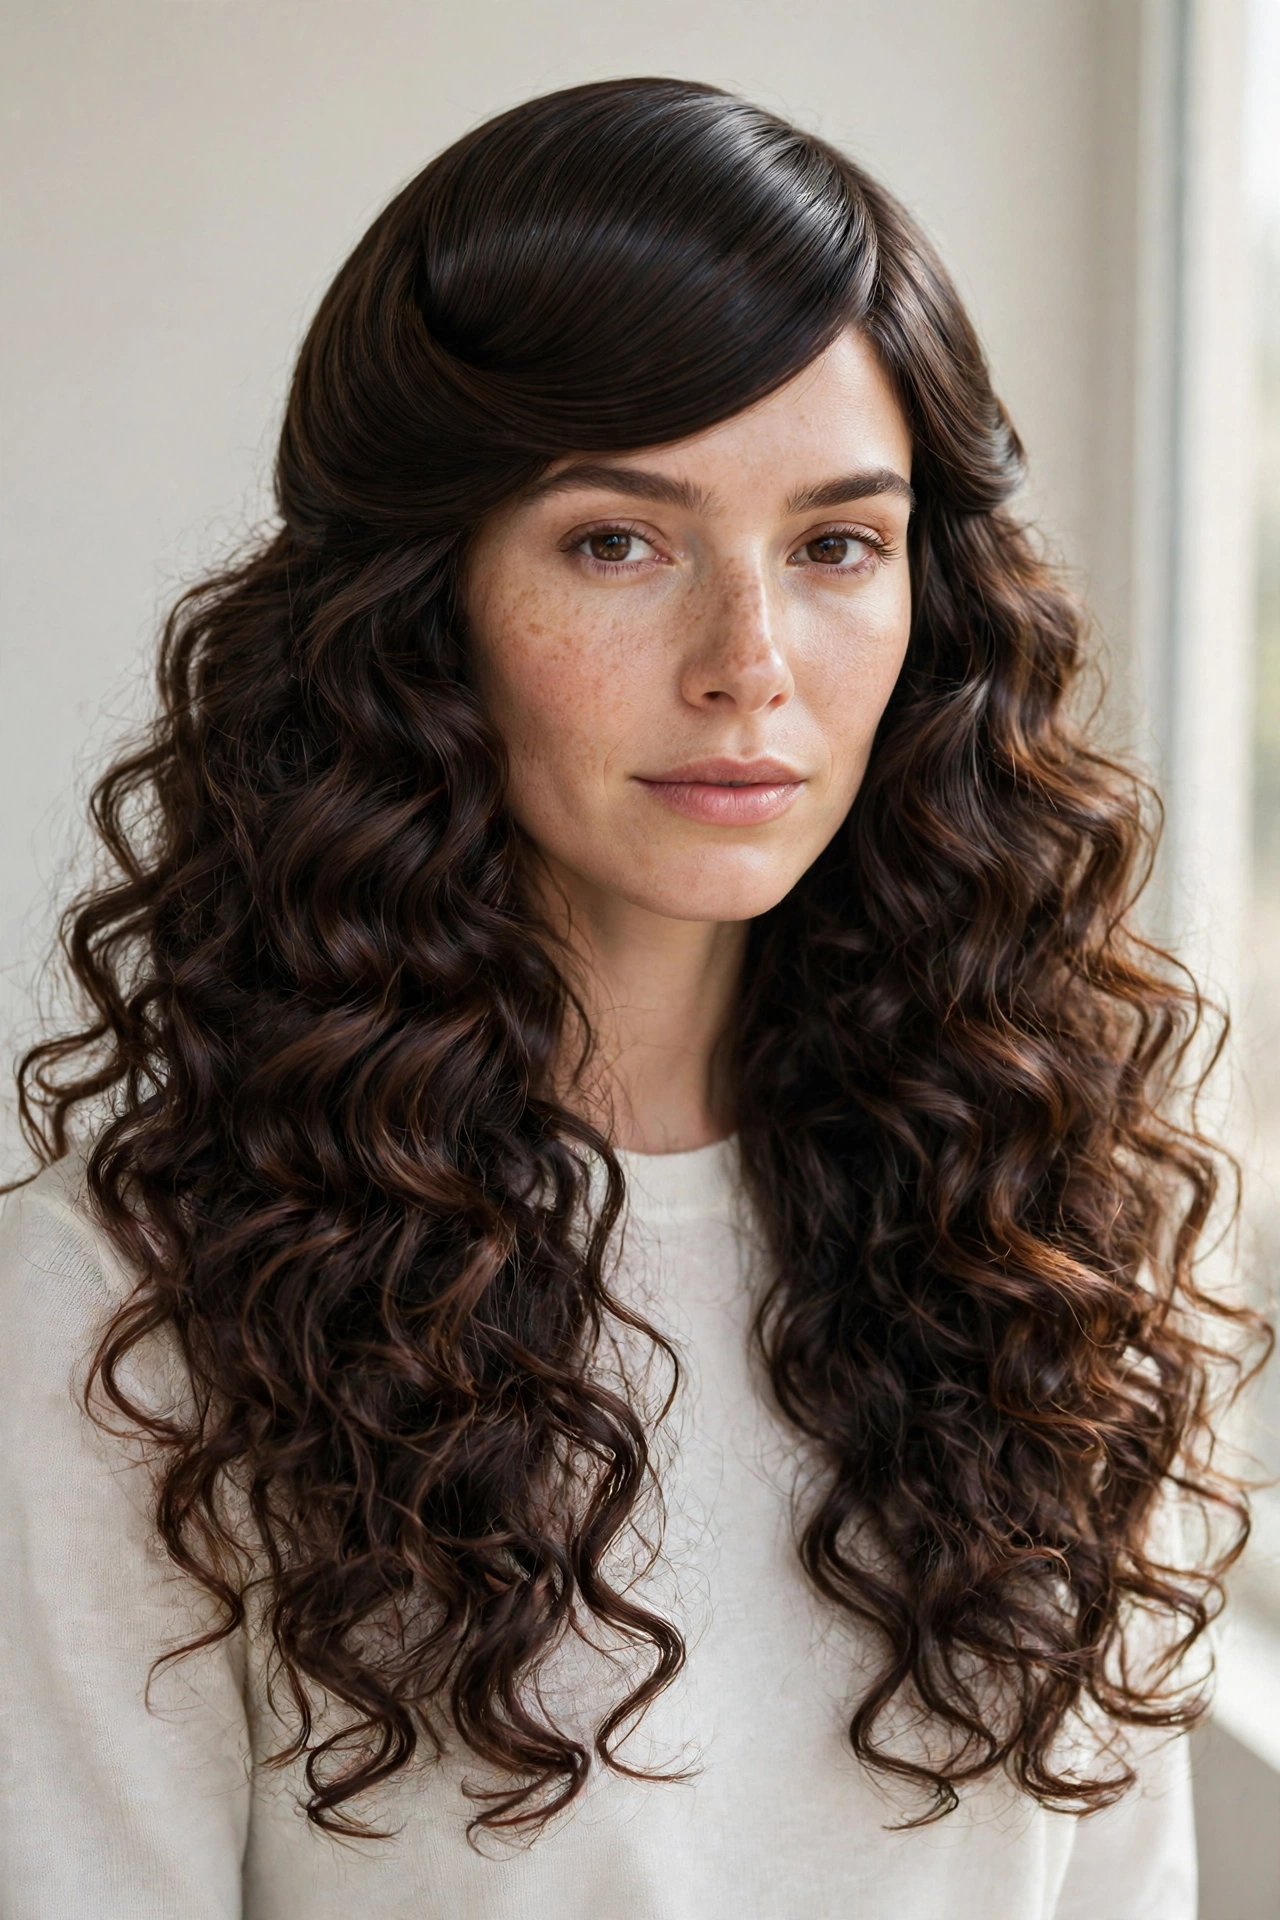
Invisible — or internal — layers are the insider secret for women who want all the benefits of layering with none of the visible short pieces. The layers are cut underneath the top canopy of hair, so the surface stays long and smooth while hidden shorter layers remove bulk, encourage curl formation, and stop the dreaded triangle shape. This is ideal for very thick 3B to 4A hair where visible layers can look choppy, and for 2C to 3A hair that needs movement without losing its sleek top layer. Every face shape suits it because the outer silhouette stays long and even — the magic happens underneath.
- Apply products in sections, lifting the top canopy to reach hidden layers.
- Scrunch the under-layers firmly so they push the canopy outward with volume.
- Diffuse with the dryer pointed upward into the under-layers to activate them.
- Flip your head upside down and shake once dry to let the layers lift.
Ask your stylist for internal or invisible layers: shorter layers cut beneath the top section to remove weight while the perimeter and surface stay one length. At home, always style in at least two sections — top and bottom — so product reaches the hidden layers, which may need a stronger-hold gel since they carry the structural work. Trim every 10 to 12 weeks; grow-out is completely invisible, making this the easiest layered cut to maintain long-term.
Long Layers with a Side-Swept Curly Fringe
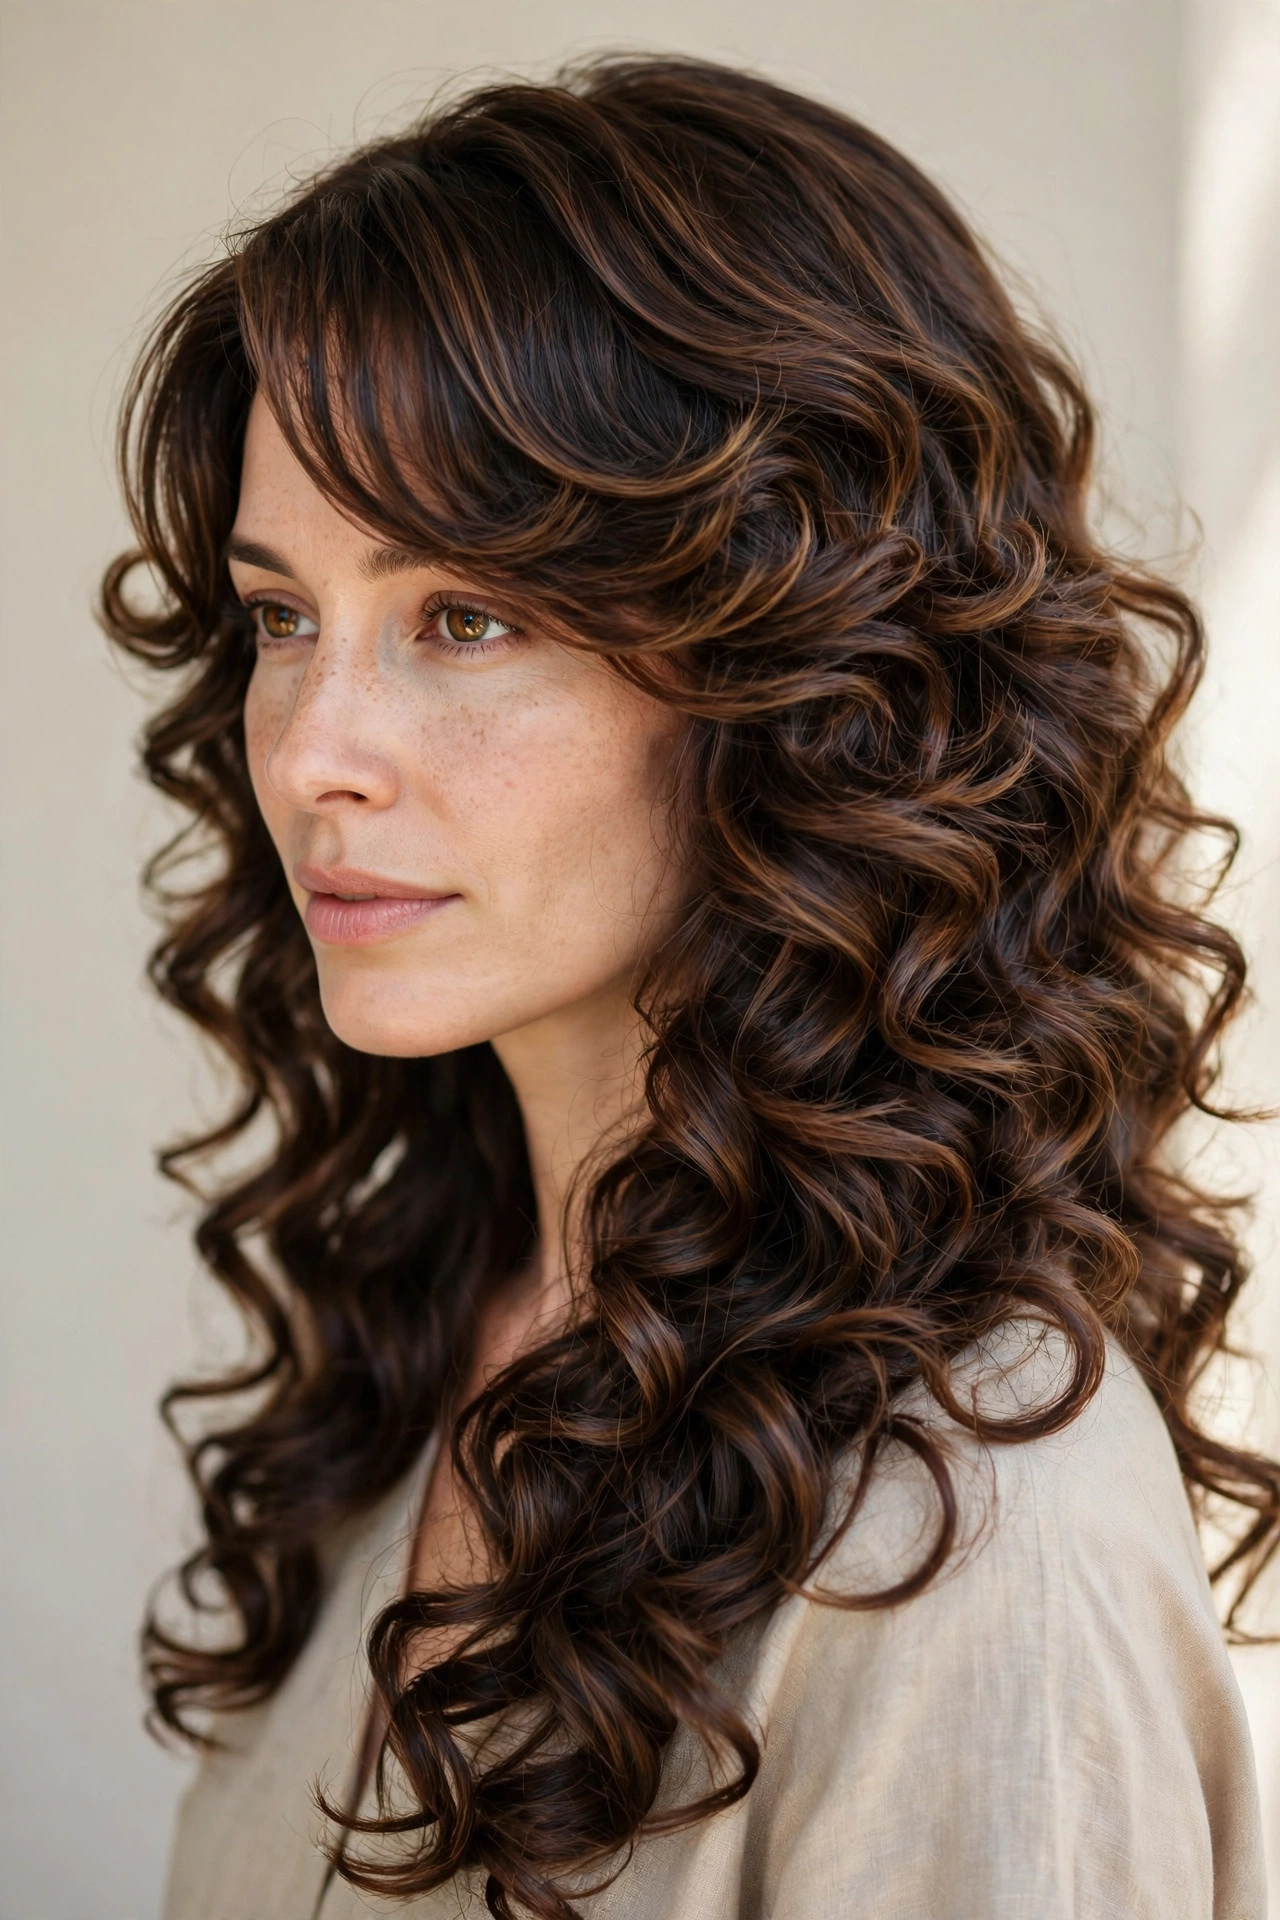
A side-swept fringe paired with long layers is the most glamorous of these cuts — it frames the face diagonally, adds instant sophistication, and gives your curls a red-carpet finish. The fringe is cut long enough to sweep across the forehead and blend into the face-framing layers, making it far more forgiving than a straight-across bang on curly hair. It suits oval, long, and heart-shaped faces especially well, since the diagonal line breaks up forehead width and adds flattering asymmetry. On 3A to 3C curls the fringe forms beautiful loose ringlets; on 2C waves it falls in soft, touchable bends.
- Apply a dab of curl cream to the fringe separately to keep it frizz-free.
- Scrunch the fringe toward the side it will fall on to train the direction.
- Diffuse the fringe with the nozzle aimed across the forehead for a smooth sweep.
- Pin the fringe to the side with a clip while it cools to lock in the shape.
Ask your stylist for a long side-swept fringe cut dry, starting around the eyebrows and angling down to blend with the face-framing layers — stress that shrinkage means it must be cut longer than it looks. At home, the fringe needs a quick daily refresh: dampen, re-scrunch to the side, and go, with a mini spray bottle and a pea of gel in your bag for midday touch-ups. Trim the fringe every 4 to 6 weeks and the layers every 10 to 12; grow-out turns the fringe into elegant face-framing pieces, so there is never an awkward stage.
Voluminous 70s-Inspired Layered Curls
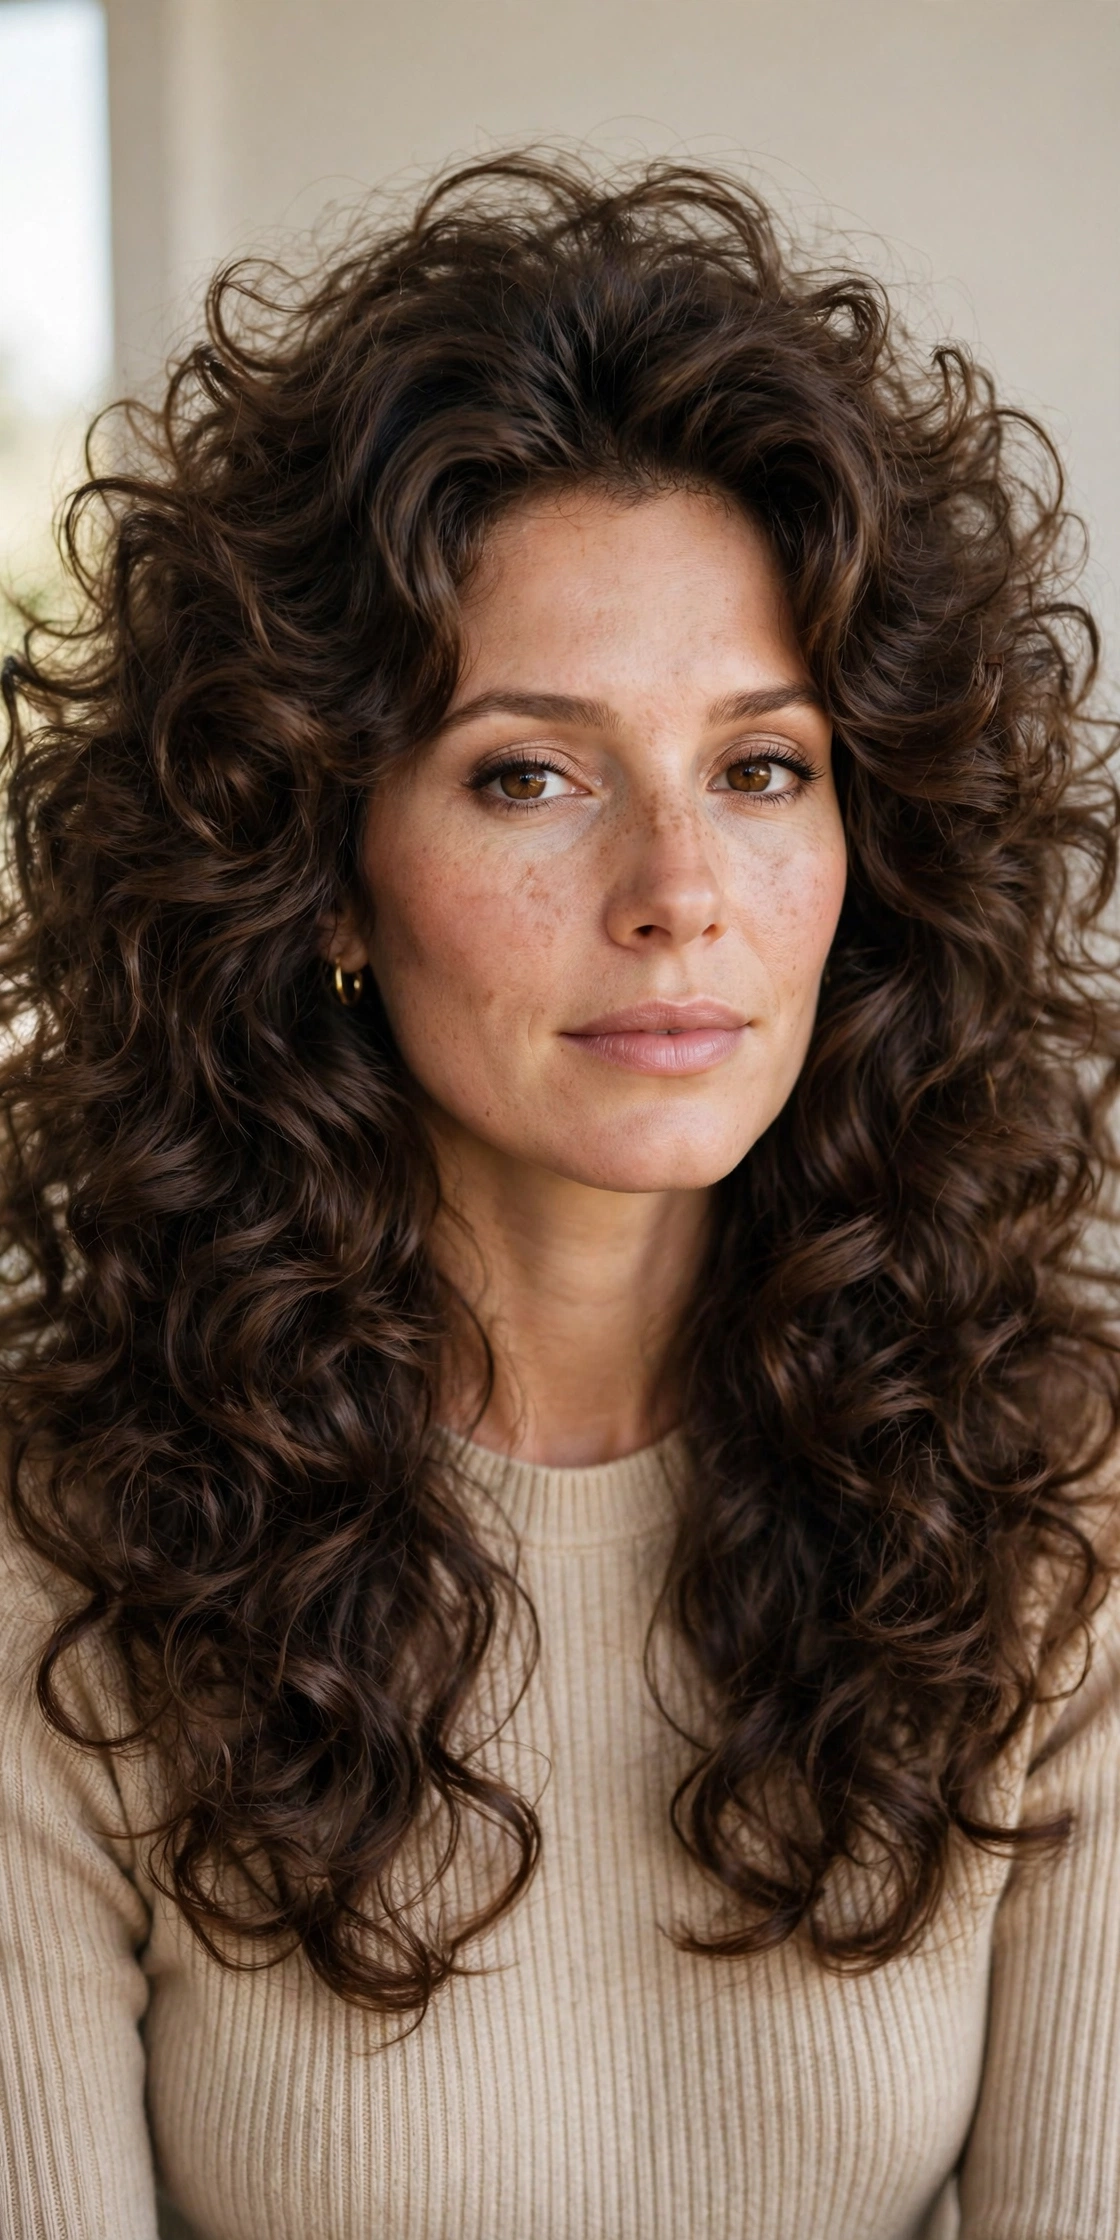
Channel the iconic big hair of the 1970s with long, bouncy layers built for maximum volume and movement. This cut layers the hair generously from the crown to the ends so every curl has room to expand, creating that lush, full-bodied silhouette that turns heads. It is spectacular on 3A to 3C curls, where the layers let each ringlet reach its full spring, and it gives 2C waves the fullness they usually lack. Round and heart-shaped faces love the width it creates through the mid-lengths, which balances the chin and jaw. It demands a little more styling effort, but the payoff is hair with undeniable presence.
- Apply a mousse-and-curl-cream cocktail to soaking-wet hair for volume plus definition.
- Scrunch vigorously in sections to encourage maximum spring in every layer.
- Diffuse with large sections lifted high off the scalp to build 70s volume.
- Pick out dry roots gently with an Afro pick for a full, cloud-like finish.
Ask your stylist for 70s-inspired long layers: generous layering from the crown down, a rounded shape, and ends that stay full rather than thinned — the goal is volume everywhere. Have it cut dry to control exactly how big each layer gets. At home, clarify monthly so buildup never weighs the volume down, deep-condition weekly, and sleep in a high pineapple to protect the shape. Refresh volume on day two by flipping upside down and shaking at the roots. Trim every 10 weeks to keep the layers bouncy; grow-out keeps the volume but softens the shape into classic long layers.
Conclusion
Long layers are the kindest thing you can do for curly hair that has grown past the shoulders — they give your coils permission to be bouncy, shaped, and full of life instead of weighed down and shapeless. Whether you choose the soft romance of feathered ends, the bold texture of a curly shag, or the quiet genius of invisible internal layers, the right cut turns your length from a burden into your best feature. Book that appointment, bring reference photos, and trust the process — great curly layers only get better as they settle in. The same layering principles work at every age — women embracing haircuts for women over 70 with natural volume prove that well-placed layers keep curls lively and youthful for decades. Your long curls deserve a cut that shows them off — go get the layers that let them shine. Between trims, keep your curls thriving with our 12 protective hairstyles for natural hair, made for texture and length retention.


3 Comments