12 Pixie Cuts with Shaved Sides
Introduction
You love your short hair, but something feels missing — that extra edge that turns a pretty cut into a statement. Pixie cuts with shaved sides deliver exactly that: the softness of a cropped top paired with the bold attitude of close-clipped sides. Whatever your hair type, this combo flatters more face shapes than you would expect: the longer top lifts the eye while shaved sides sharpen your jawline. Below are twelve ways to wear this fearless cut, from subtle tapers to dramatic skin fades, each with styling tips and grow-out advice. If you are weighing gentler options, our feminine pixie cuts guide shows the softer side of short hair.
Classic Tapered Pixie with Clean Shaved Sides
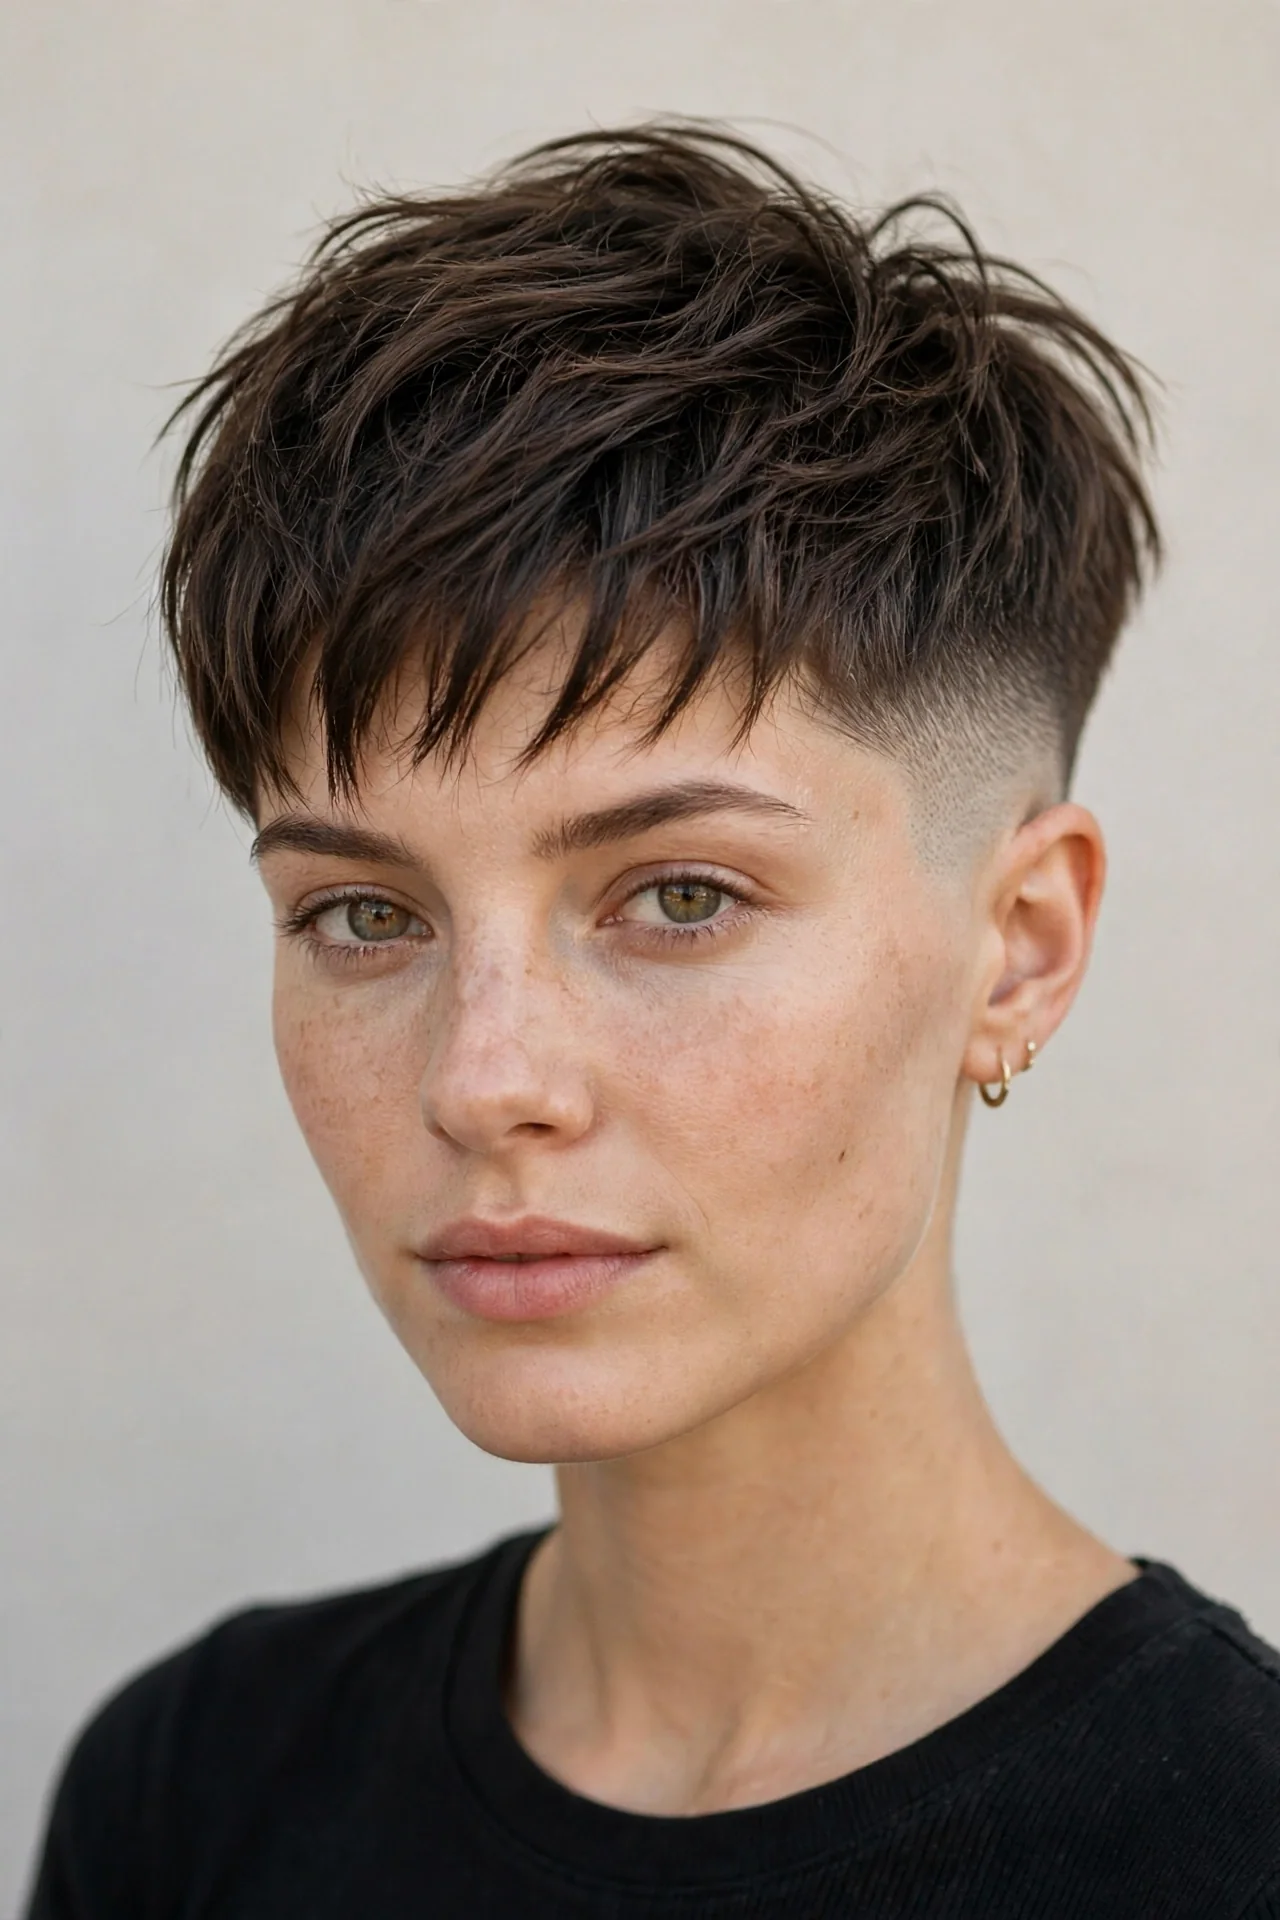
This is the gateway version of the look — a softly tapered pixie where the crown keeps a few inches of length while the sides are clipped close with a #2 guard and blended upward. It suits oval, round, and heart-shaped faces especially well: the longer top adds height that balances fuller cheeks, while the tidy sides reveal your jawline and neck. Fine to medium straight hair wears it best — the top needs enough density to sweep or tousle. The effect reads polished but quietly rebellious — short enough to make a statement, refined enough for the office — and it is the easiest version to grow out if you ever want length back.
- Apply matte pomade to dry hair and tousle the crown for texture.
- Blow-dry the top upward with your fingers to create lift at the roots.
- Smooth the sides flat with a damp hand for a freshly cut look.
- Finish with a light mist of flexible-hold hairspray to lock the shape.
Ask your stylist for a tapered pixie: a #2 guard on the sides blended into two to three inches on top, with the back tapered close to the nape. Bring a reference photo, because taper lengths vary between stylists. At home, your routine takes under five minutes: a dab of matte paste, a quick finger blow-dry, and you are done. Keep the sides crisp with a trim every three to four weeks — once they grow out, the contrast disappears. To grow it out, stop trimming the sides and let the top catch up; the taper makes the awkward phase far less noticeable than a buzz would.
Platinum Pixie Cuts with Shaved Sides for High Contrast
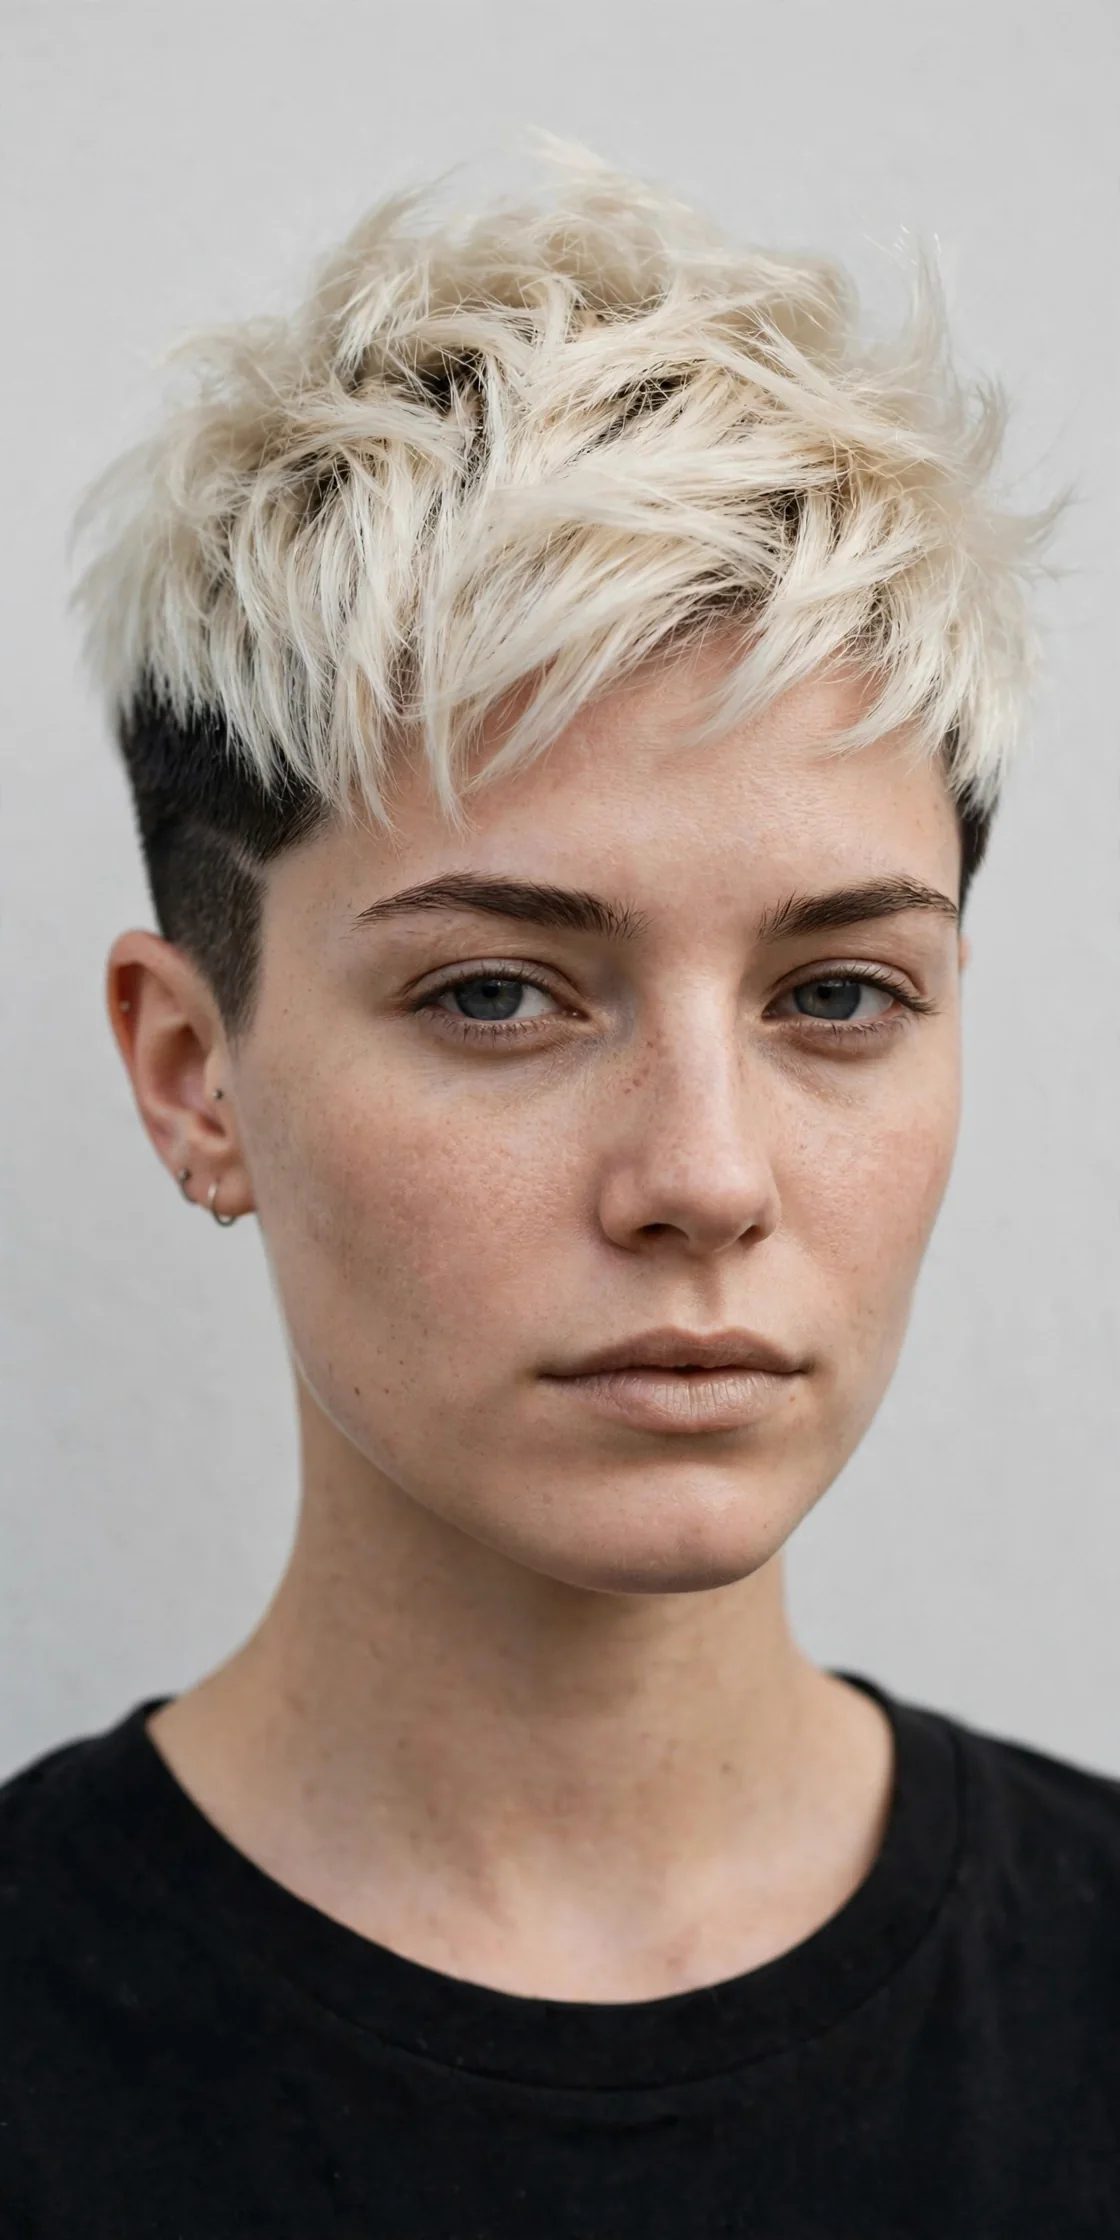
The drama of this cut comes entirely from contrast. The top is lifted to a cool platinum while the shaved sides reveal your darker natural roots, creating a two-tone effect that turns heads. It suits cool and neutral skin tones best, and thick, straight hair takes the double process most gracefully — fine hair can go platinum too, but it needs a shorter top so the bleached strands stay strong. Oval and longer faces benefit most: the icy color draws the eye upward and softens strong angles. If you love bold color but hate visible roots, this is your workaround: the shaved sides mean regrowth hides itself.
- Tone with purple shampoo once a week to keep the platinum icy, never brassy.
- Apply a bond-building treatment after every bleach touch-up appointment.
- Blow-dry the top forward with a vent brush for a smooth, glossy finish.
- Rub hair oil through the ends to add shine to bleached strands.
Book a colorist who specializes in blonding — lifting short hair to platinum usually takes one to two sessions. Ask for a #1 or #2 on the sides, leaving your natural color untouched so the roots grow in dark. Touch up the top every four to six weeks as roots appear. Between appointments, wash with sulfate-free purple shampoo and deep-condition weekly; bleach weakens strands, so it pays to follow the American Academy of Dermatology’s hair care tips on gentle washing and conditioning. Grow-out is graceful: let the top darken naturally or add lowlights, and the shaved sides simply blend back into your base color.
Curly Top Pixie with Skin-Faded Sides
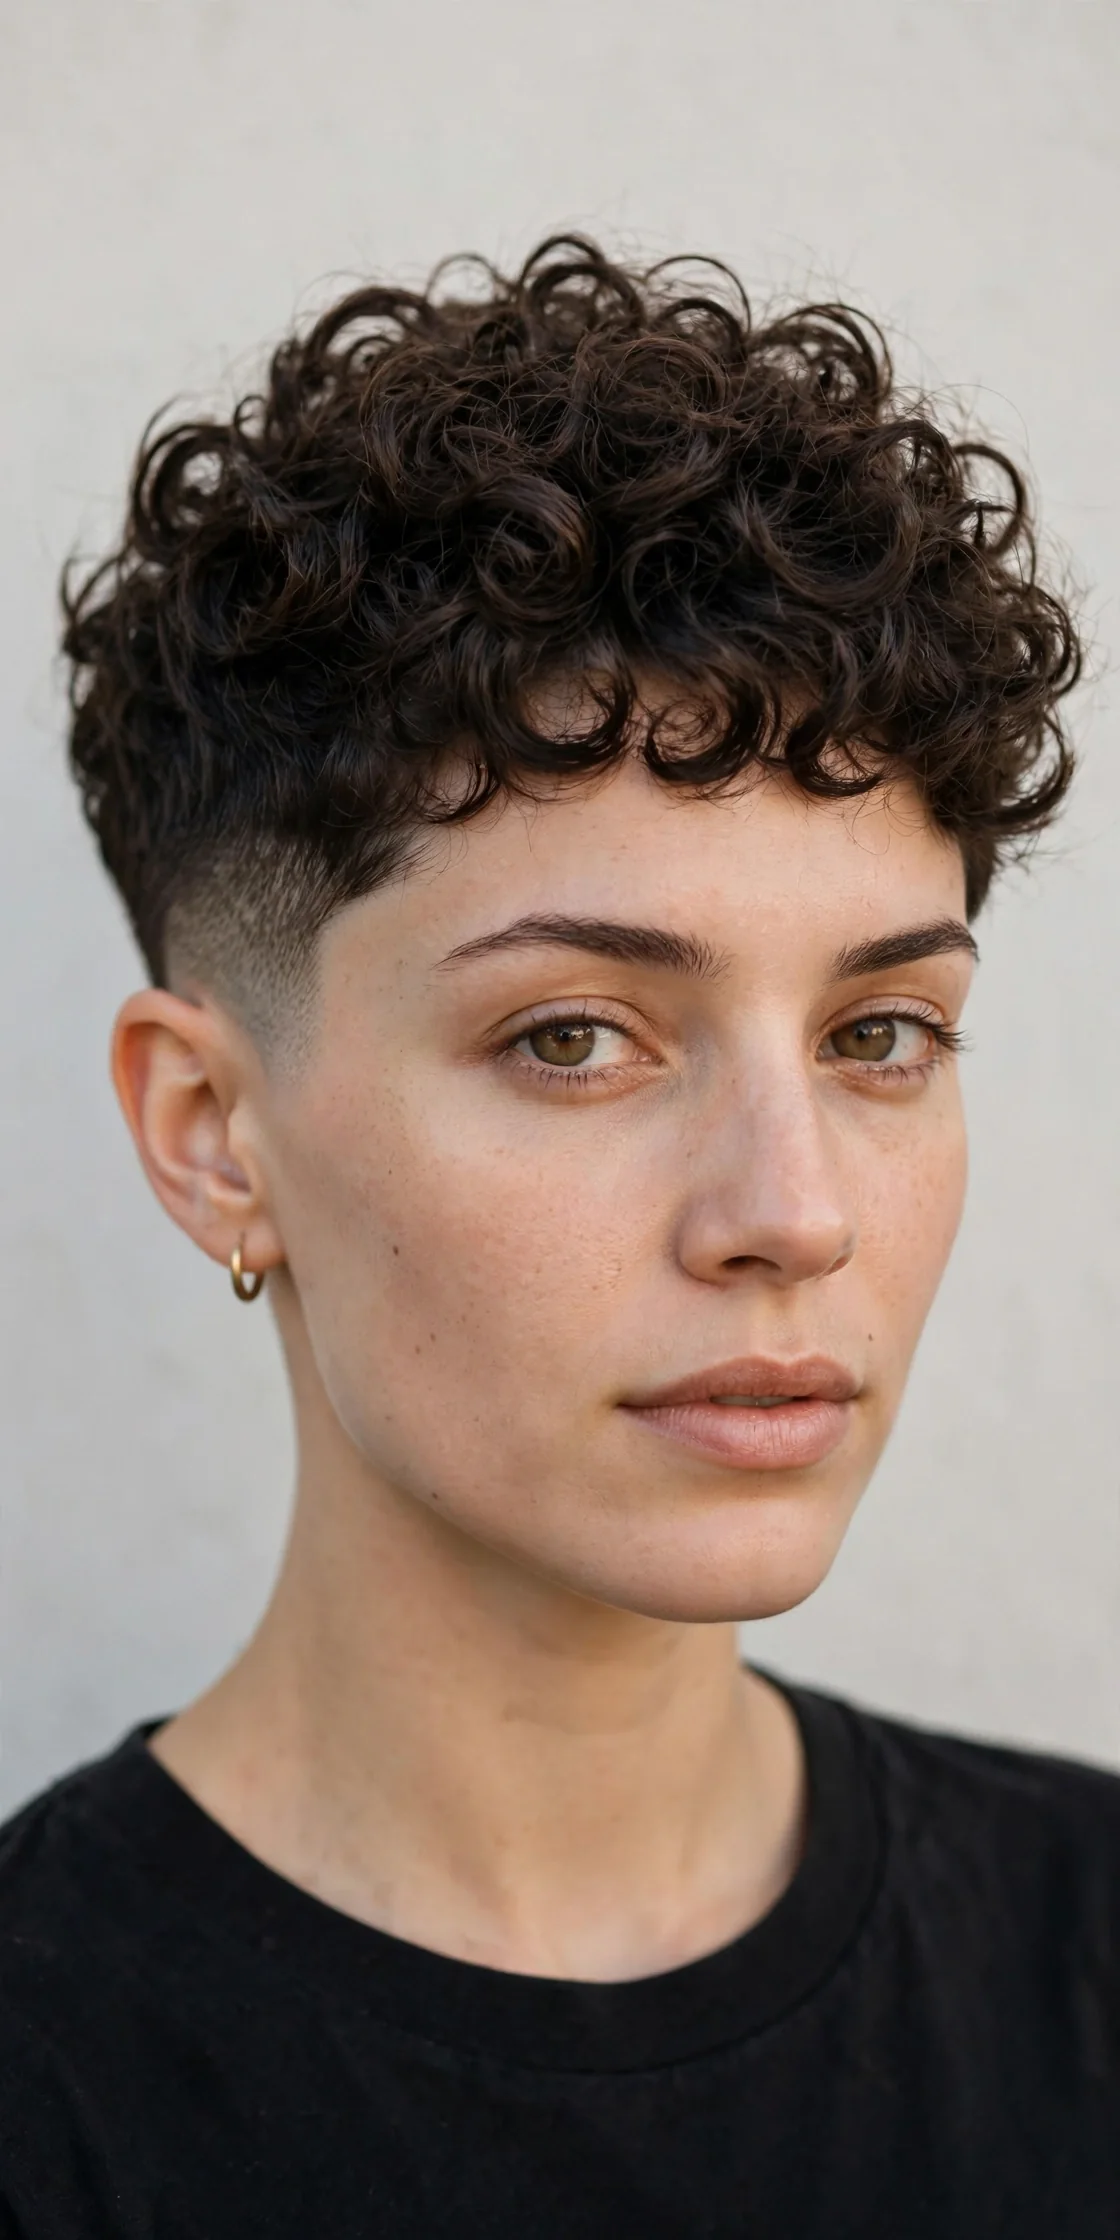
Natural curls do the styling work for you here. The top keeps enough length for your curls to coil and spring — usually two to four inches — while the sides fade down to skin, removing bulk exactly where curly hair tends to pyramid outward. This pairing flatters round and square faces beautifully, because the tall, curly crown adds length and the fade sculpts the sides into a narrower profile. It is a dream for 3A through 3C curl patterns, though tighter coils can wear a slightly longer top. Soft, bouncy curls against a razor-clean fade feels effortlessly cool, and it cuts drying time dramatically since half your head is clippered close.
- Scrunch curl-defining cream into damp curls to encourage tight, frizz-free coils.
- Diffuse the top on low heat, lifting at the roots for maximum height.
- Refresh second-day curls with a water and leave-in conditioner spray.
- Line up the fade edges with a trimmer between barber visits.
Ask your barber for a skin fade on the sides that transitions into a curly top left long enough to spring — a curl-by-curl cut from a stylist who works with texture keeps the shape balanced. Your daily routine is wash, condition, scrunch in curl cream, diffuse, done. Refresh the fade every two to three weeks to keep the contrast sharp; curly tops grow out more forgivingly than straight ones, so you can stretch the top trim to six or eight weeks. Growing it out means letting the sides catch up to the curls — ask your barber to blend the fade as it grows so you skip the awkward mushroom stage.
Pixie Cuts with Shaved Sides and Etched Undercut Designs
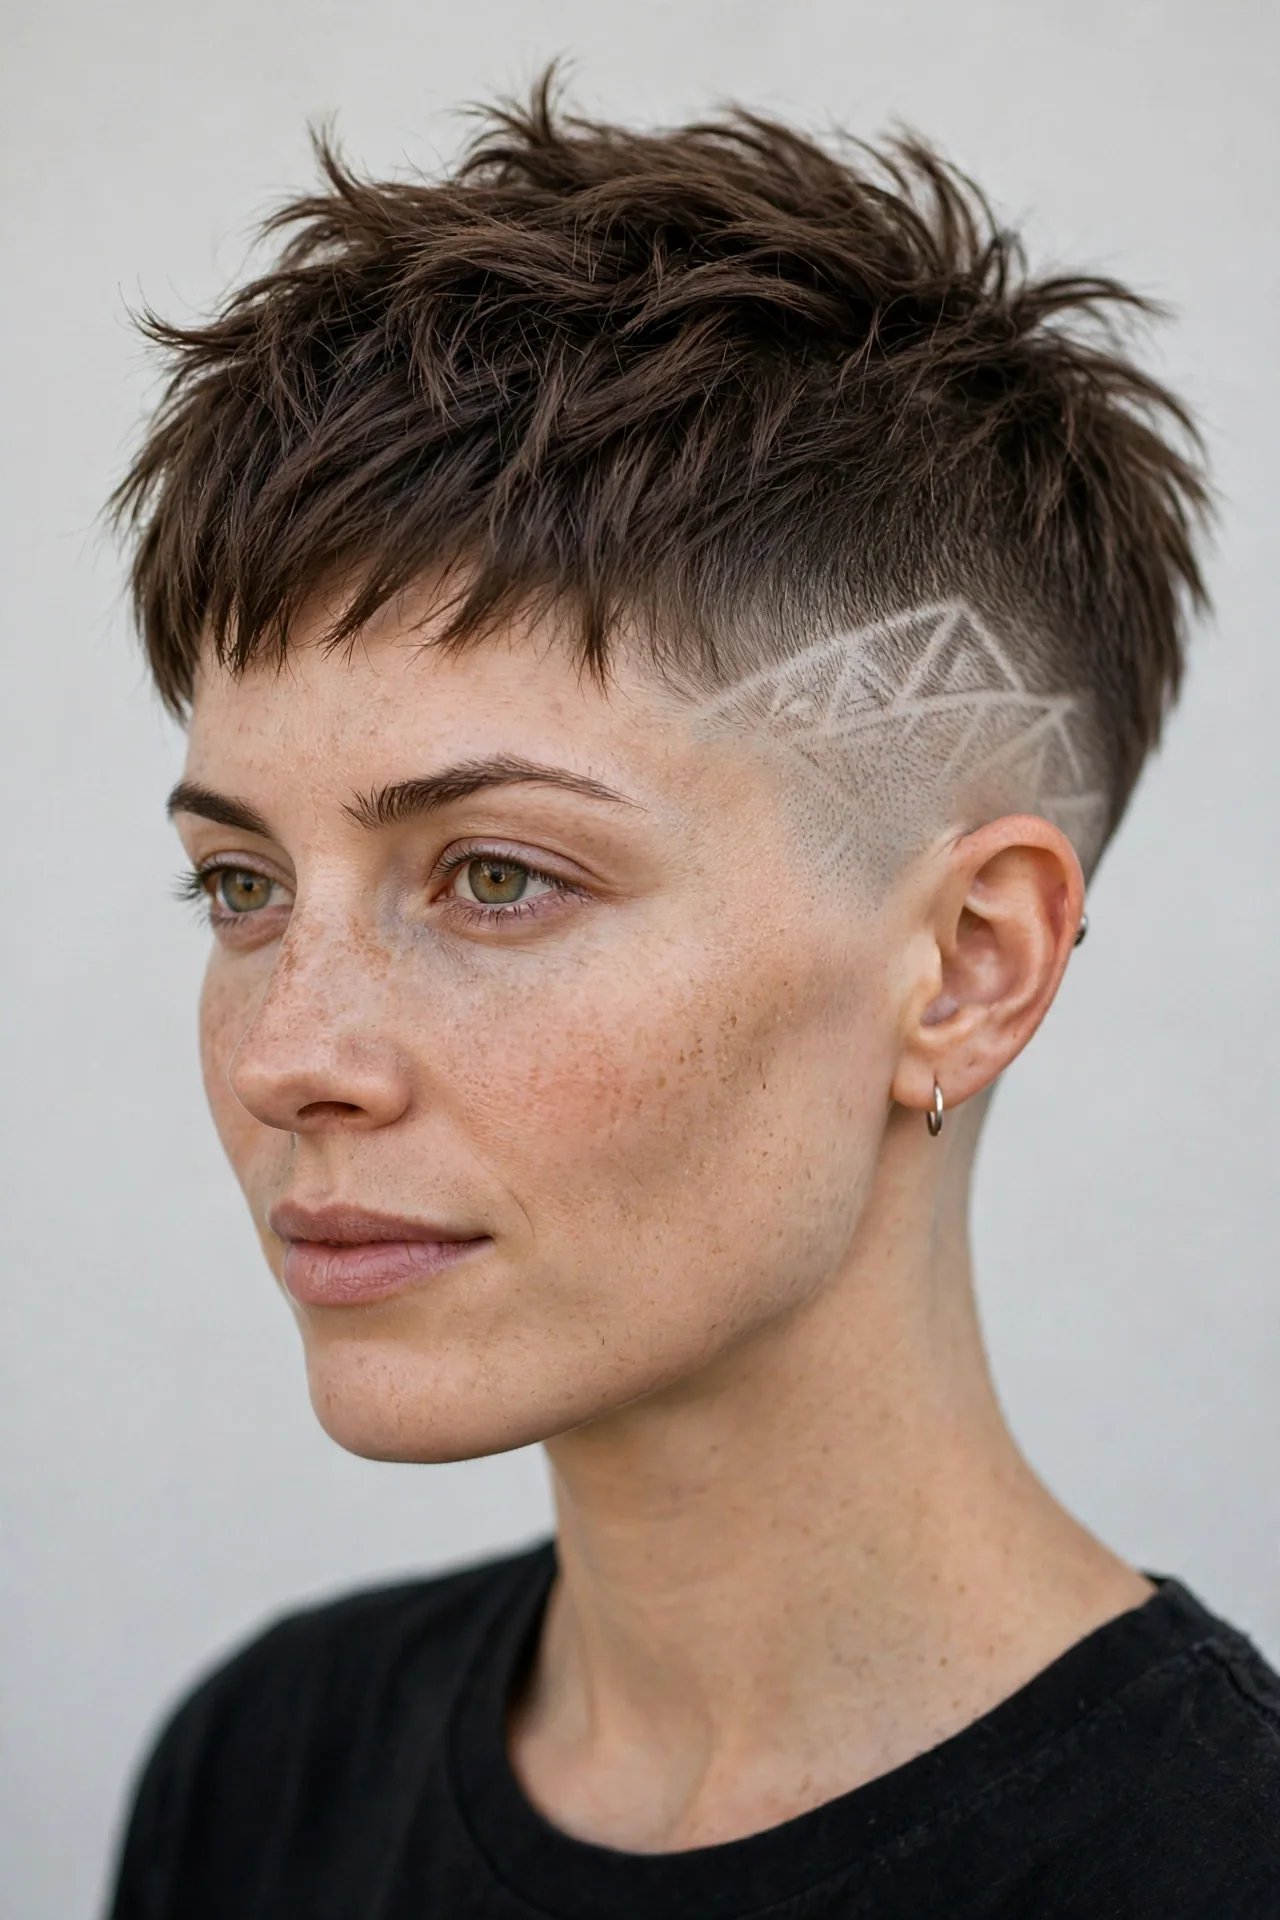
If you want a pixie that doubles as body art, this is it. The top stays a classic textured pixie while one or both shaved sides carry an etched design — geometric lines, a zigzag, or a star carved into the fade. It suits thick, dark hair best, because the design shows up most clearly against high-contrast growth. Round and oval faces wear it well; the eye-catching detail draws attention outward and adds instant personality. This is the highest-commitment version on this list, but also the most complimented. If your workplace is conservative, the top can be styled to cover a single-sided design when needed.
- Style the top to the opposite side to show off the etched design.
- Apply matte clay to the top so the design contrast stays bold.
- Photograph your favorite design so your barber can recreate it later.
- Moisturize the shaved area to keep the lines crisp and skin smooth.
Ask your barber for a mid fade with an etched design — bring a photo, since freehand designs vary in skill between barbers. The design blurs as hair grows, so plan a refresh every two to three weeks; the fade itself needs the same schedule. At home, styling the top takes minutes with a little clay. When you tire of the design, simply let it grow out and return to a clean fade, or switch designs each visit like nail art for your head. No products are needed on the shaved sections beyond light moisturizer, which keeps the etched lines looking intentional rather than stubbly.
Asymmetrical Pixie with One Shaved Side
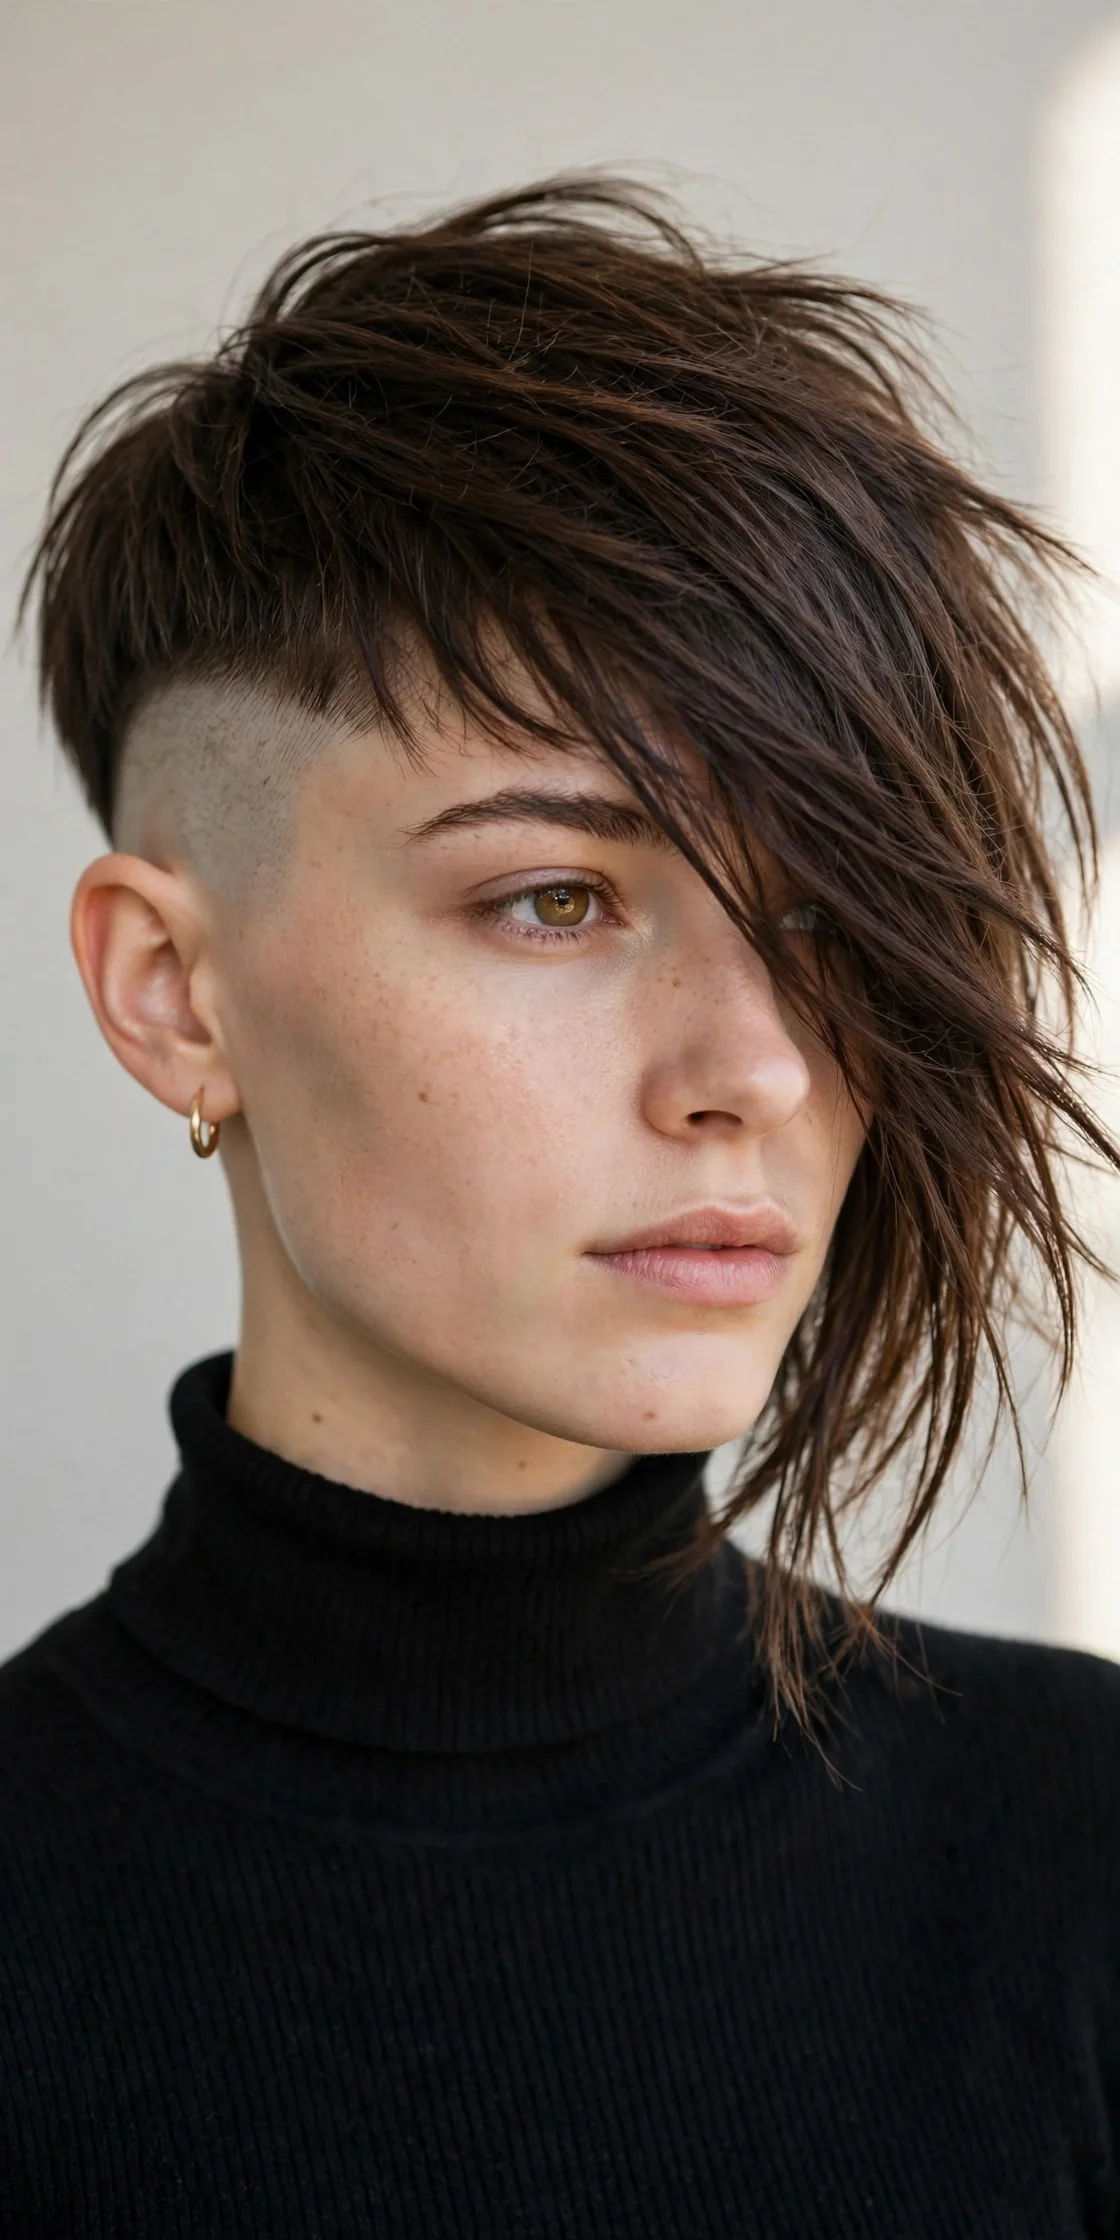
The drama here comes from imbalance done on purpose. One side is clipped close — sometimes right to the skin — while the other side keeps a long, sweeping fringe that crosses the forehead and falls past the ear. This suits oval and heart-shaped faces, because the diagonal sweep softens foreheads and the shaved side slims the cheek. Fine hair actually excels at this cut: the long side needs to lie sleek and flat, and fine strands do that naturally. If you are pixie-curious but not ready to shave both sides, this is the perfect half-step — you get the edge without full commitment. The look reads fashion-editorial: bold but wearable, with incredible dimension in photos.
- Blow-dry the long side across your forehead with a paddle brush for sleekness.
- Tuck the longer side behind your ear to show the shaved contrast.
- Apply smoothing serum to the fringe so the long side falls perfectly flat.
- Switch your part occasionally to keep the sweep from going limp.
Ask your stylist for a pixie with one side clipped to a #1 guard and the other left long enough to sweep the forehead — at least three to four inches. Your daily styling is a quick blow-dry of the long side; the shaved side needs nothing. Keep the shaved side sharp every three weeks, and trim the fringe before it covers your eyes. If shaving even one side feels like a leap, our short choppy haircuts roundup offers edge without the clippers. Growing it out is easy: let the shaved side grow while the long side is trimmed back, and the asymmetry melts into a standard pixie.
Textured Pixie Cuts with Disconnected Shaved Sides
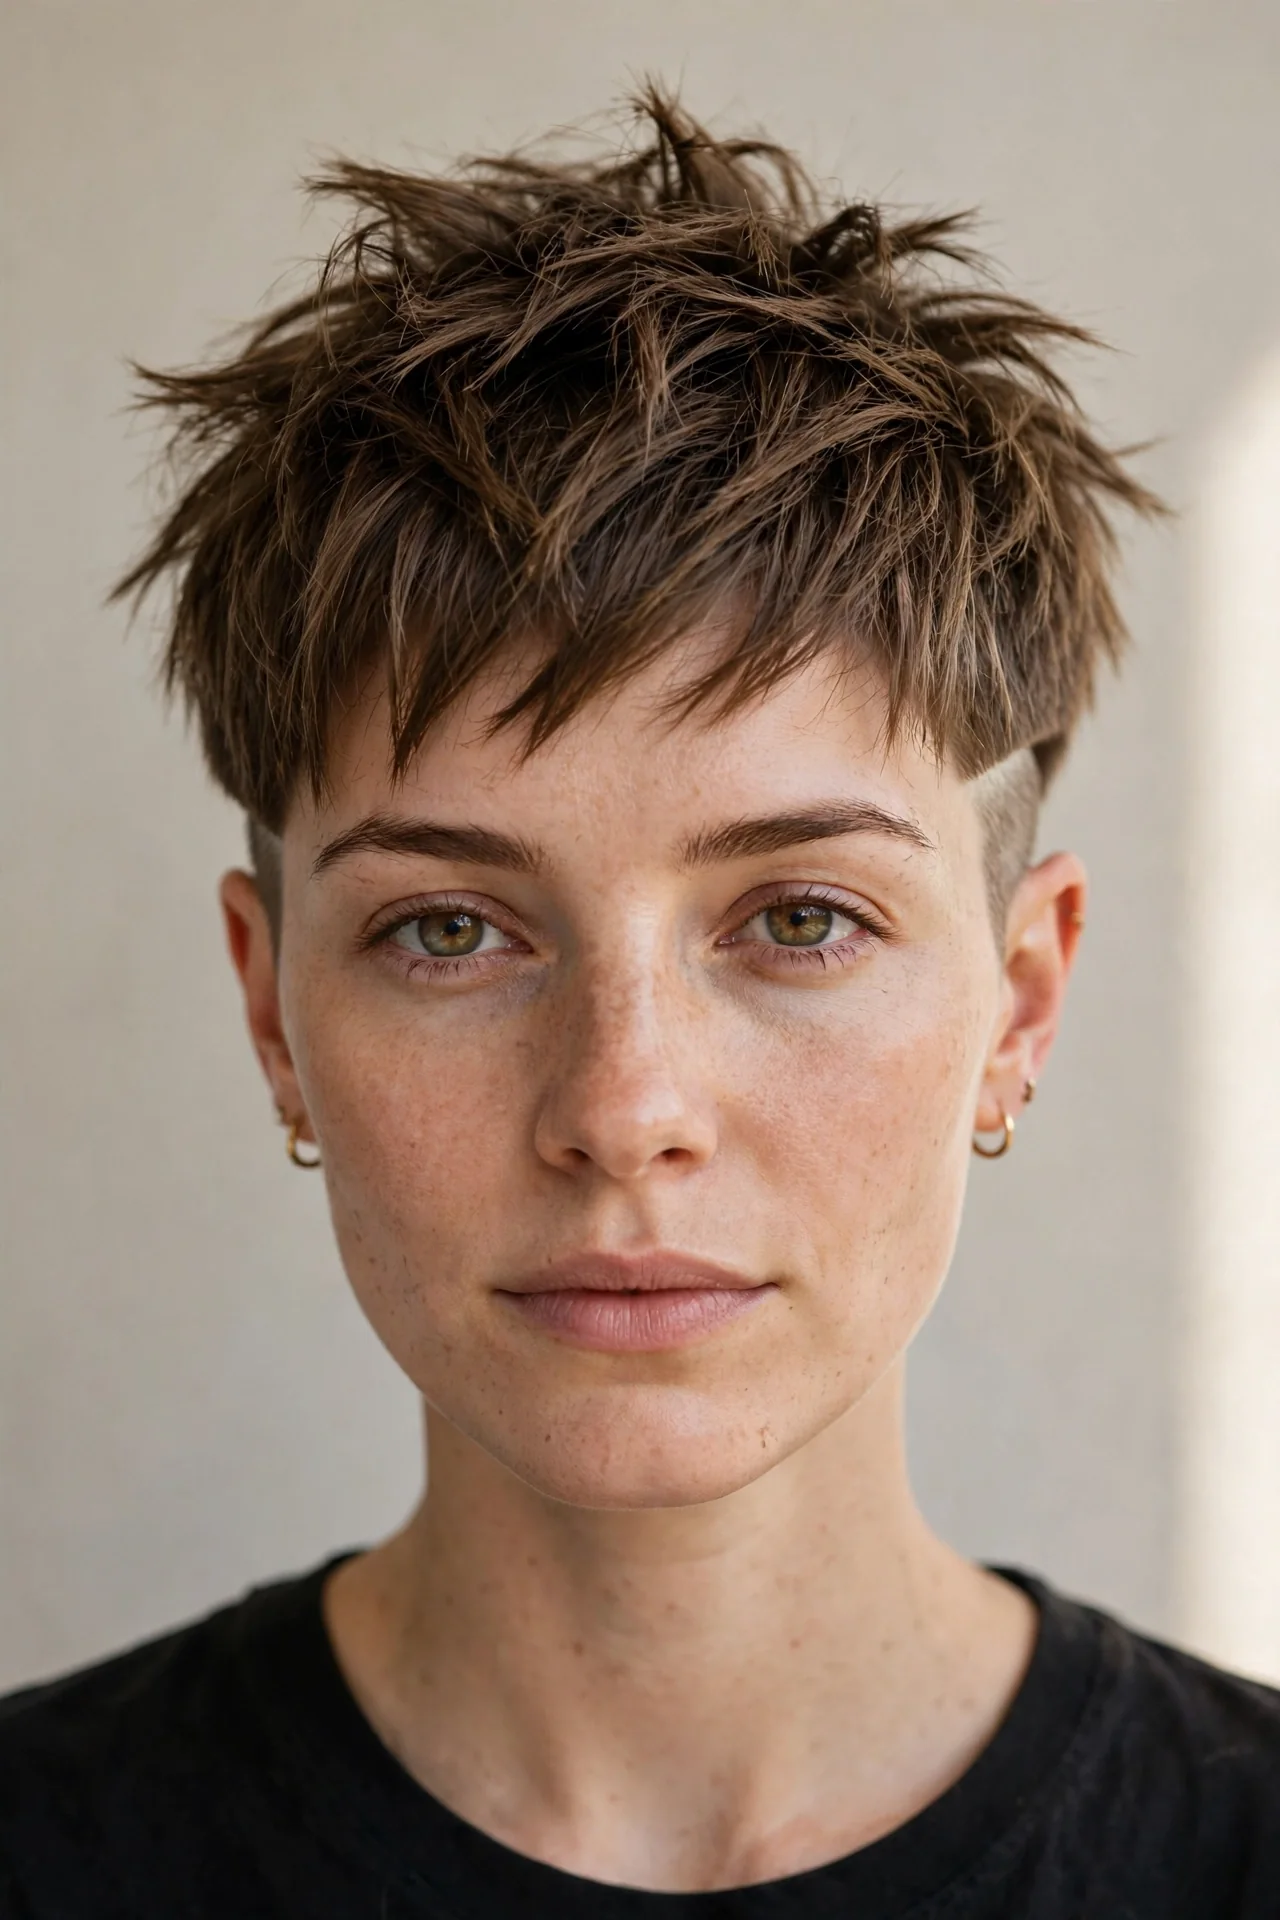
This cut is all about deliberate contrast. The top is cut choppy and piecey with plenty of point-cut texture, then disconnected from the shaved sides — no blend, just a clean visible line where long meets short. It suits thick, straight to wavy hair, because the top needs weight to create those separated, jagged pieces. Square and oblong faces benefit, since the choppy crown breaks up strong lines and the sharp sides add definition. The effect is punk-rock polish: edgy enough for concerts, structured enough to look intentional. If your hair is fine, ask for extra layering so the top still shows texture; without it, the disconnect can look flat.
- Work a texturizing paste through dry strands, pinching the ends for separation.
- Blow-dry the top roughly with your fingers, never a brush, for jagged texture.
- Lift the crown with a root-boosting powder on flat days.
- Smooth the sides down after styling to keep the disconnect line crisp.
Ask your stylist for a disconnected pixie: a heavily point-cut, textured top with the sides shaved to a #1 or #2 and a defined line where they meet. This cut lives or dies on styling, so commit to the daily routine — warm paste between your palms, scrunch and pinch the top, smooth the sides flat. Trim every three weeks to maintain the disconnect; once the sides blur into the top, the whole point of the cut is lost. To grow it out, ask for the disconnect line to be blended away, and the cut transitions into a regular textured pixie before eventually reaching bob length.
Wavy Pixie with Shaved Sides and Soft Layers
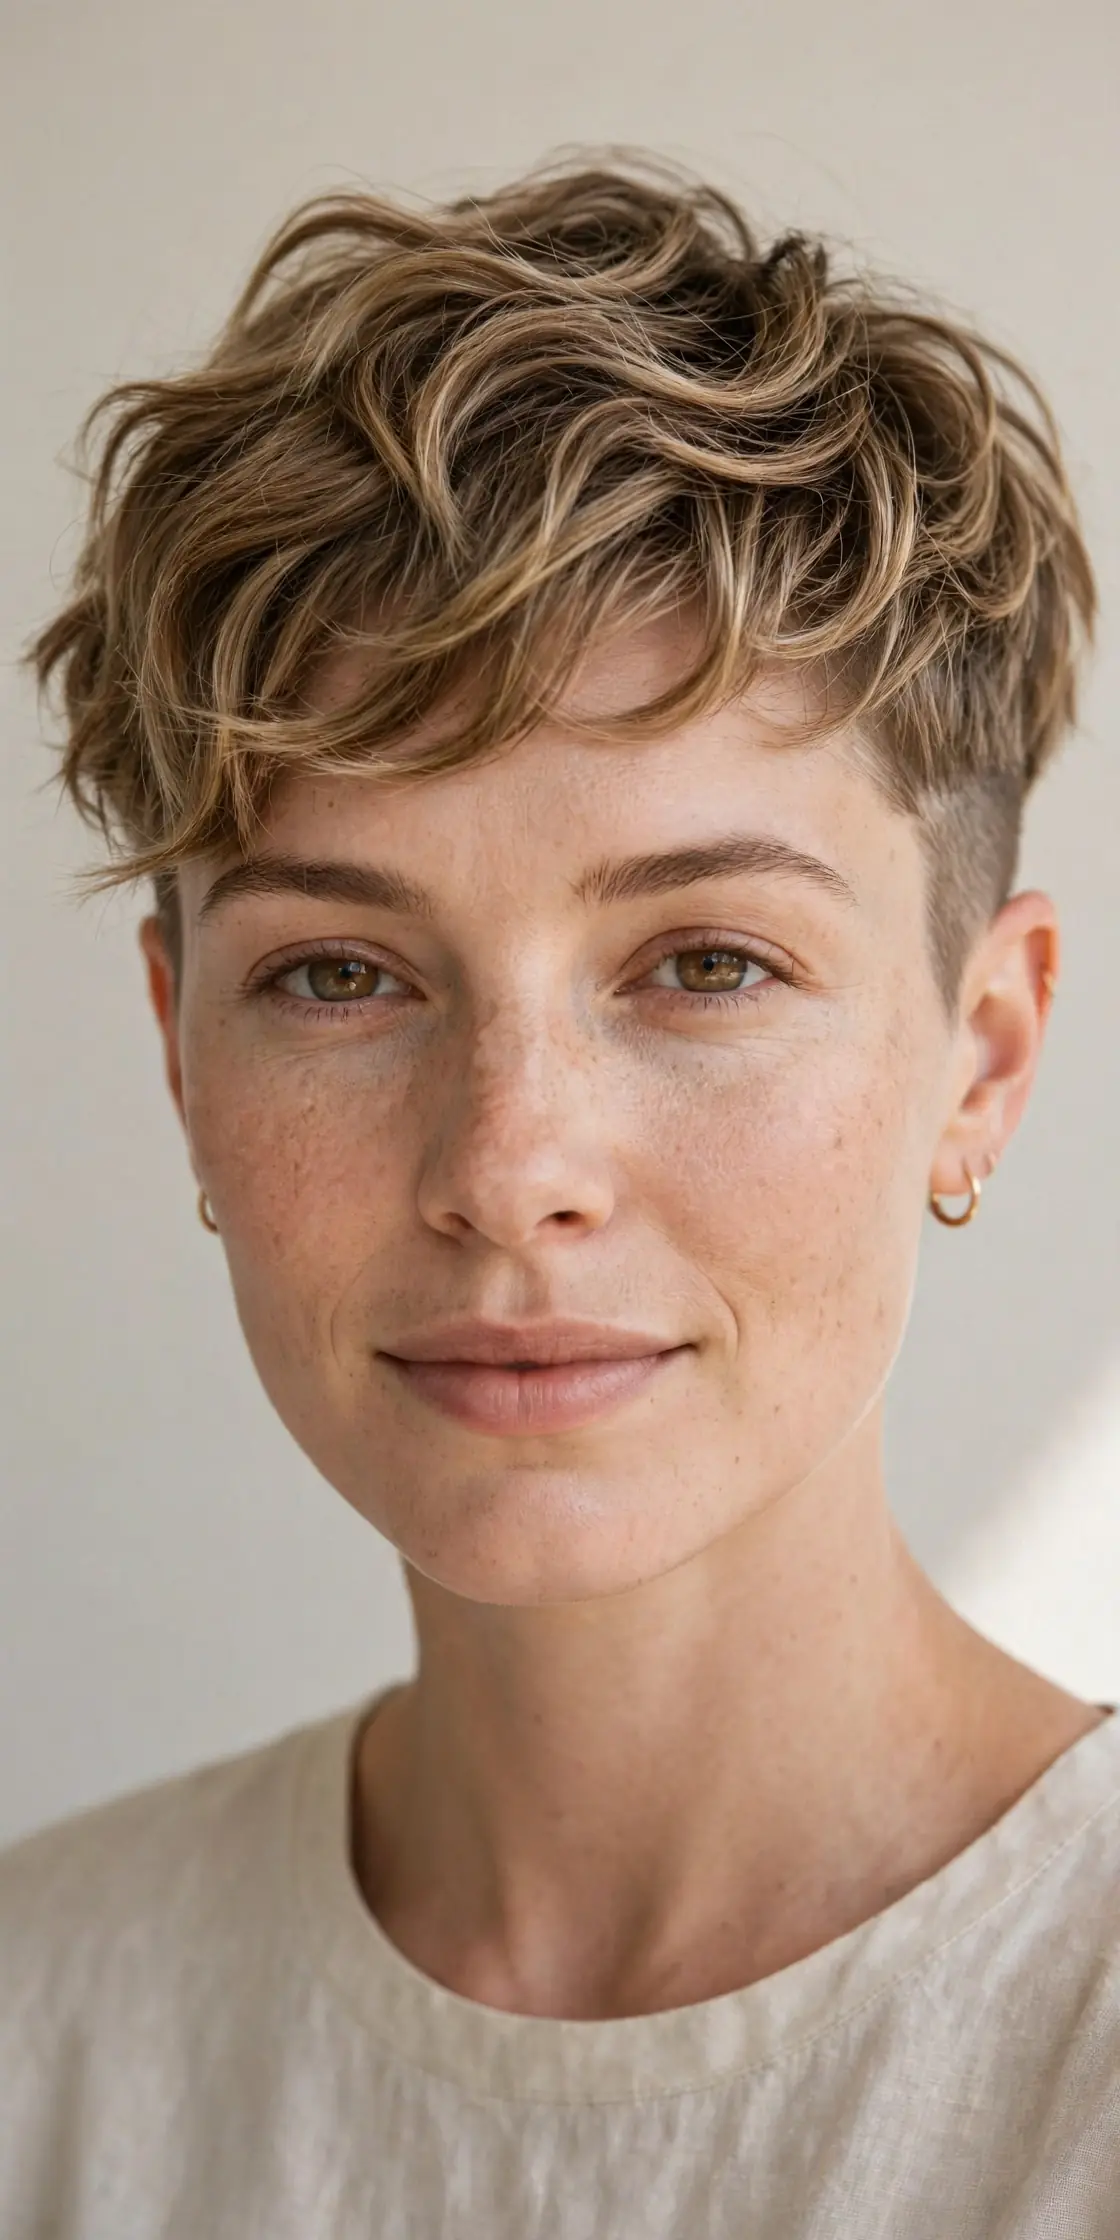
Not every edgy cut has to shout — here the top keeps soft, touchable layers that let your natural waves do their thing, while the shaved sides keep the silhouette sharp. This suits 2A to 2B wavy hair perfectly — the layers prevent the triangle effect and the sides remove the bulk that makes wavy pixies puff outward. Round faces love it, because the height on top elongates and the close sides slim the cheeks. The mood is effortless cool: beachy texture with a rebellious edge underneath. It is also one of the most low-maintenance options here, since wavy hair styles itself with the right product and the shaved sides guarantee the shape holds.
- Scrunch sea salt spray into damp hair to wake up your waves.
- Diffuse on medium heat, cupping the top upward for airy volume.
- Twist a few face-framing pieces for defined, casual waves.
- Tame frizz at the hairline with a tiny drop of smoothing oil.
Ask your stylist for a layered wavy pixie with the sides shaved to a #2 and a soft blend into the top — hard lines fight the relaxed mood of this cut. Your routine is wash, scrunch in salt spray, diffuse, and go; second-day waves usually just need a water mist. Refresh the shaved sides every three to four weeks and trim the layers every six weeks to keep the shape. Growing it out is easy: let the sides grow into the layers and you land at a wavy crop, then a short bob — no awkward stages, just a slow return to softness.
Mohawk-Inspired Pixie with Narrow Shaved Panels
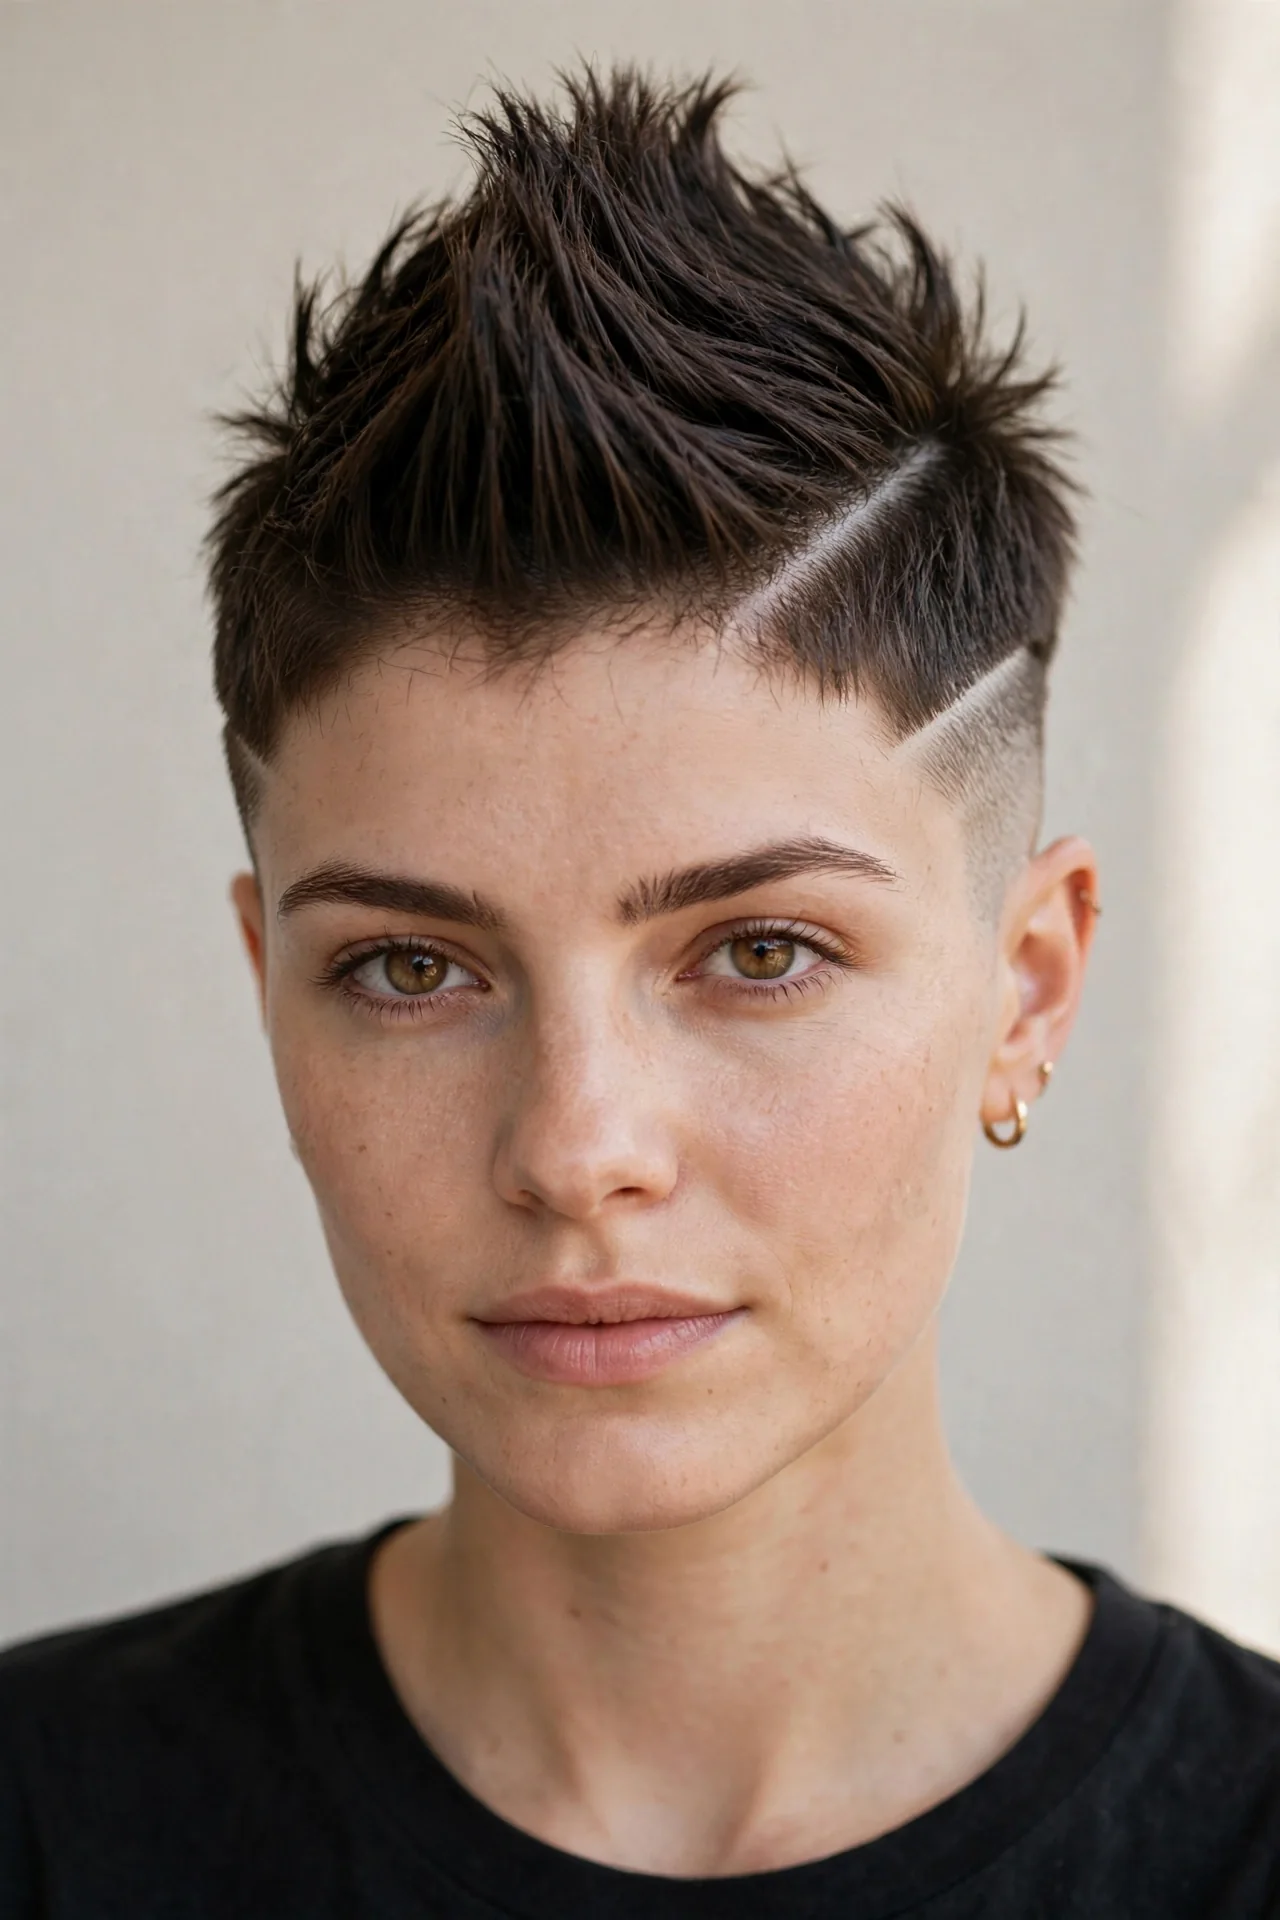
The boldest silhouette on this list. A wide strip of longer hair runs from forehead to nape while both sides are shaved close, giving you a wearable mohawk that reads fierce but feminine. It suits oval and longer faces, since the vertical strip adds height without widening, and thick, straight hair holds the shape best. The pixie version is versatile — spike it up for a night out, sweep it flat for the day, or part it softly to tone things down. Confidence is the real requirement here, not any particular hair type. If you have ever wanted a mohawk without going full punk, this is it.
- Spike the central strip upward with strong-hold gel for maximum drama.
- Sweep the strip flat with a blow-dryer and round brush for daytime wear.
- Define the strip’s edges with light wax so the shaved panels show.
- Refresh the panels with a trimmer at home between barber visits.
Ask your barber for a wide central strip — two to three inches of length — with the sides faded or shaved to a #1. The strip’s width is your call: wider reads softer and more versatile, narrower reads punk. Style it up with gel or down with a blow-dry depending on the day; the cut gives you both options. A strong-hold pomade or fiber wax beats gel for all-day spikes without crunch. Clean up the shaved panels every two weeks to keep the contrast sharp. To grow it out, widen the strip gradually at each appointment until the sides catch up, then blend everything into a standard pixie.
Pastel Pink Pixie with Cool Shaved Sides
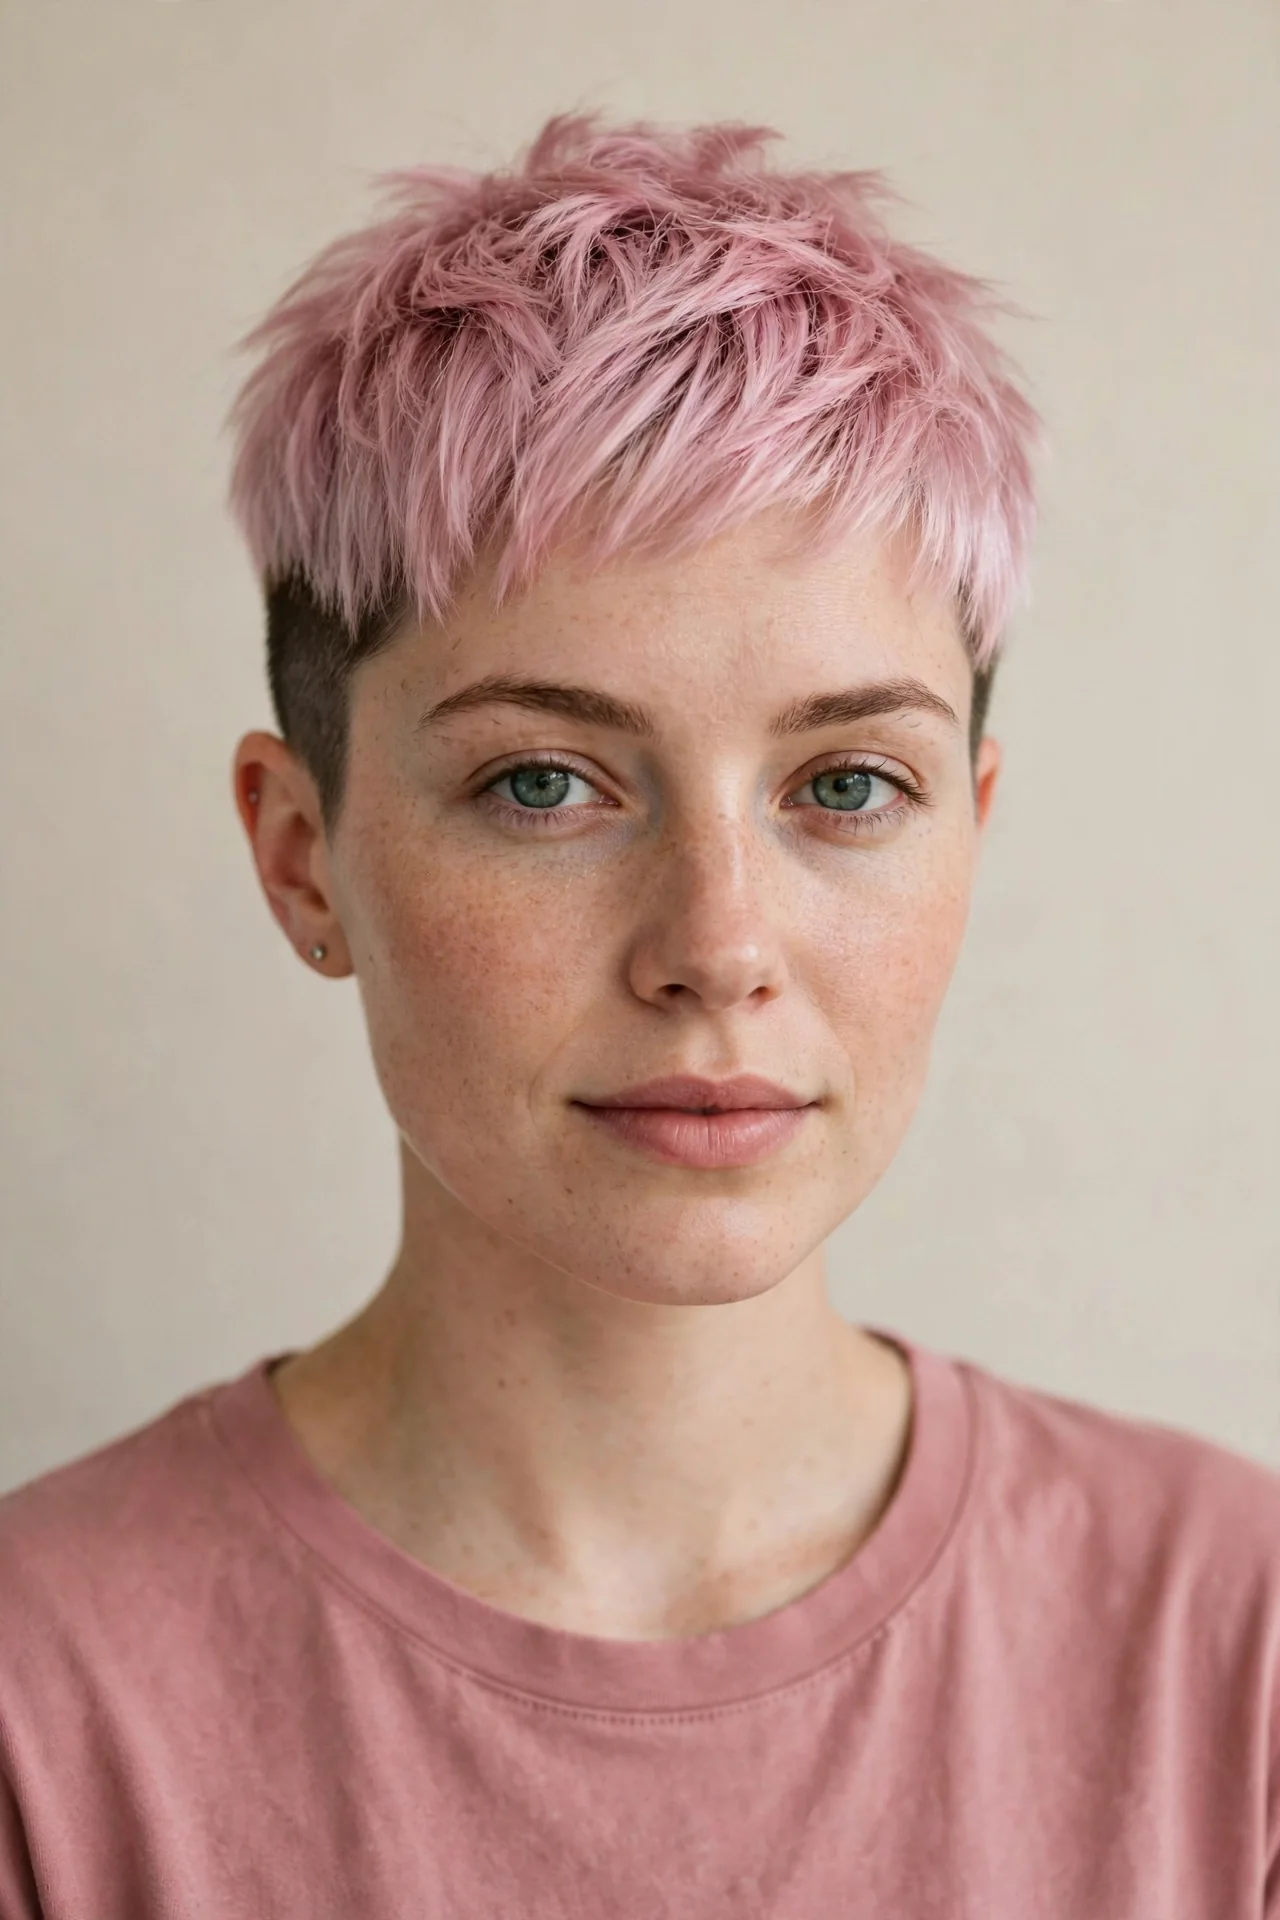
Color does the talking here. The top is tinted a soft pastel pink — dusty rose, cotton candy, or peachy blush — while the shaved sides stay your natural color, which makes the pastel pop even harder by contrast. It suits fair to medium skin tones, and fine to medium hair takes pastel most evenly since the color needs a light, even base. Oval and heart-shaped faces carry it beautifully; the playful color draws the eye up while the shaved sides keep the sweetness from tipping into cutesy. The vibe is edgy-meets-soft: a rebellious cut in a dreamy color that still looks grown-up.
- Refresh the pastel with a color-depositing conditioner once a week.
- Wash in cool water to slow fading and keep the shade true.
- Style the top with light cream so the color looks glossy, not chalky.
- Protect the tint from sun with a UV hair spray on bright days.
Ask your colorist to pre-lighten the top to a pale blonde, then apply a pastel pink toner or semi-permanent dye — pastels need that near-white base. Keep the shaved sides in your natural color for contrast. Pastel fades fast, so refresh the tone every three to four weeks and use color-safe, sulfate-free shampoo. At home, a weekly color-depositing mask keeps the pink alive, and a silk pillowcase reduces the friction that strips delicate color overnight. To grow it out, let the pastel fade naturally or have your colorist melt it into your roots; the shaved sides simply grow back into your natural shade.
Sleek Side-Swept Pixie with Tapered Shaved Sides
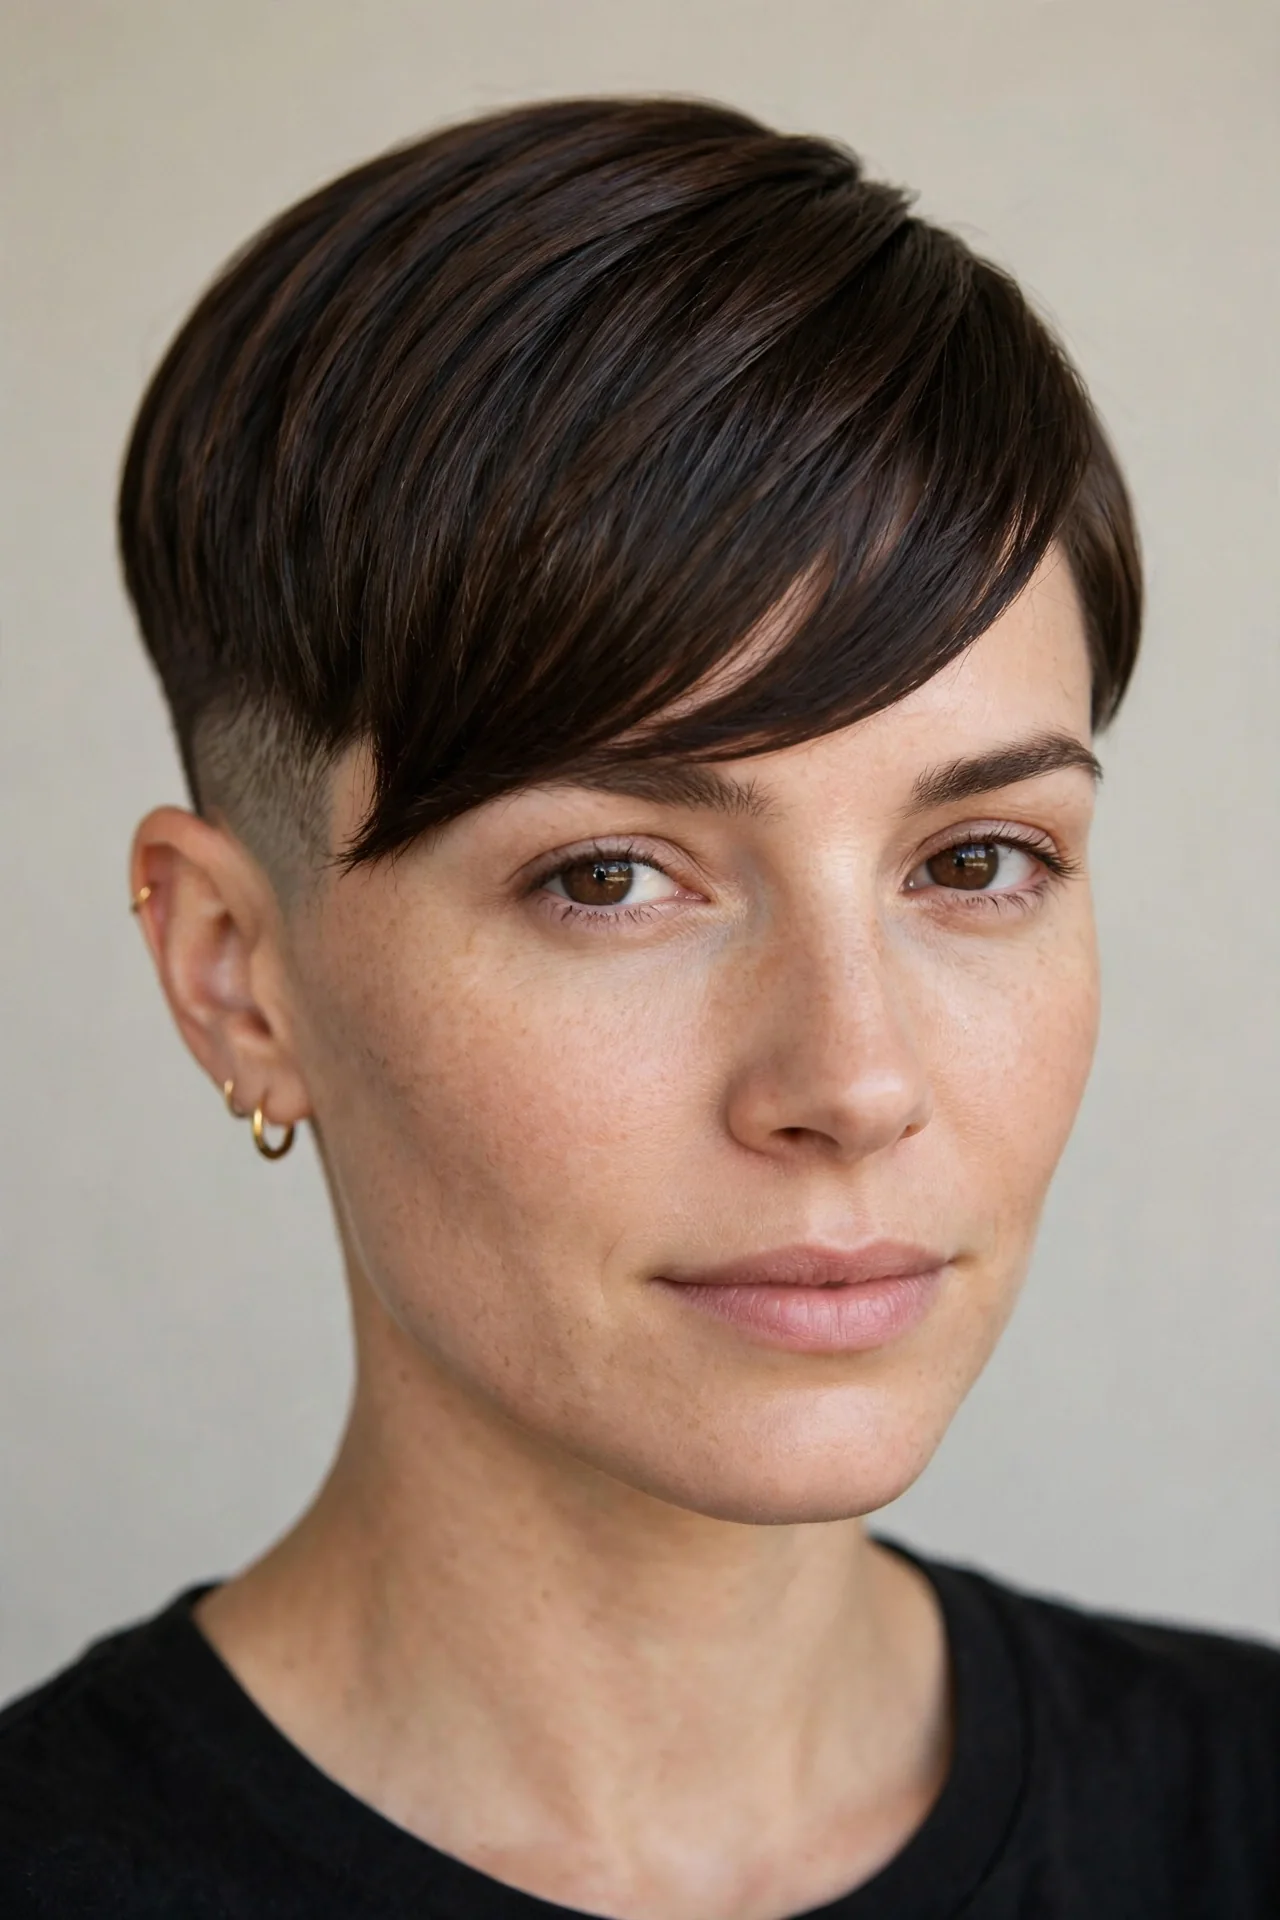
The office-friendly rebel. A long, side-swept fringe gives this pixie its polish while the tapered shaved sides keep a quiet edge underneath — from the front it reads sophisticated, from the side it reveals your secret. It suits straight to slightly wavy hair and oval, round, and heart-shaped faces; the diagonal fringe slims fuller cheeks and softens strong jawlines. If you love edgy haircuts but work somewhere with unspoken rules about appearance, this cut lets you have both. The overall effect is sleek and intentional, the kind of pixie that looks expensive, and the fringe creates movement that photographs beautifully in every shot.
- Blow-dry the fringe across your forehead for glassy smoothness.
- Apply smoothing serum to tame flyaways along the part.
- Flat-iron the fringe on humid days to keep the sweep crisp.
- Brush the tapered sides flat so the silhouette stays clean.
Ask your stylist for a pixie with a four-to-five-inch side-swept fringe and sides tapered with a #2 guard, blended softly into the top. The fringe is the star, so trim it every four weeks before it hits your eyes. Your daily routine is a quick paddle-brush blow-dry and a drop of serum; five minutes, done. On high-humidity days, a flat iron keeps the sweep sleek, and a touch of anti-humidity spray over the finished fringe keeps it from collapsing by midday. Growing it out is painless: let the taper grow and the fringe keeps getting longer, melting naturally into a side-swept bob.
Edgy Pixie Cuts with Shaved Sides and Chunky Highlights
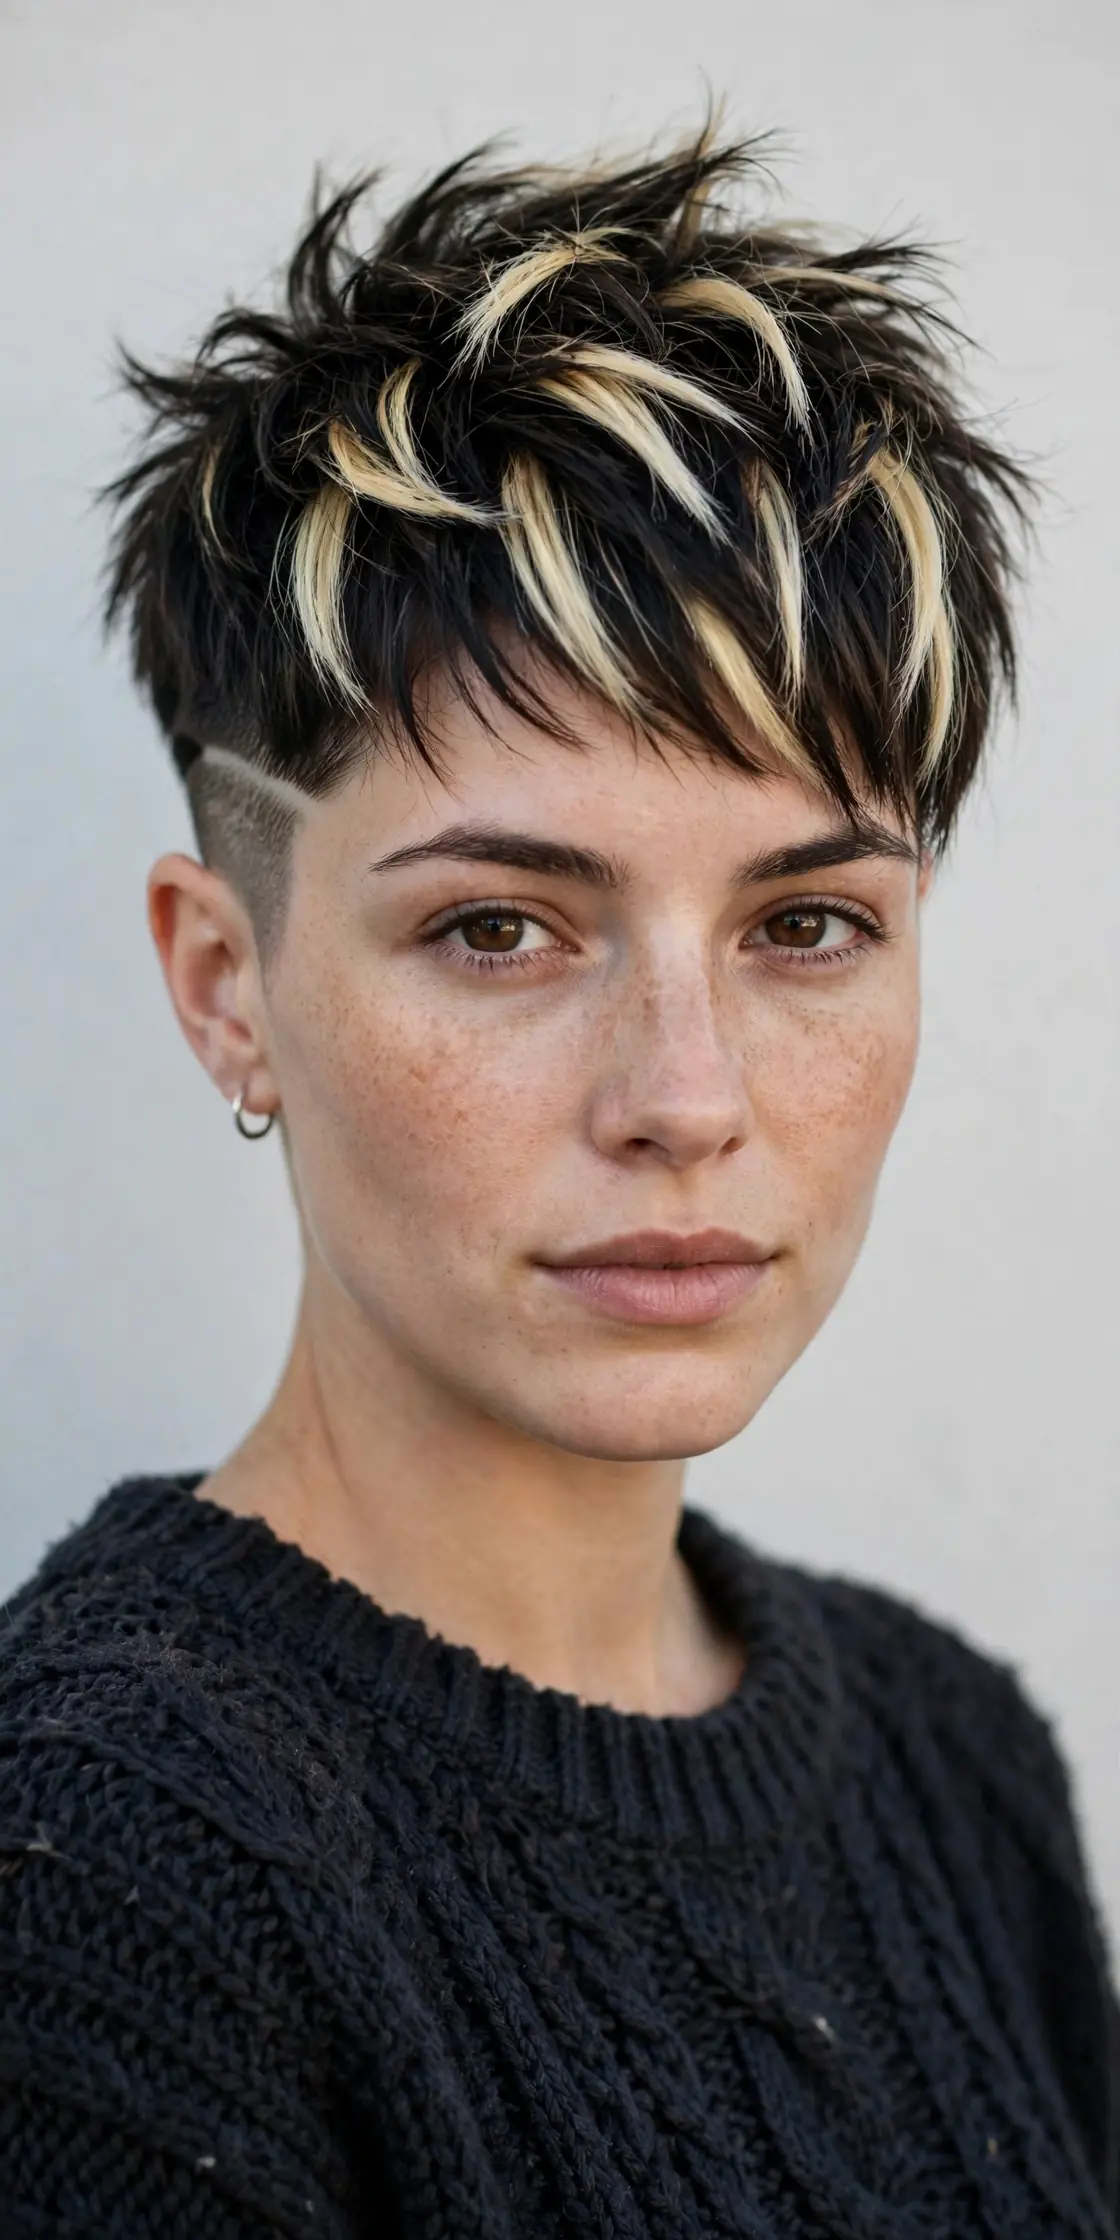
Chunky highlights are back, and they were made for this cut. Bold, contrasting streaks — blonde on dark hair, copper on brown, silver on black — run through the textured top while the shaved sides stay solid, making every highlight pop. It suits medium to thick hair, because the top needs enough density for the streaks to read as chunks rather than thin lines. Square and oval faces wear it well; the vertical streaks draw the eye up and add height. The look is pure early-2000s attitude with a modern, grown-up execution. If subtle balayage bores you, these unapologetic streaks are your answer.
- Define the highlighted chunks with a texturizing spray for piecey separation.
- Blow-dry the top forward to show the streak pattern at the hairline.
- Refresh dull highlights with a glossing treatment between color appointments.
- Keep the shaved sides clean so the solid-to-streaked contrast stays sharp.
Ask your colorist for chunky highlights through the top, spaced about an inch apart — bring a reference photo, since “chunky” varies between colorists. Pair it with a #1 or #2 on the sides. Refresh the highlights every six to eight weeks as roots grow; the shaved sides need a trim every three weeks. Ask for a toner at each highlight appointment to keep the streaks bright and brass-free. At home, use color-safe shampoo and a weekly gloss to keep the streaks vibrant. To grow it out, have your colorist blend the streaks into an all-over color while the sides grow in.
Long-Top Pixie with Shaved Sides and a Side Fringe
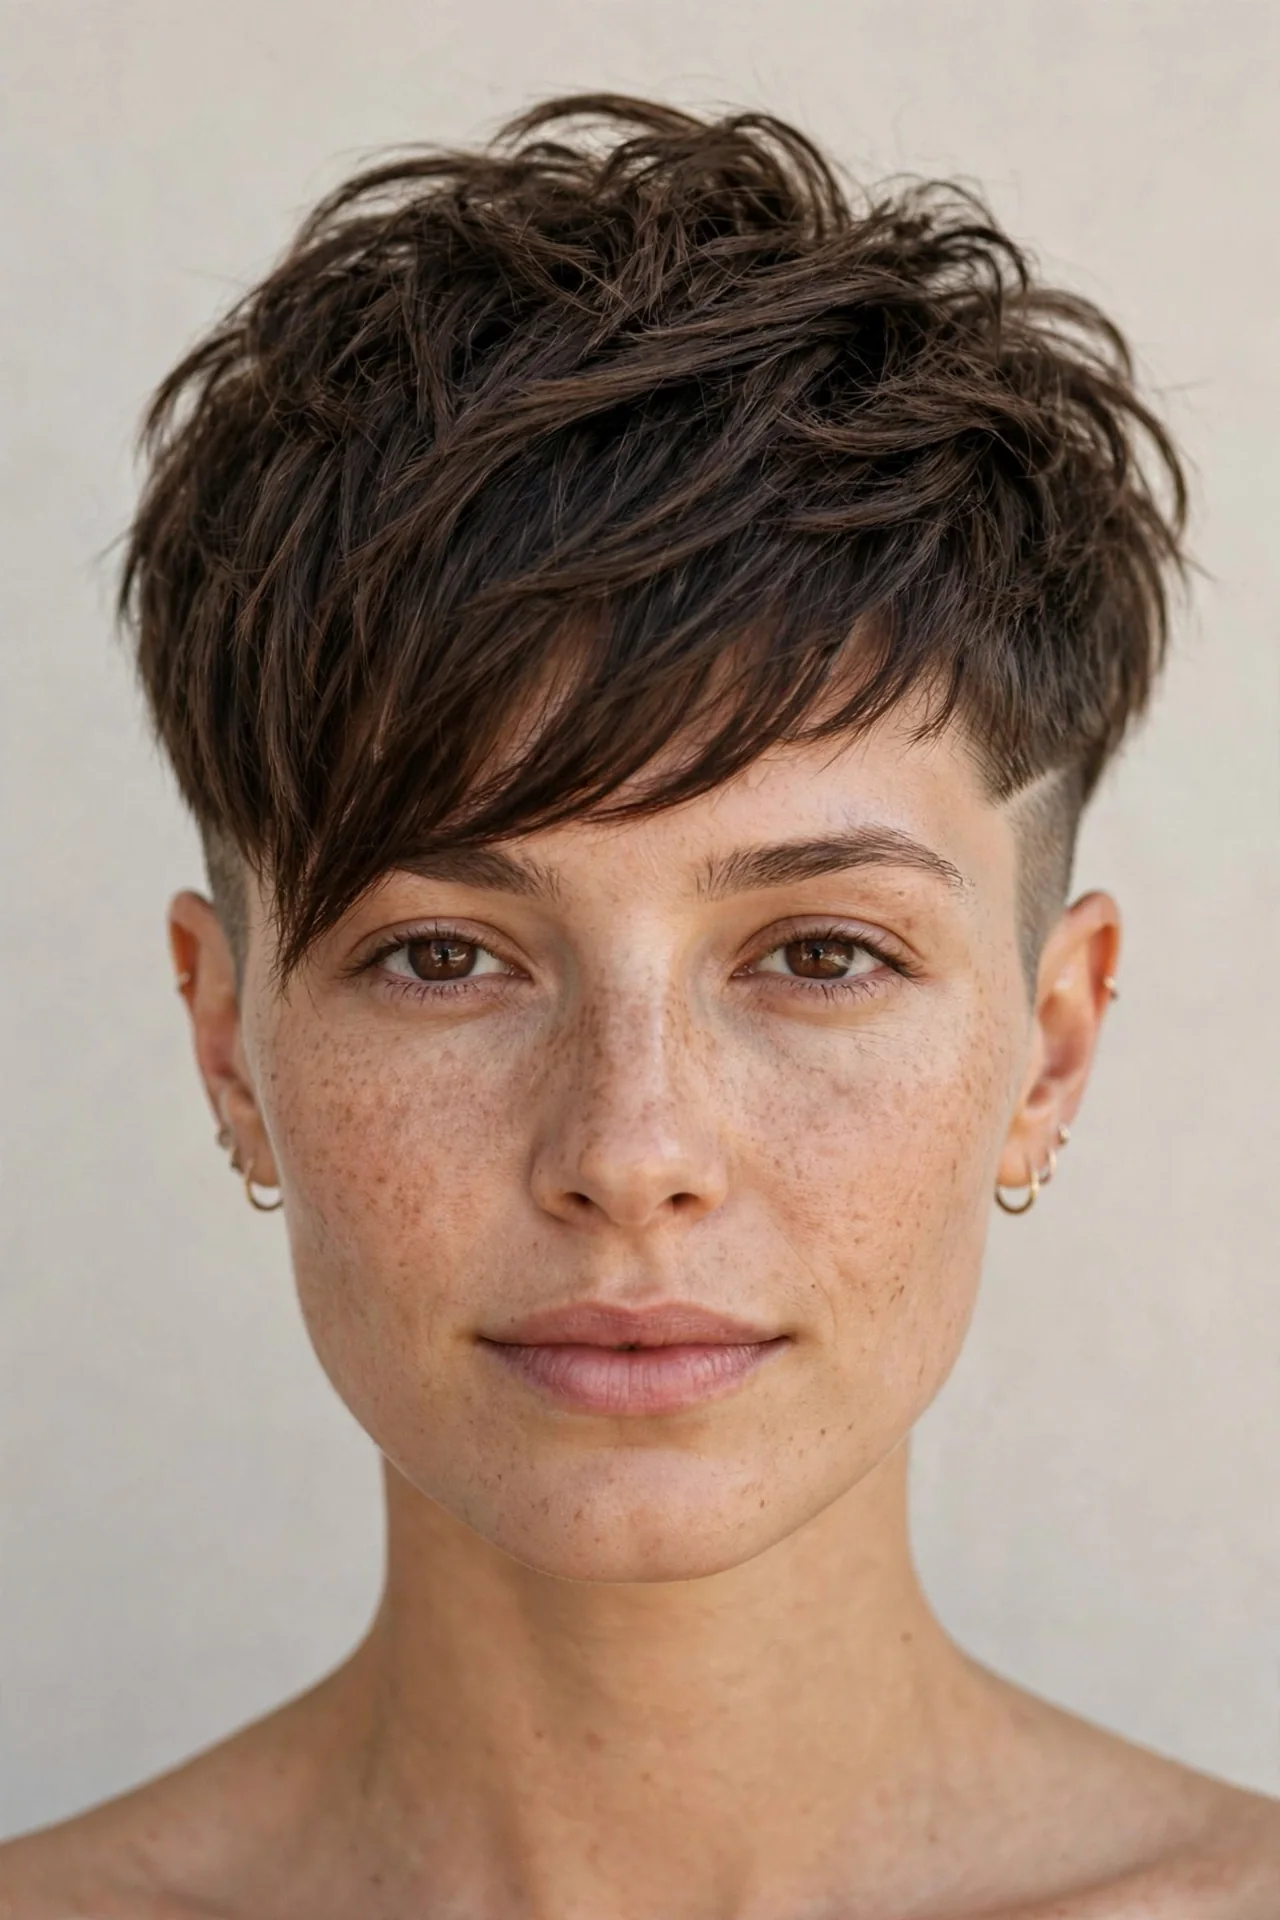
The most versatile cut on this list. The top keeps three to five inches of length — enough to style a dozen ways — while the shaved sides guarantee the silhouette stays edgy no matter how you wear the top. It suits nearly every face shape: heart faces get balance, round faces get height, oval faces get options. Thick hair thrives here, but fine hair works too with the right layering. The magic is the mood swing — sleek for work, tousled for the weekend, slicked back for a night out. One cut, many personalities. If you can only commit to one edgy pixie, make it this one.
- Change your part from side to center to instantly transform the look.
- Tousle the long top with matte wax for an effortless weekend texture.
- Slick the top back with gel for a sharp evening style.
- Pin the fringe loosely on lazy days for a soft, romantic variation.
Ask your stylist for a long pixie — three to five inches on top with a side fringe — and sides shaved to a #2. The length is the point, so protect it: trim the top every six to eight weeks, but keep the sides sharp every three. Your styling routine changes with your mood, which is the whole appeal — wax for texture, gel for slick, or nothing at all for air-dried ease. To grow it out, simply stop shaving the sides and let the top keep growing; you will pass through a shaggy crop on your way to a bob, and it will look intentional the whole way.
Conclusion
Twelve cuts, one fearless attitude — whether you fell for the clean taper, the platinum contrast, or the full mohawk moment, there are pixie cuts with shaved sides waiting to match your mood. The best part is how forgiving these cuts are: the shaved sides keep every version looking sharp as it grows, and the styling routines take minutes, not mornings. Show your stylist a photo, commit to three-week touch-ups, and enjoy the compliments. If your hair is on the finer side and you want more short-hair inspiration, our short pixie haircuts for fine hair collection is the perfect next read — and whichever edgy crop you choose, wear it like you mean it.



One Comment